Показаны сообщения с ярлыком Multi-Part Series. Показать все сообщения

пятница, 14 февраля 2020 г.

A Look Inside Grand Seiko’s 9S Hi-Beat Mechanical Movement

High-beat movements, or calibers that run at 36,000 beats-per-hour/10 beats-per-second, are relatively uncommon in the industry today. The prevailing standard for quite some time now has been 28,800 beats-per-hour, or 8 beats-per-second, and it’s for good reason. These movements strike an excellent compromise as far as overall performance is concerned, with 28,800bph calibers being capable of excellent timekeeping without undue wear and tear on components.
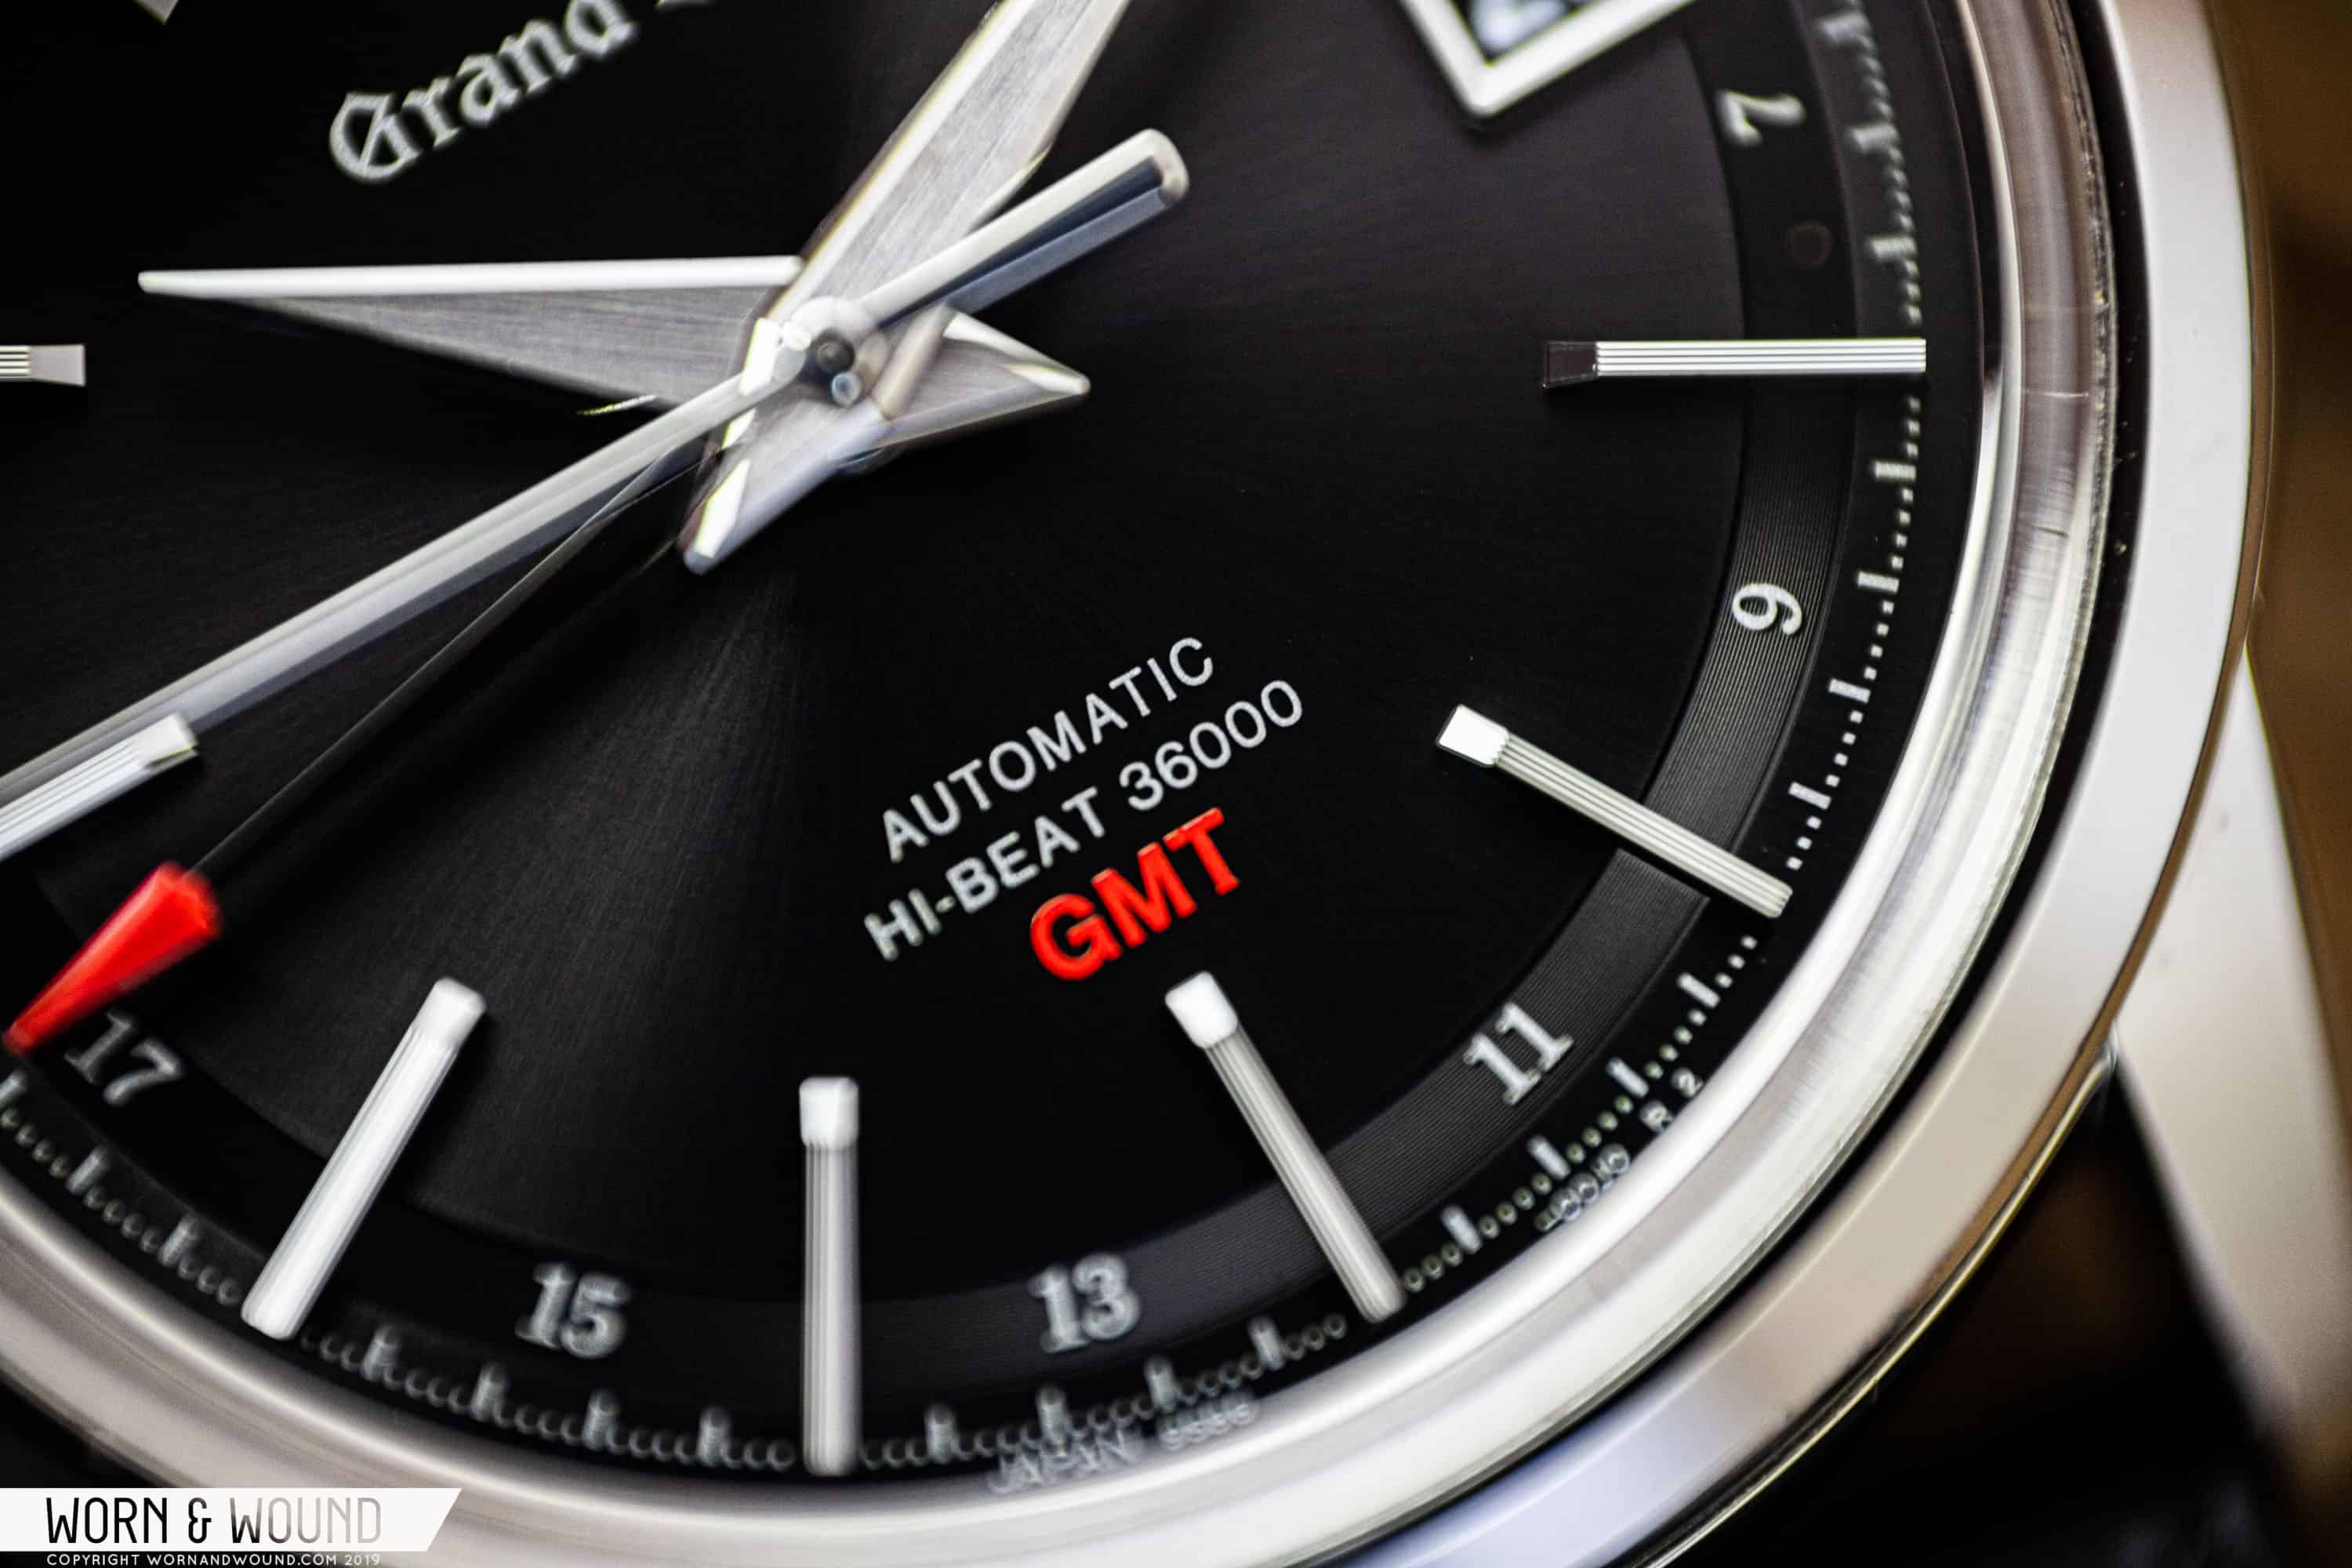
Grand Seiko Ref. SBGJ219, one of the brand’s “Hi-Beat” GMTs.

Nevertheless, high-beat movements are exceptionally cool and come with two notable advantages. The first is aesthetic — higher-beat movements feature second hands with a smoother sweep. Advancing at 10 beats-per-second, a high-beat second hand glides elegantly across the dial, further masking the start-stop operation of the escapement which one can still make out in slower rate movements.

The second advantage is greater reliability. Ultimately, a balance operating at a faster beat rate will show greater resilience to external rotational forces, like sudden shocks, which in turn results in more reliable daily timekeeping.

But as I briefly mentioned into above, higher-beat movements are not without their downsides, chief among them a decreased power reserve and increased wear and tear on components. So when Grand Seiko approached their modern high-beat movements,, which they call “Hi-Beat,” these concerns were top of mind. Ultimately, by employing state of the art manufacturing processes to ingenious architecture, Grand Seiko’s engineers were able to devise modern Hi-Beat movements that are beautiful, hard wearing, and reliable.
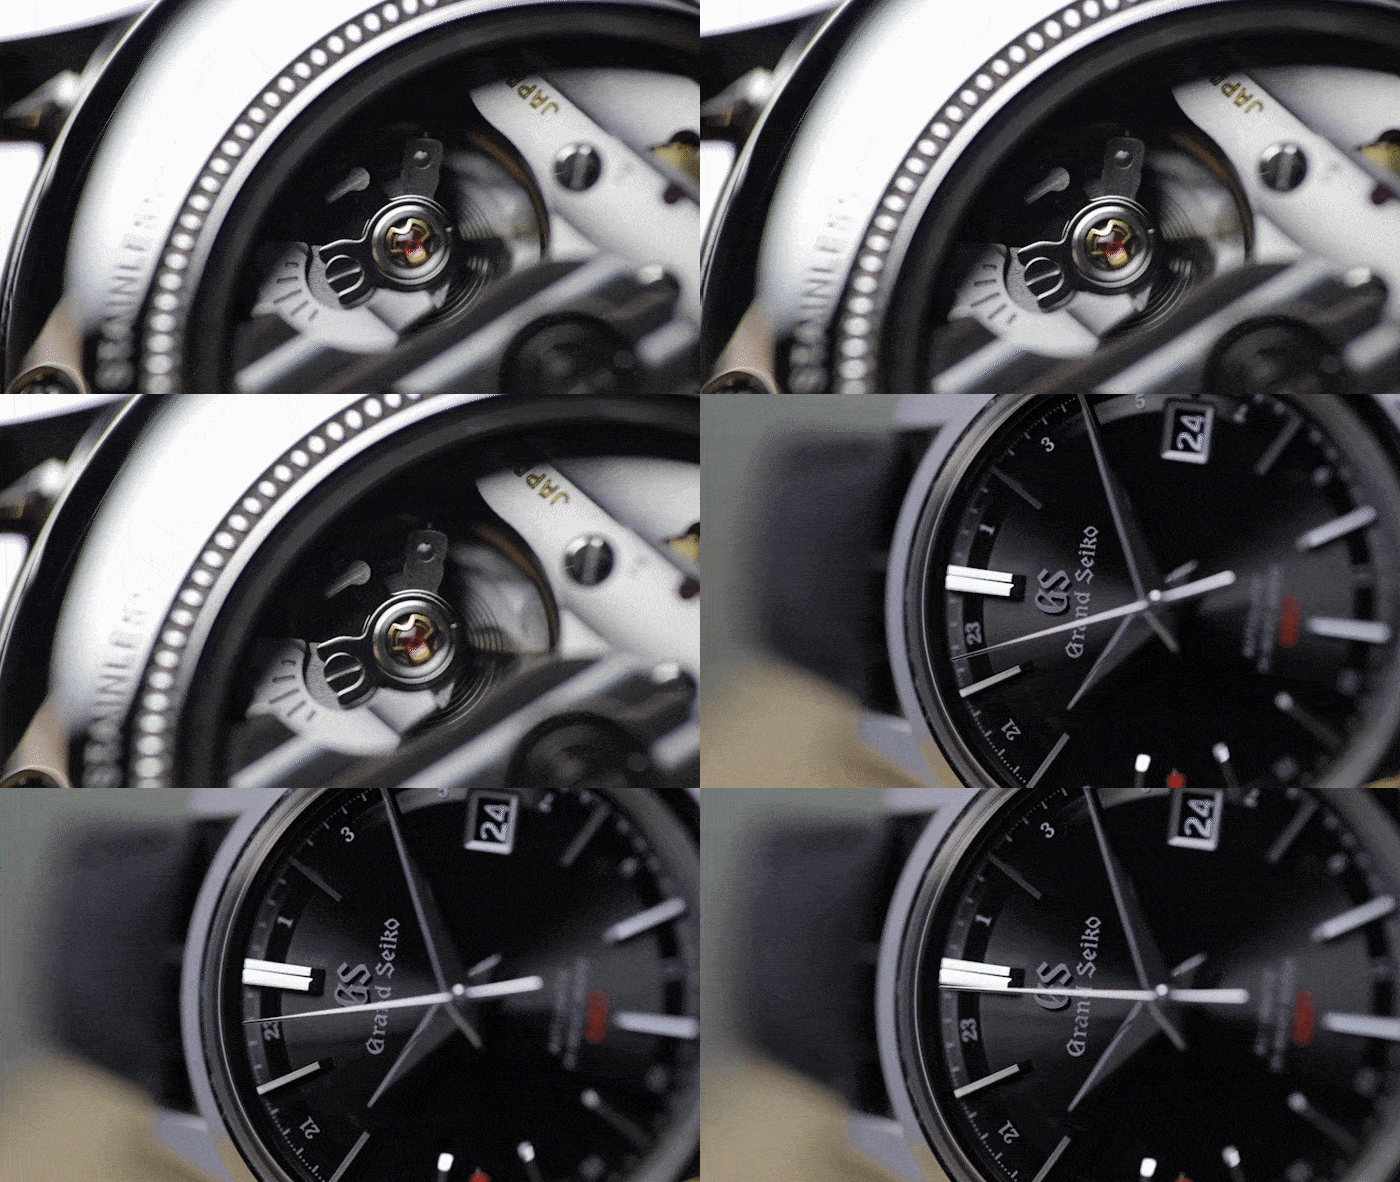
Here you can really see the smoother sweep of a “Hi-Beat” movement.

Let us take a closer look at Grand Seiko’s Hi-Beat mechanicals, starting with the all-important mainspring.
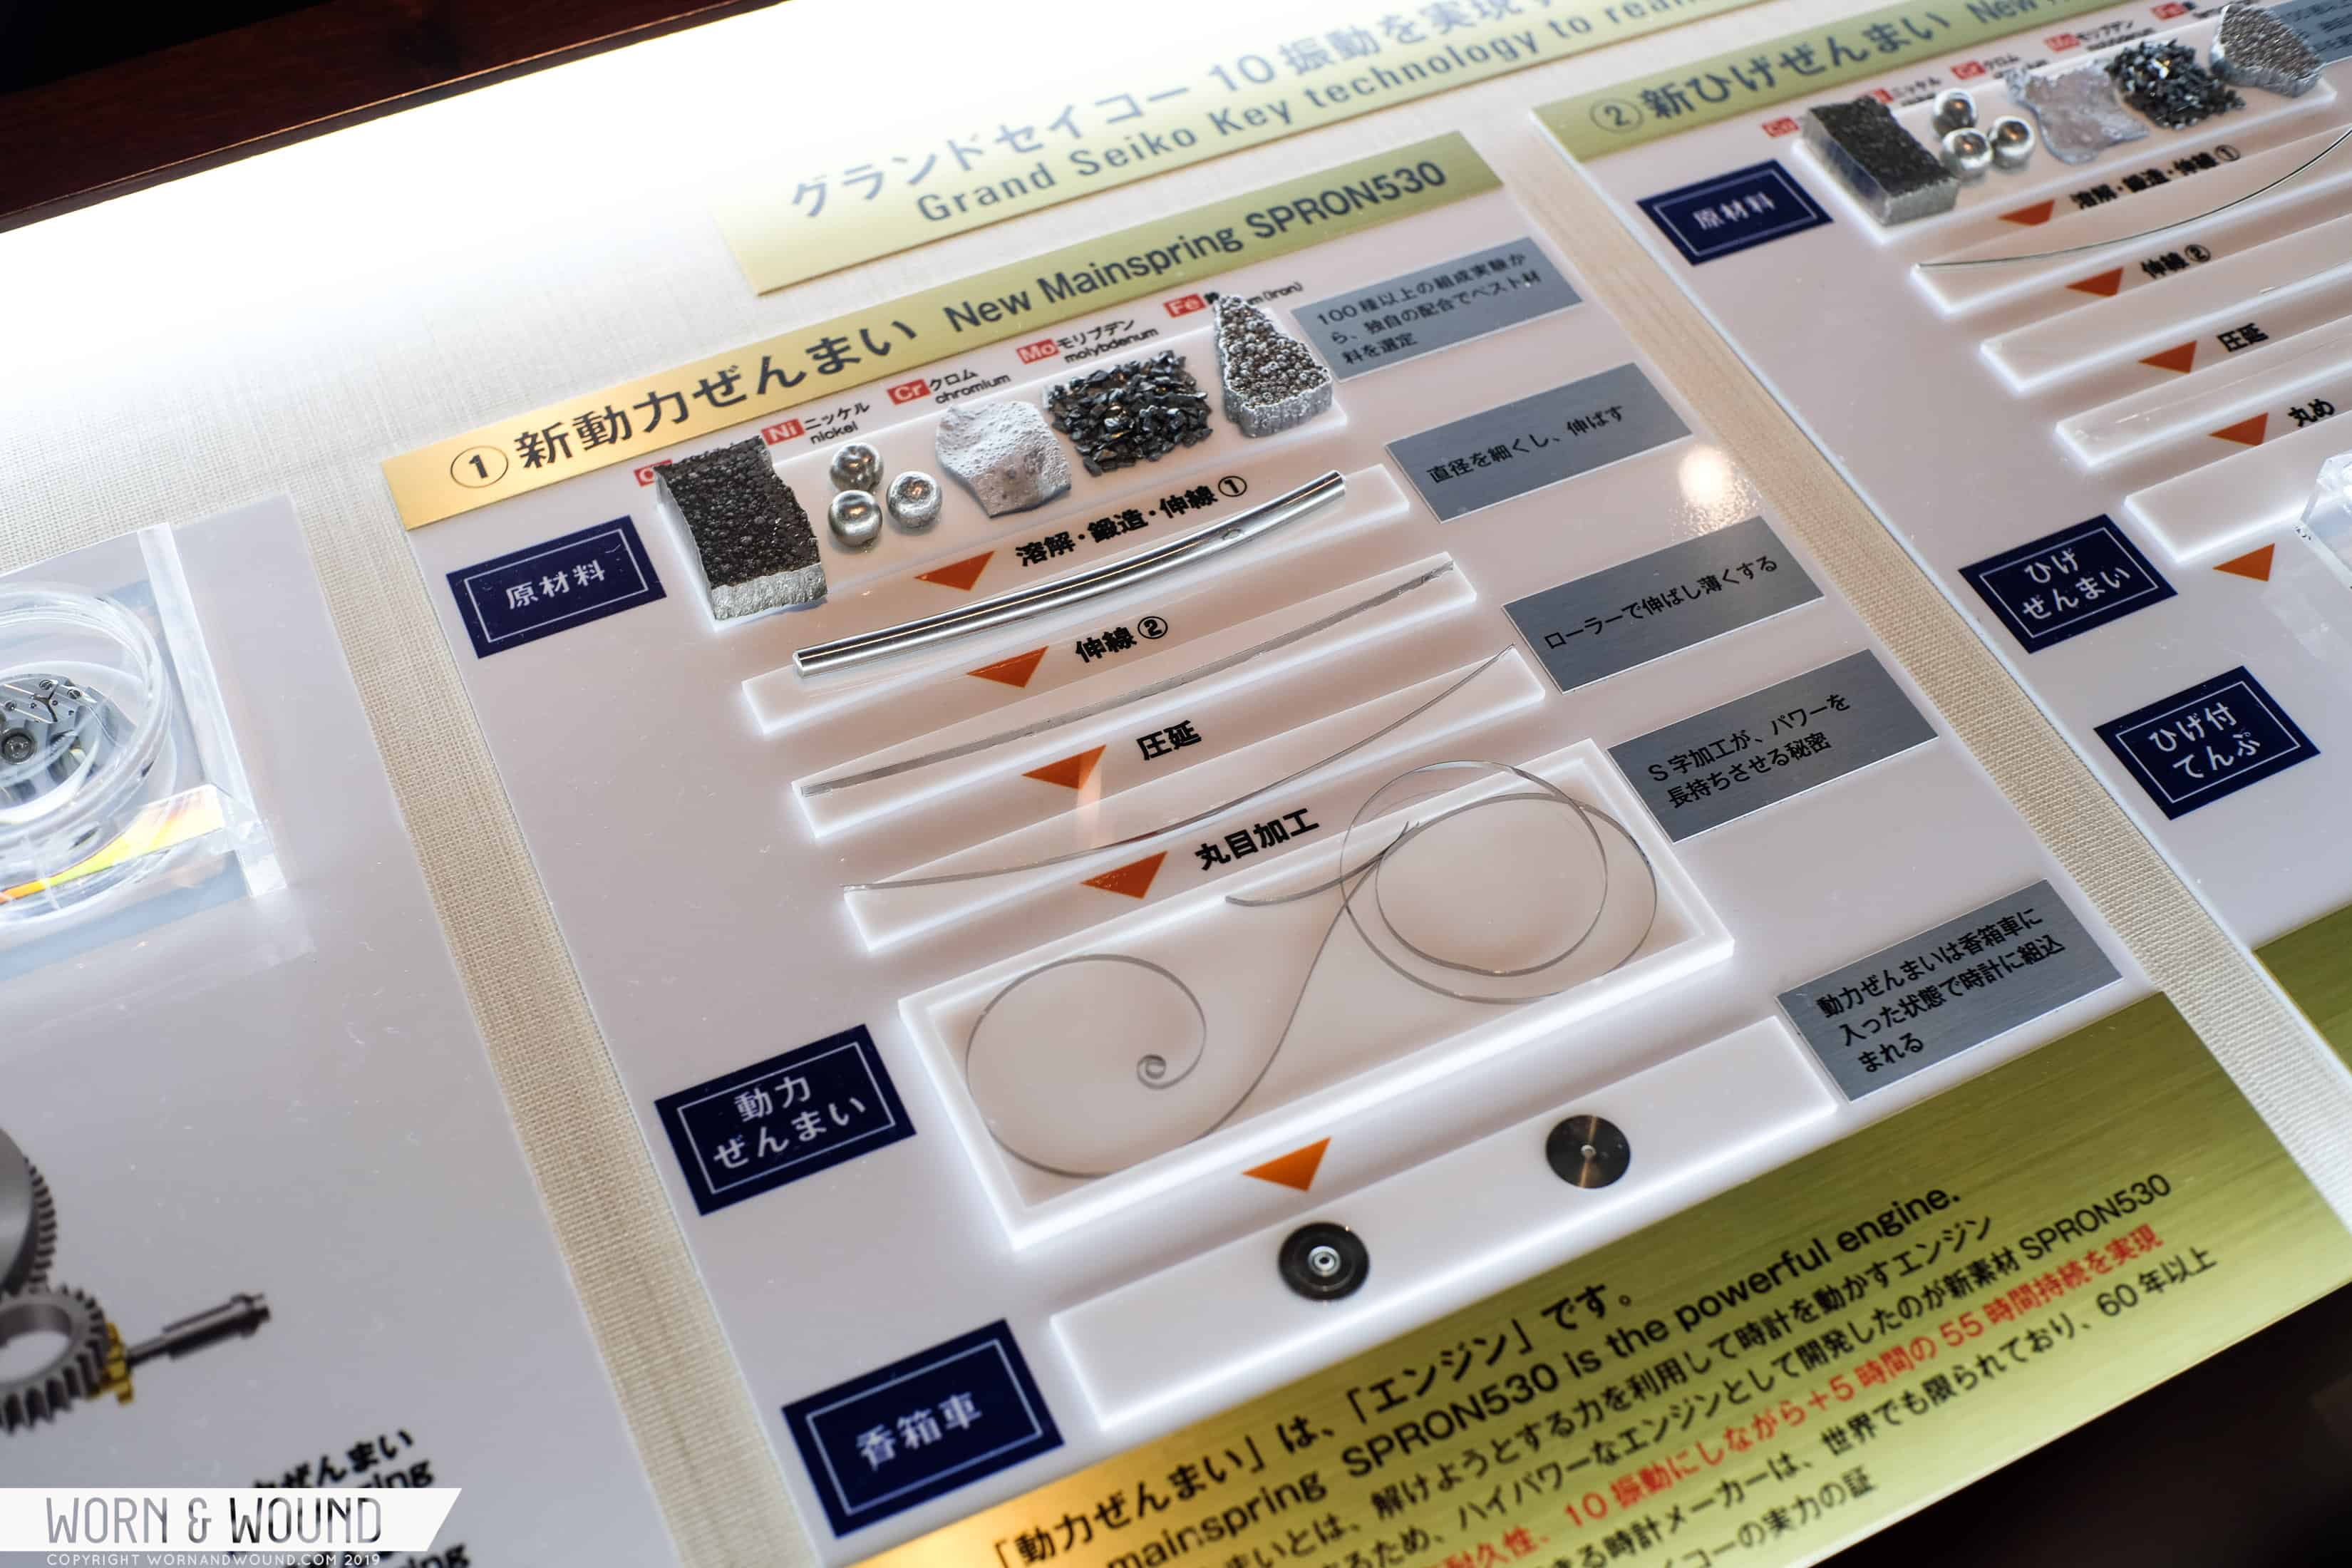
Breaking down Spron 530.

Grand Seiko’s engineers needed a special type of mainspring with 1.5 times the torque of your standard mainspring. Grand Seiko works with a proprietary metallic alloy they call Spron, and for their purposes here they developed a special reinforced variant dubbed Spron 530. This mainspring has the right amount of torque needed to achieve the higher beat rate, and it also manages a higher-than-average power reserve of 55 hours, also notable because higher-beat movements naturally consume more energy.

“Ultimately, a balance operating at a faster beat rate will show greater resilience to external rotational forces, which in turn results in more reliable daily timekeeping.”

Speaking of energy consumption, this is where MEMS comes into play. Now, if you’re at all familiar with Grand Seiko, you may have heard of MEMS without truly understanding what it is and why it’s important. So without getting overly technical about it, MEMS stands for Micro-Electro-Mechanical Systems, and it’s essentially a highly advanced manufacturing process Grand Seiko brought over from the production of semi conductors. Grand Seiko uses MEMS to fabricate certain precision metal parts for their 9S movements, and through this process they’re able to achieve structures that would otherwise be difficult to produce through traditional machine cutting. Additionally, parts produced via MEMS feature smoother surfaces, which minimizes friction, a major source of energy loss inside a movement.
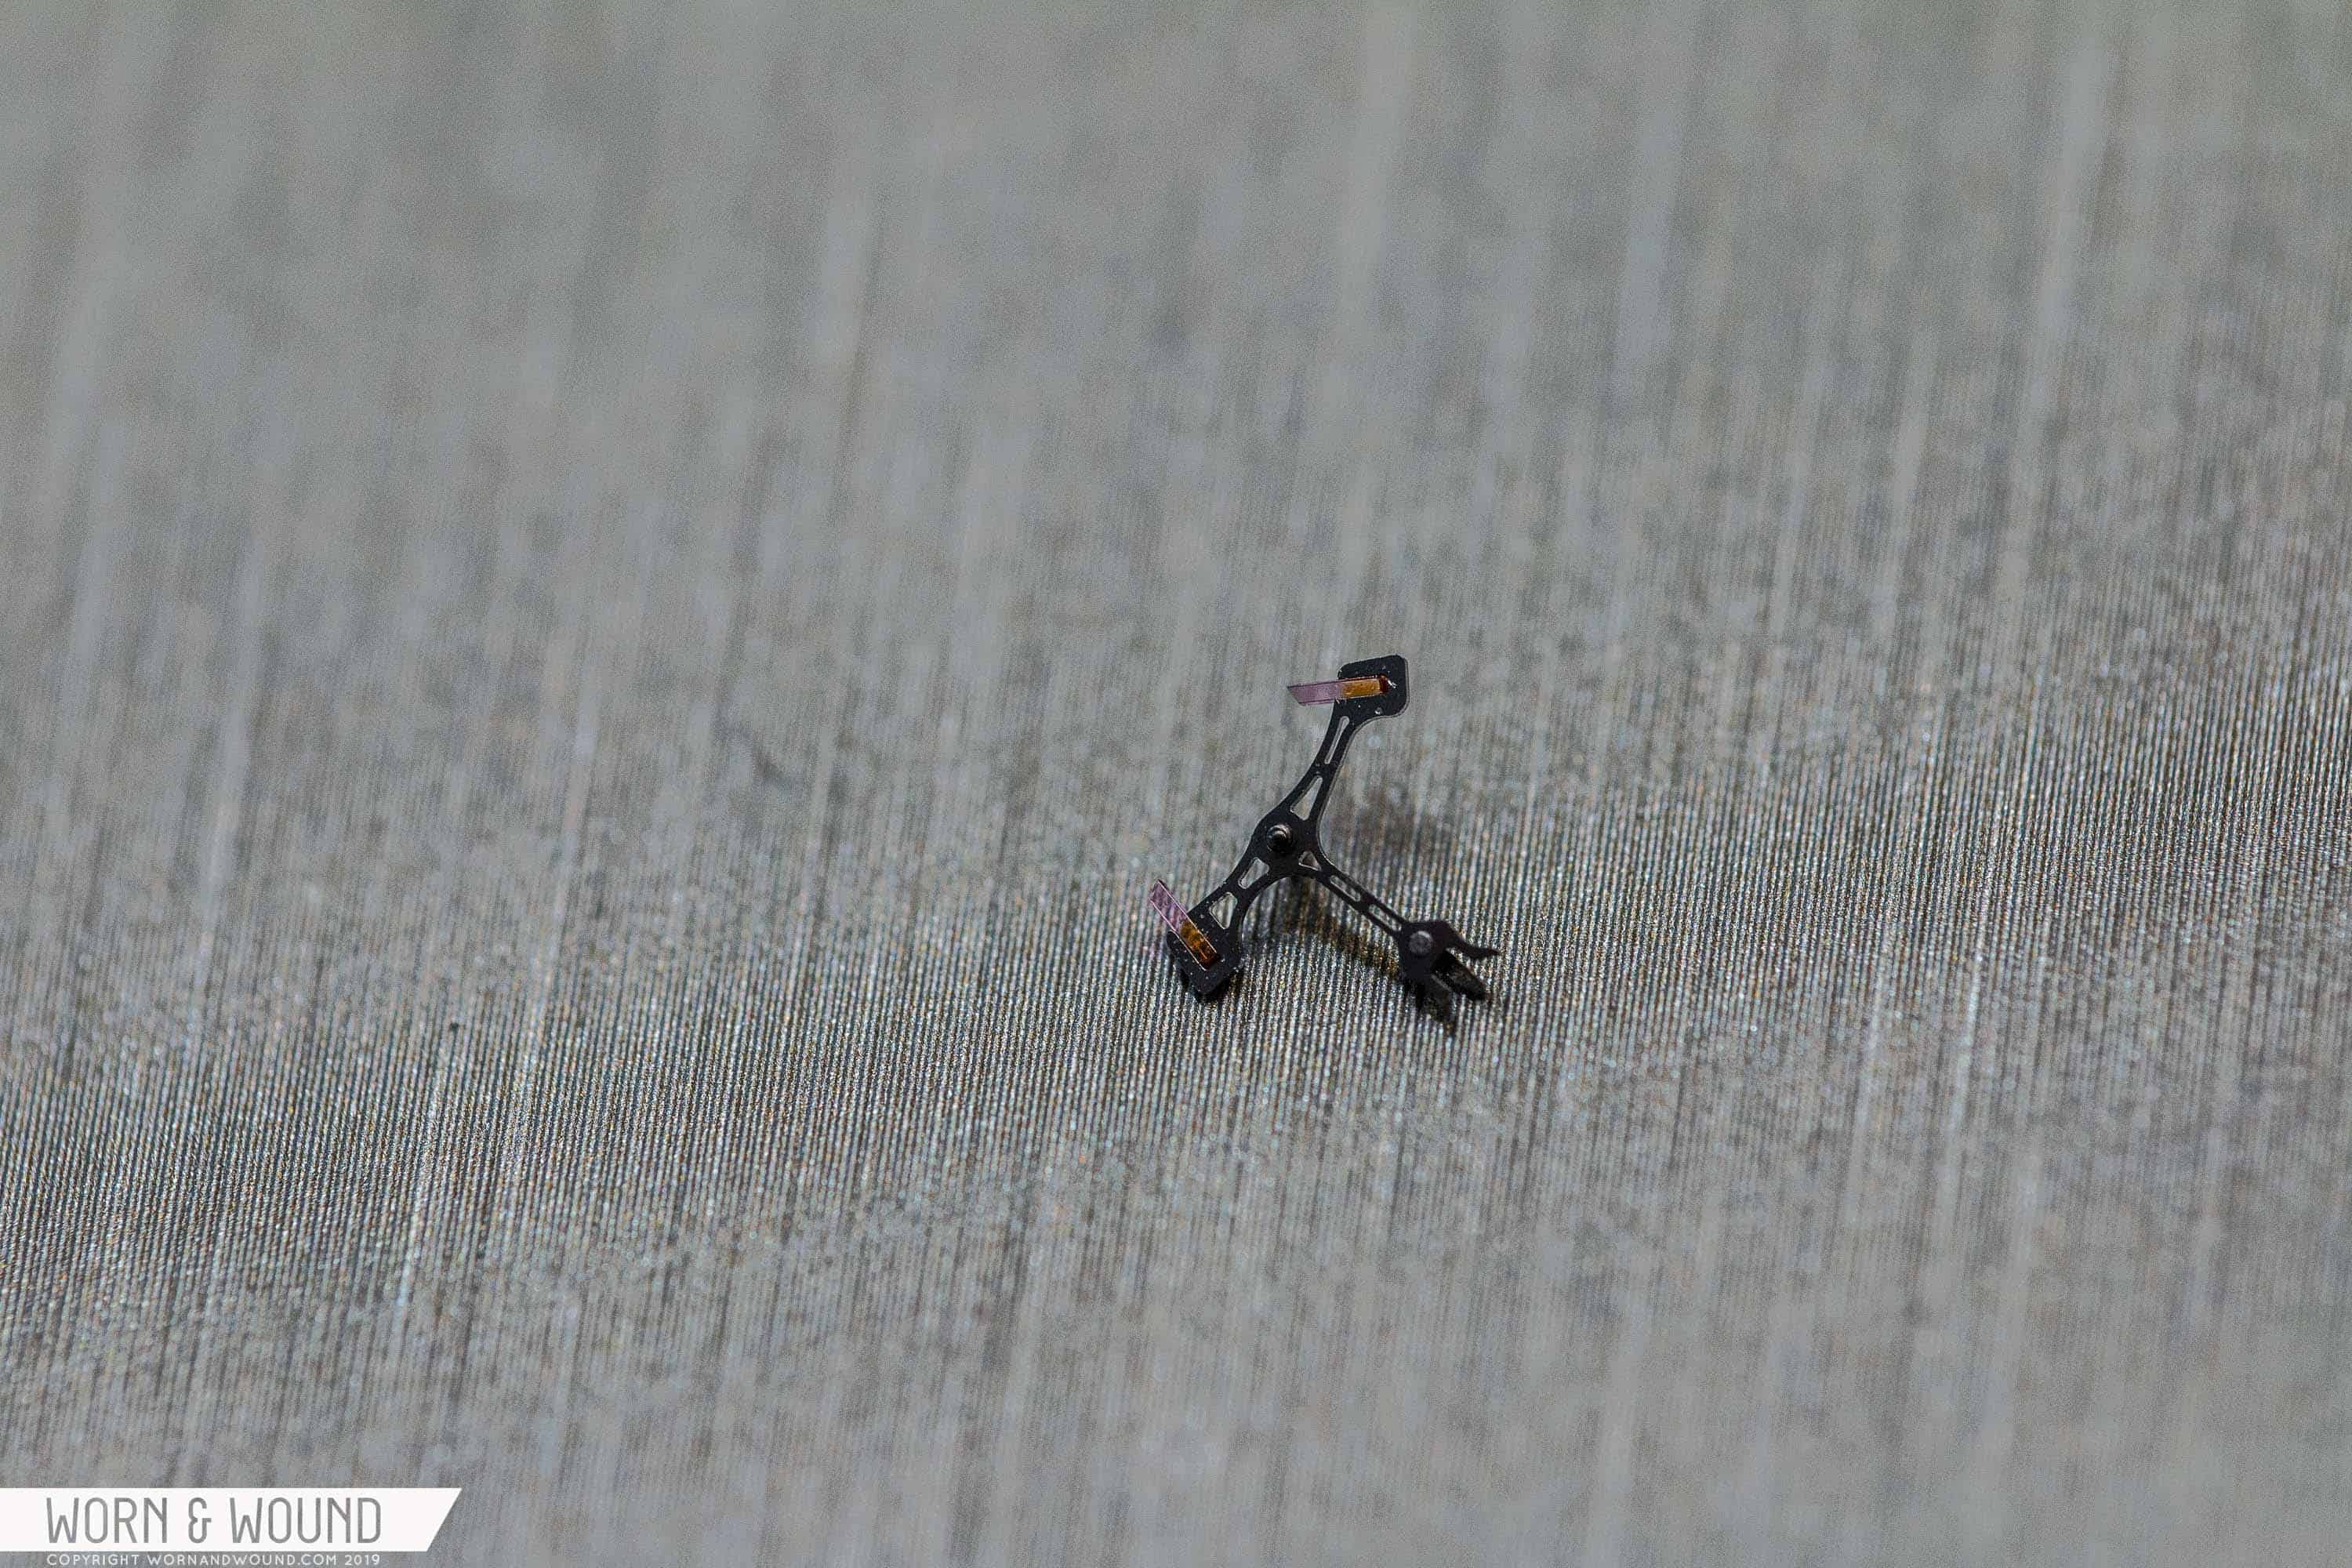
Pallet fork.

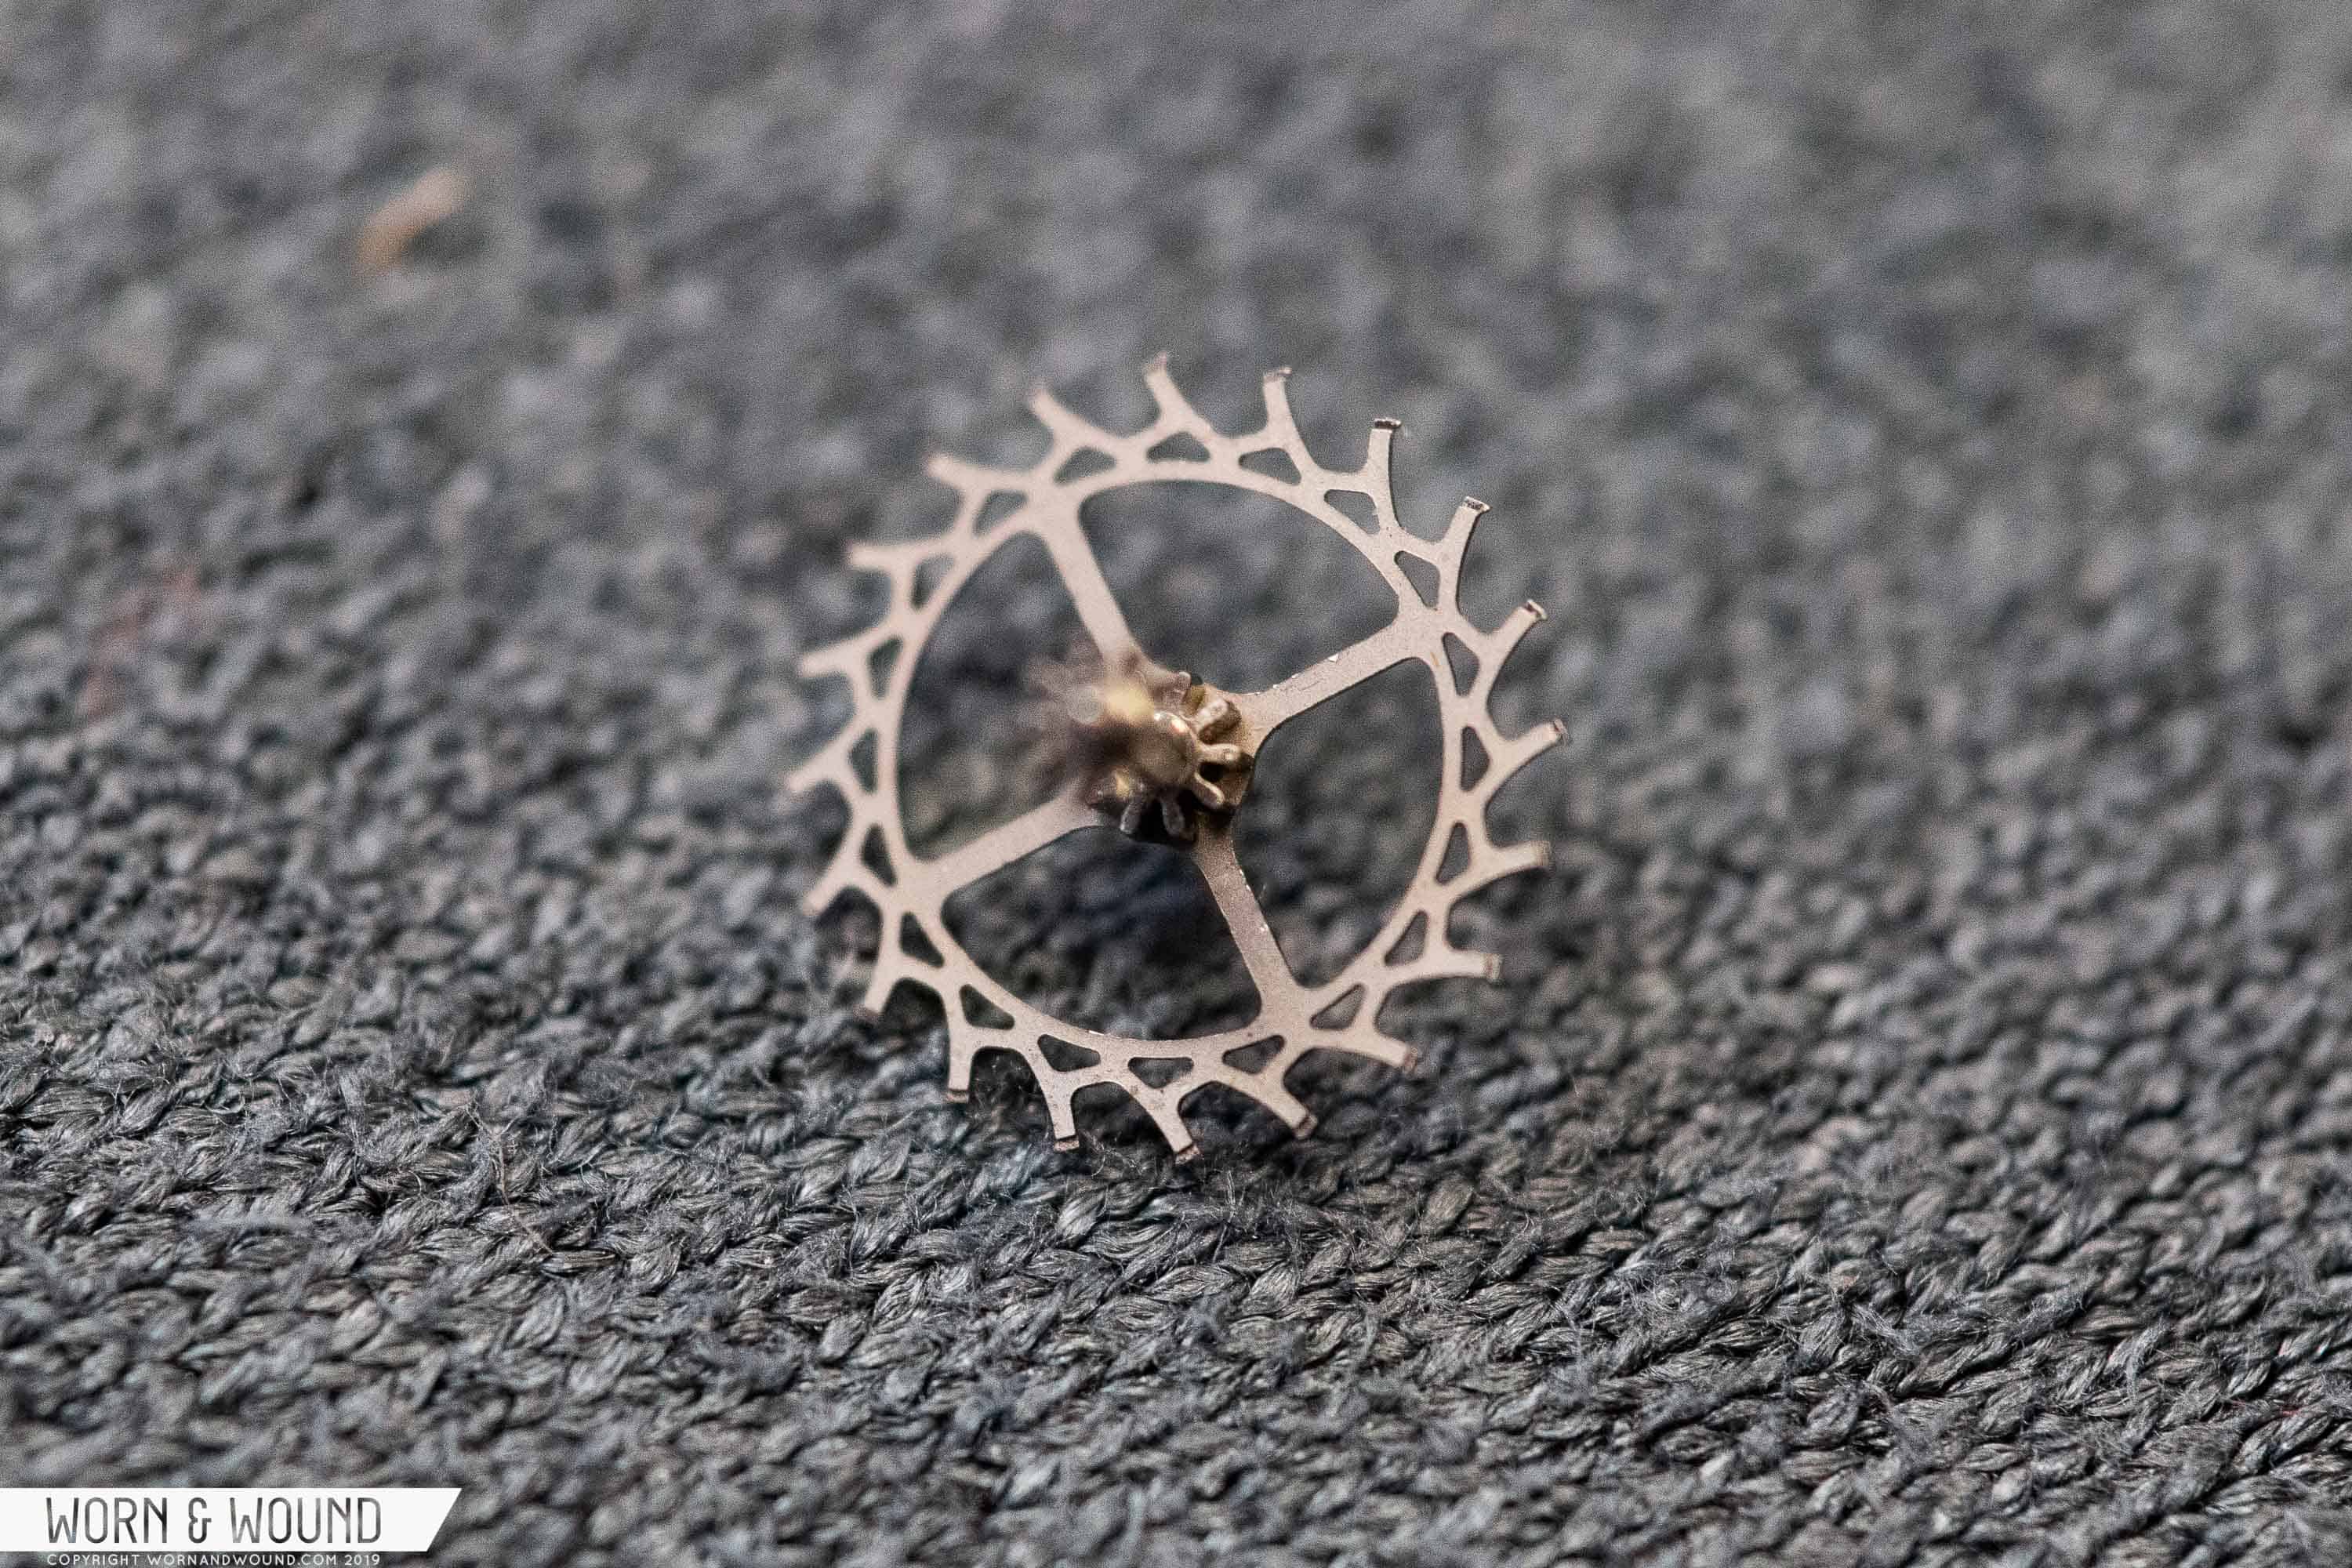
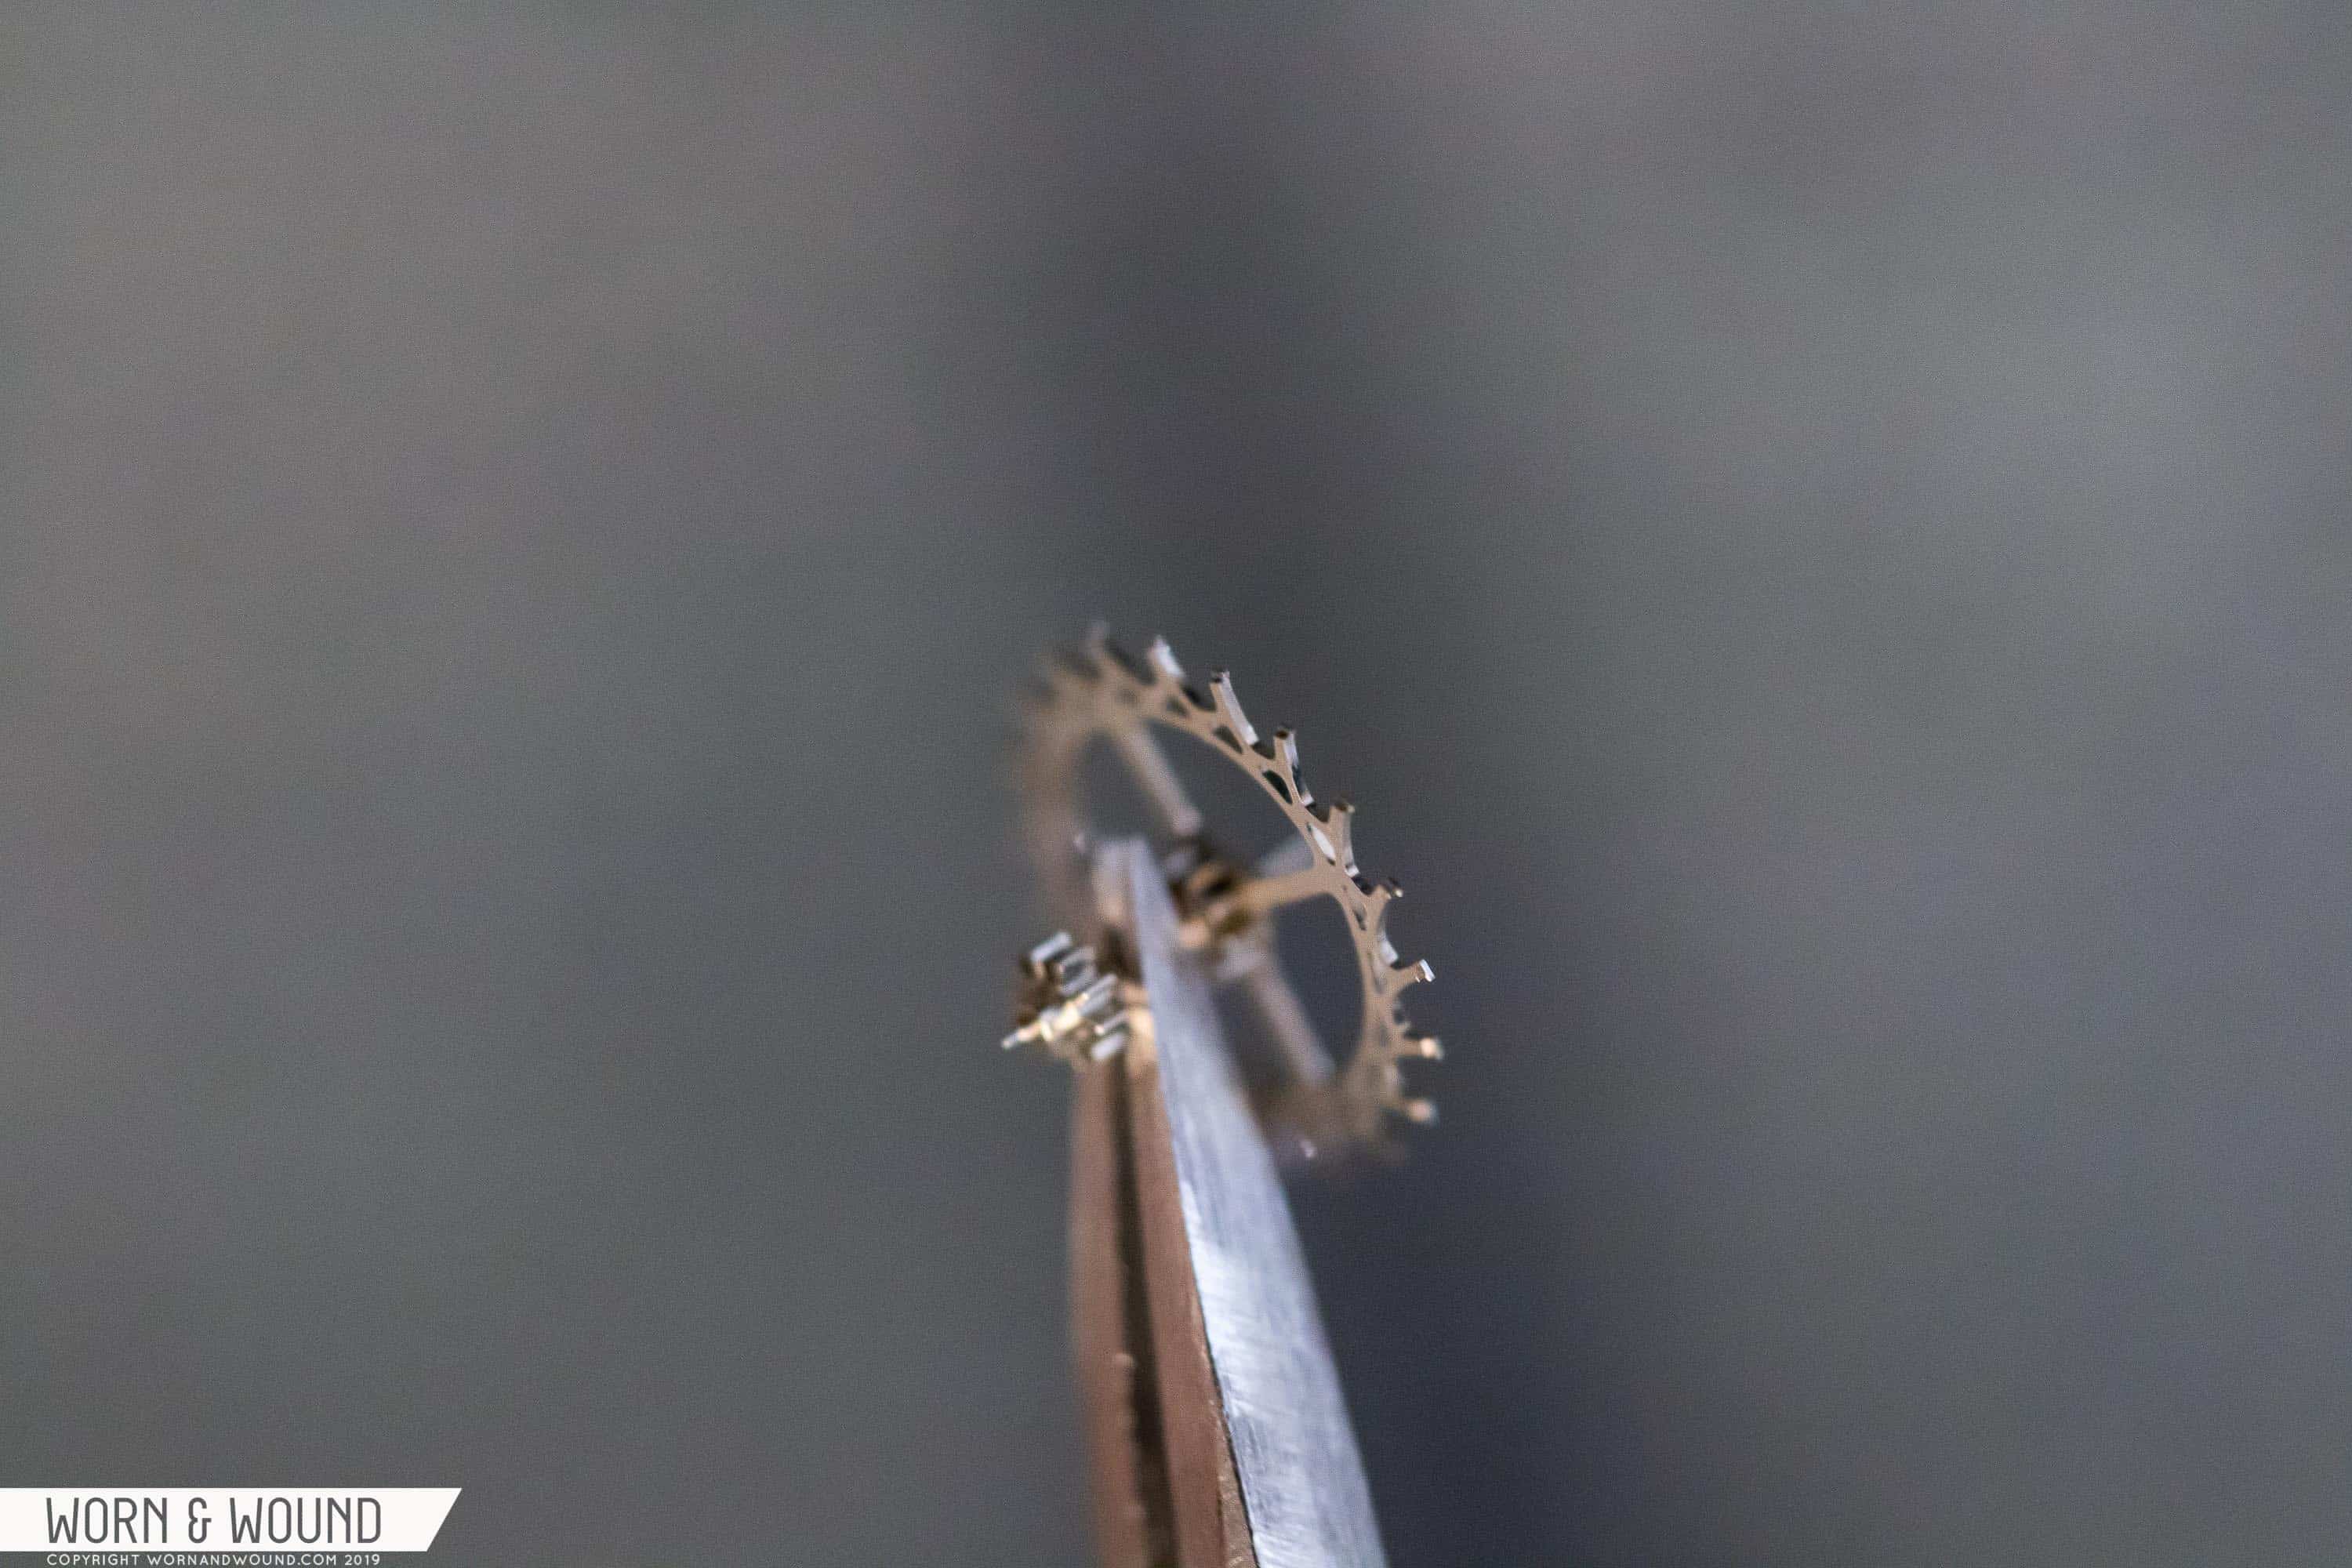
Escape wheel.

Note the L-shaped tips on the escape wheel.

Two components Grand Seiko produces with MEMS are the escape wheel and the pallet fork. Through MEMS, Grand Seiko makes skeletonized escape wheels that are 5% lighter and pallet forks that are 25% lighter than their conventional counterparts. Furthermore, to address the higher degree of wear and tear sustained by hi-beat calibers, these parts are engineered for the purposes of better oil retention. If you look closely at Grand Seiko’s escape wheel, you’ll notice that in addition to the unique skeletonized structure, the cogs feature L-shaped tips designed to better retain lubricant for a longer period of time.
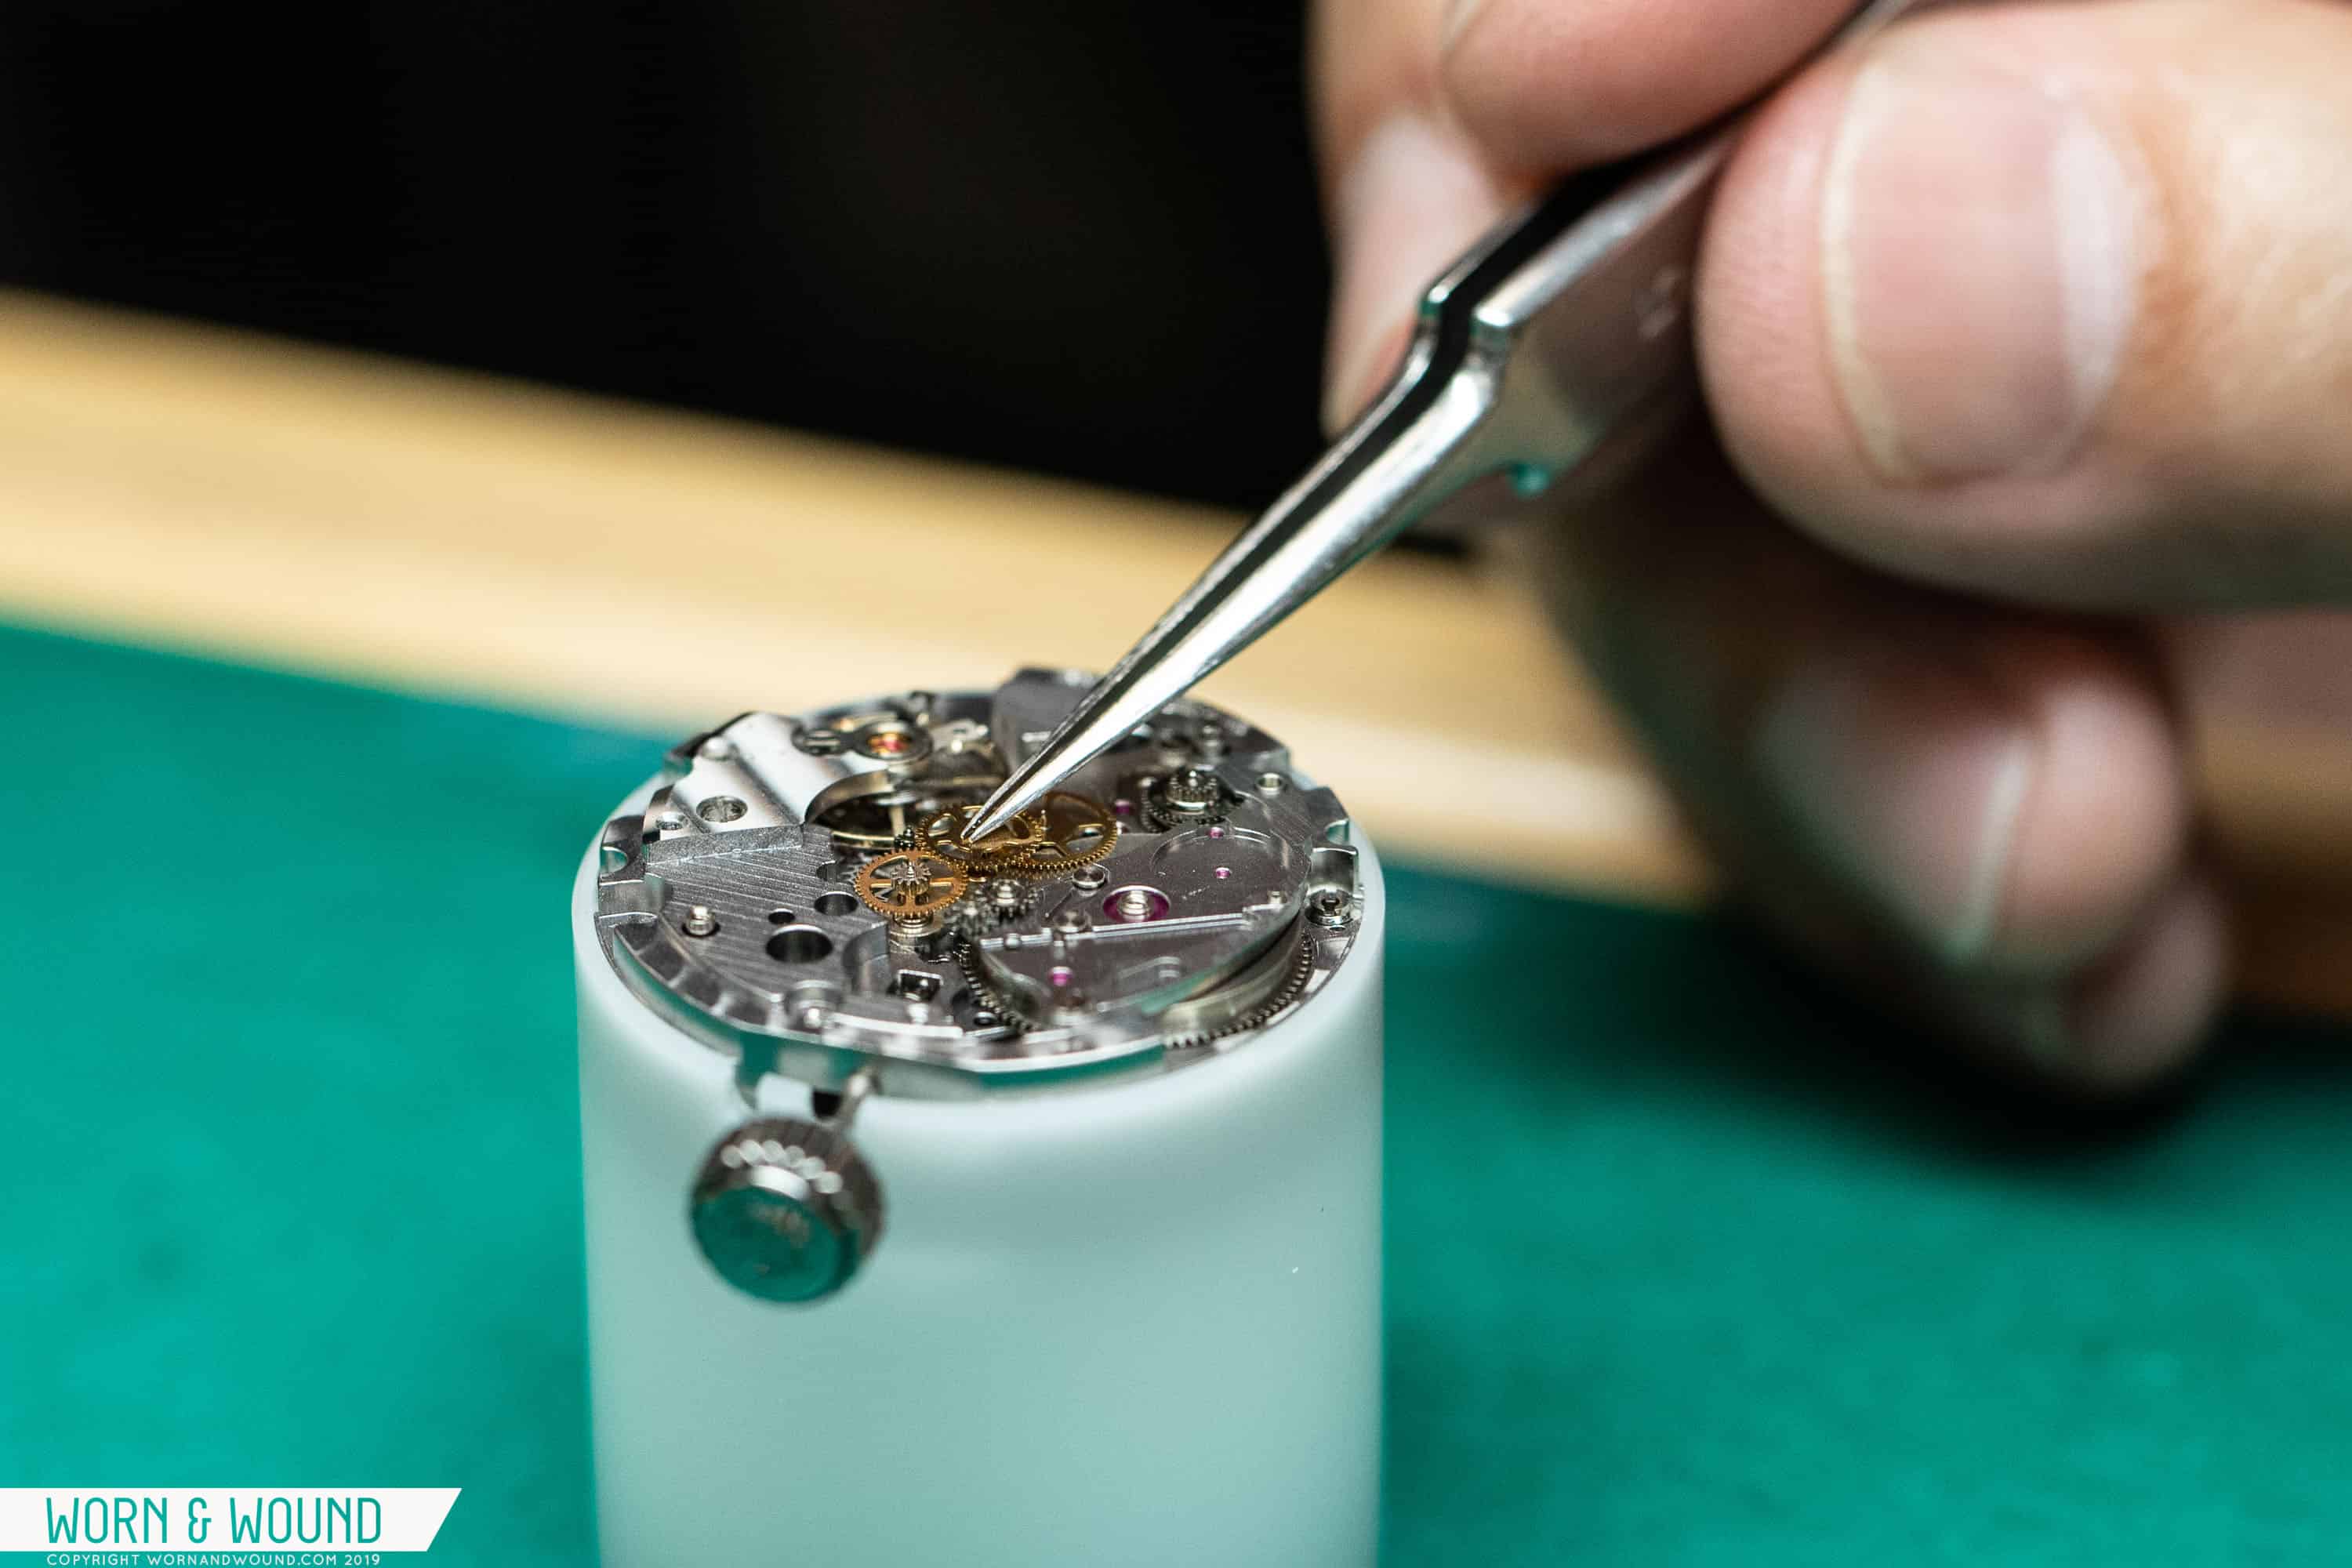
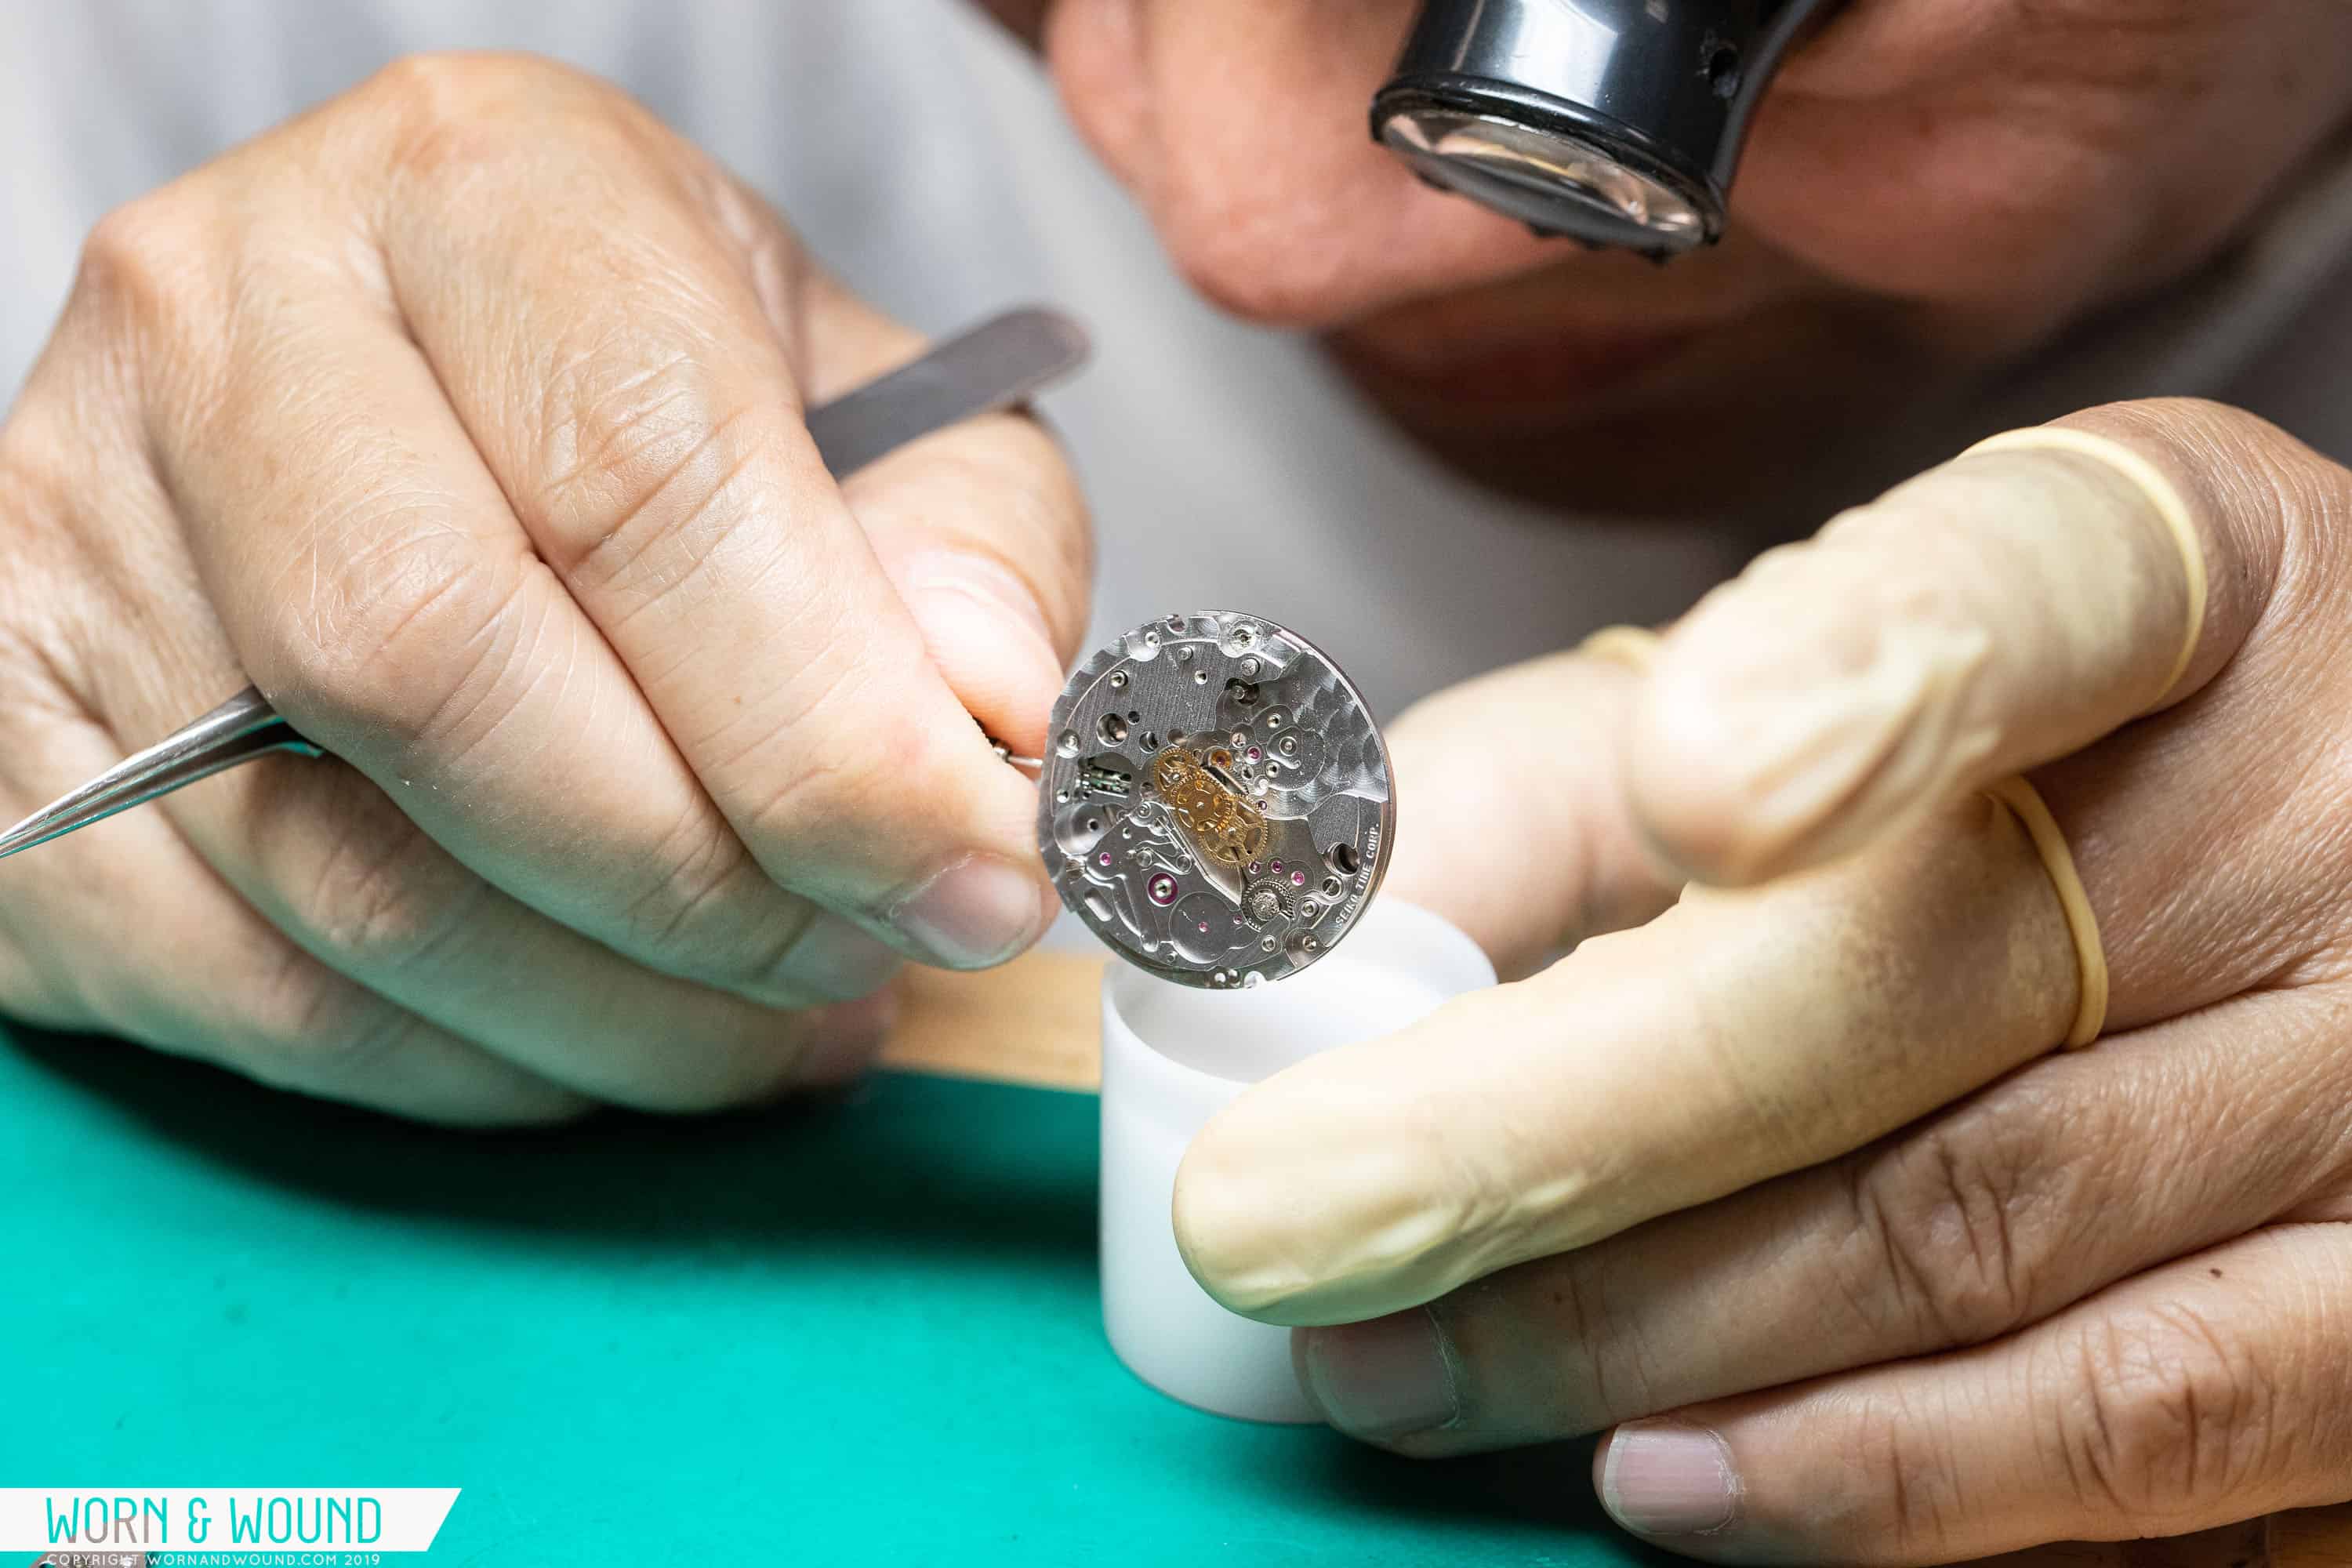
As far as the architecture is concerned, Grand Seiko’s watchmakers also had to redesign the gear train, but they took a different and significantly better approach than what would be considered more common. What generally happens with higher-beat movements is watchmakers will add more teeth to the gear train’s fourth wheel, or the wheel that drives the second hand, to achieve a higher gear ratio. While this is a solution, it is not a great one, because in order to add more teeth, you have to decrease their size, and doing so can cause slippage between gears and results in less stable transmission of energy. Also, smaller teeth are more fragile, and therefore more prone to breaking.  So Grand Seiko’s engineers came up with an excellent solution — they added an extra wheel to the gear train, allowing them to achieve the appropriate gear ratio without sacrificing stability.

Note the extra wheel on the gear train.


Ultimately, what you get from Grand Seiko here is an incredibly accurate movement, with Grand Seiko rating their Hi-Beat calibers to +5/-3 seconds a day, a spec that is well beyond what the COSC specifies. Hi-Beat models marked “Special” have even greater tolerances of +4/-2 seconds a day, and VFA, or Very Fine Adjusted models, are calibrated to a whopping +3 -1 second a day.

To read other installments in this series, click here. To explore Grand Seiko’s 9S Hi-Beat, visit Grand Seiko.

Movements and watches featured are instructional samples. No Grand Seiko watches or movements were hurt in the making of this series.

The post A Look Inside Grand Seiko’s 9S Hi-Beat Mechanical Movement appeared first on Worn & Wound.

четверг, 13 февраля 2020 г.

Watchmaker’s Bench: Breaking Down a Seiko 6139 Chronograph

Vintage chronographs are a hot commodity right now and have been for some time, and it’s not looking like that market will be slowing any time soon. With prices soaring for well-known Swiss brands, some consumers and collectors are looking further afield to satisfy their desires. The vintage Seiko market has been growing steadily over the years as collectors realize the enormous value from particular models. The most popular of these would have to be the original 6139 series of chronographs. 

The Seiko 6139 was produced in 1969, a big year for the automatic chronograph, as that was the year the famous Zenith El Primero was introduced, as well as the Heuer/Buren Caliber 11.  The 6139 was a single-register chronograph, displaying elapsed seconds and minutes, and it came in two variants: the 6139A and the later 6139B, which replaced the A.

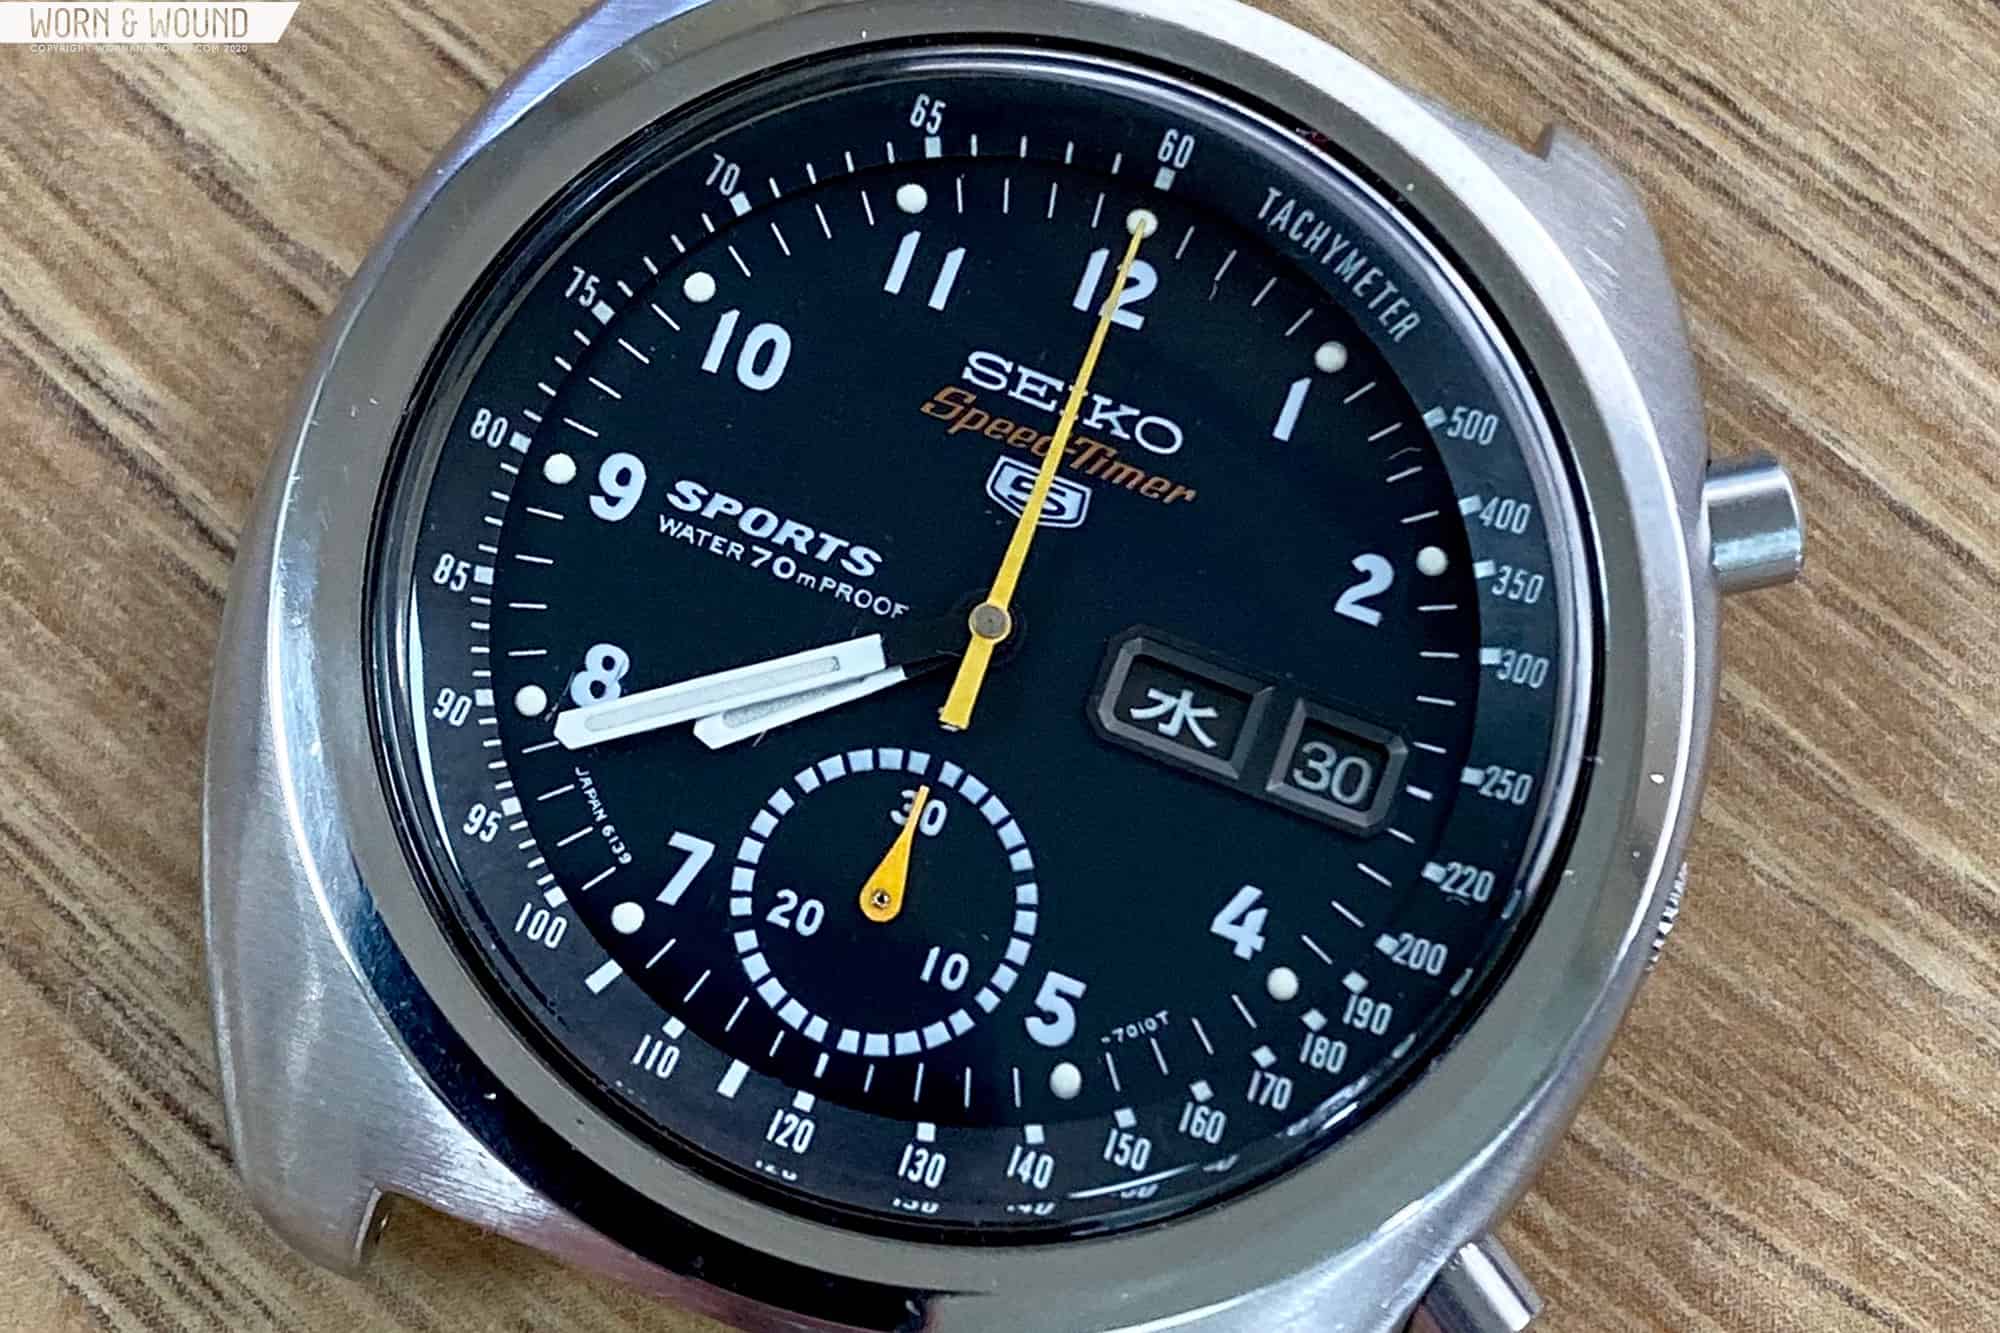
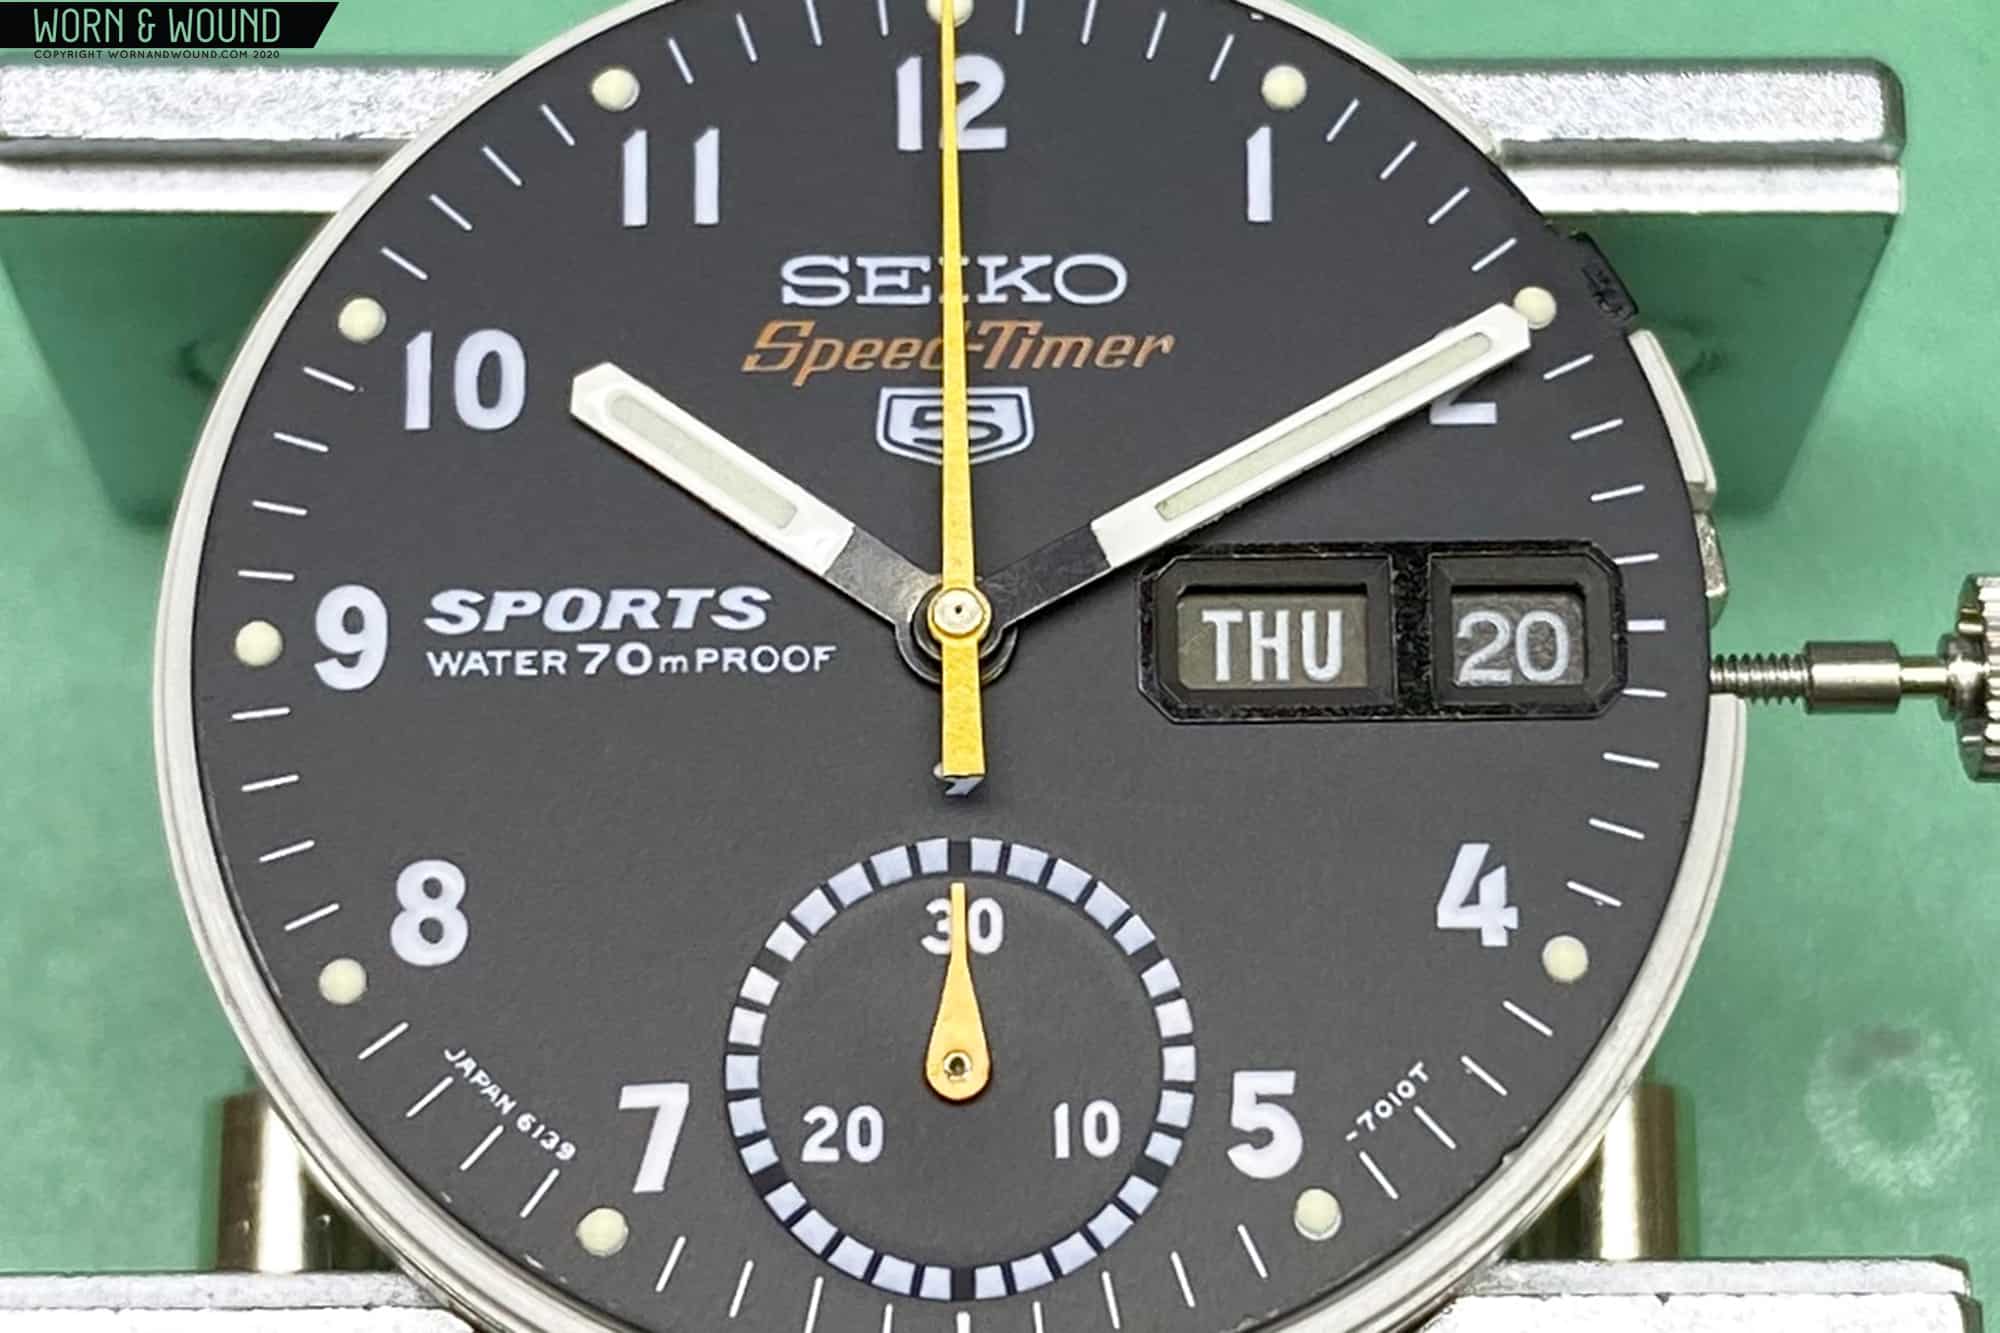
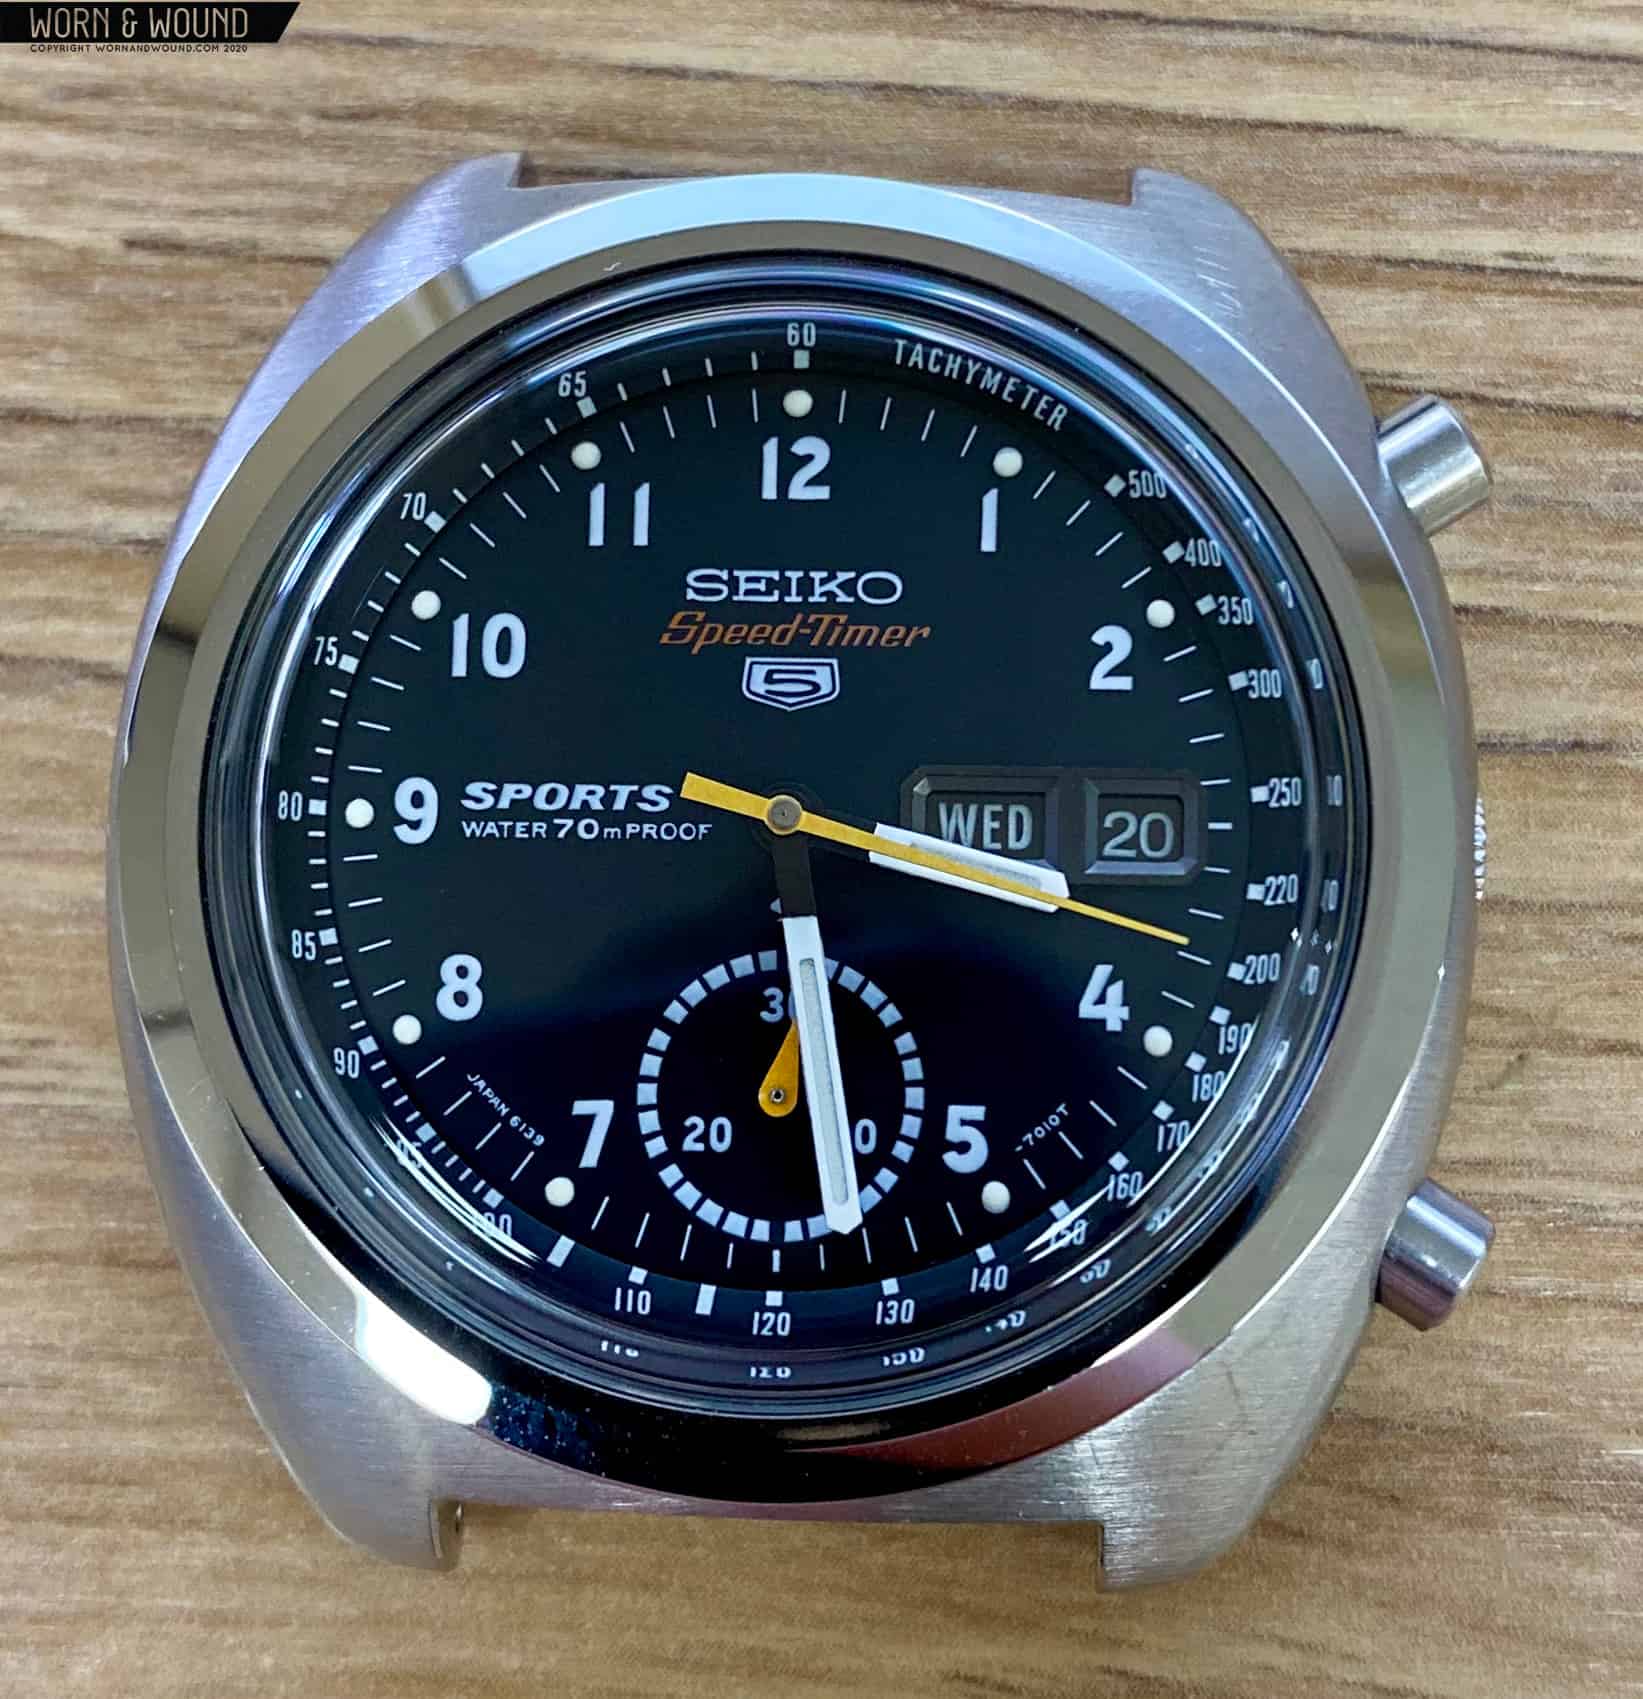
The watch under the microscope today is a Seiko 6139-7010. It features a “military” dial, as it’s rumored this watch was a Japanese Defense Forces-issued piece. This particular variant is the 6139B caliber with a 21-jewel count. A 17-jewel variant also exists, but I’ll get into that later. This watch was purchased by a Canadian Seiko collector (@canadianwatchguy) who sent it to me for a full overhaul.

Now, these 6139s tend to be solid, reliable calibers, and this watch wasn’t running terribly, but it needed some general maintenance, the crystal was scratched, and the bezel had been rounded due to over-polishing. With a NOS (new-old-stock) crystal and bezel sourced, I got to the movement. 

The Breakdown

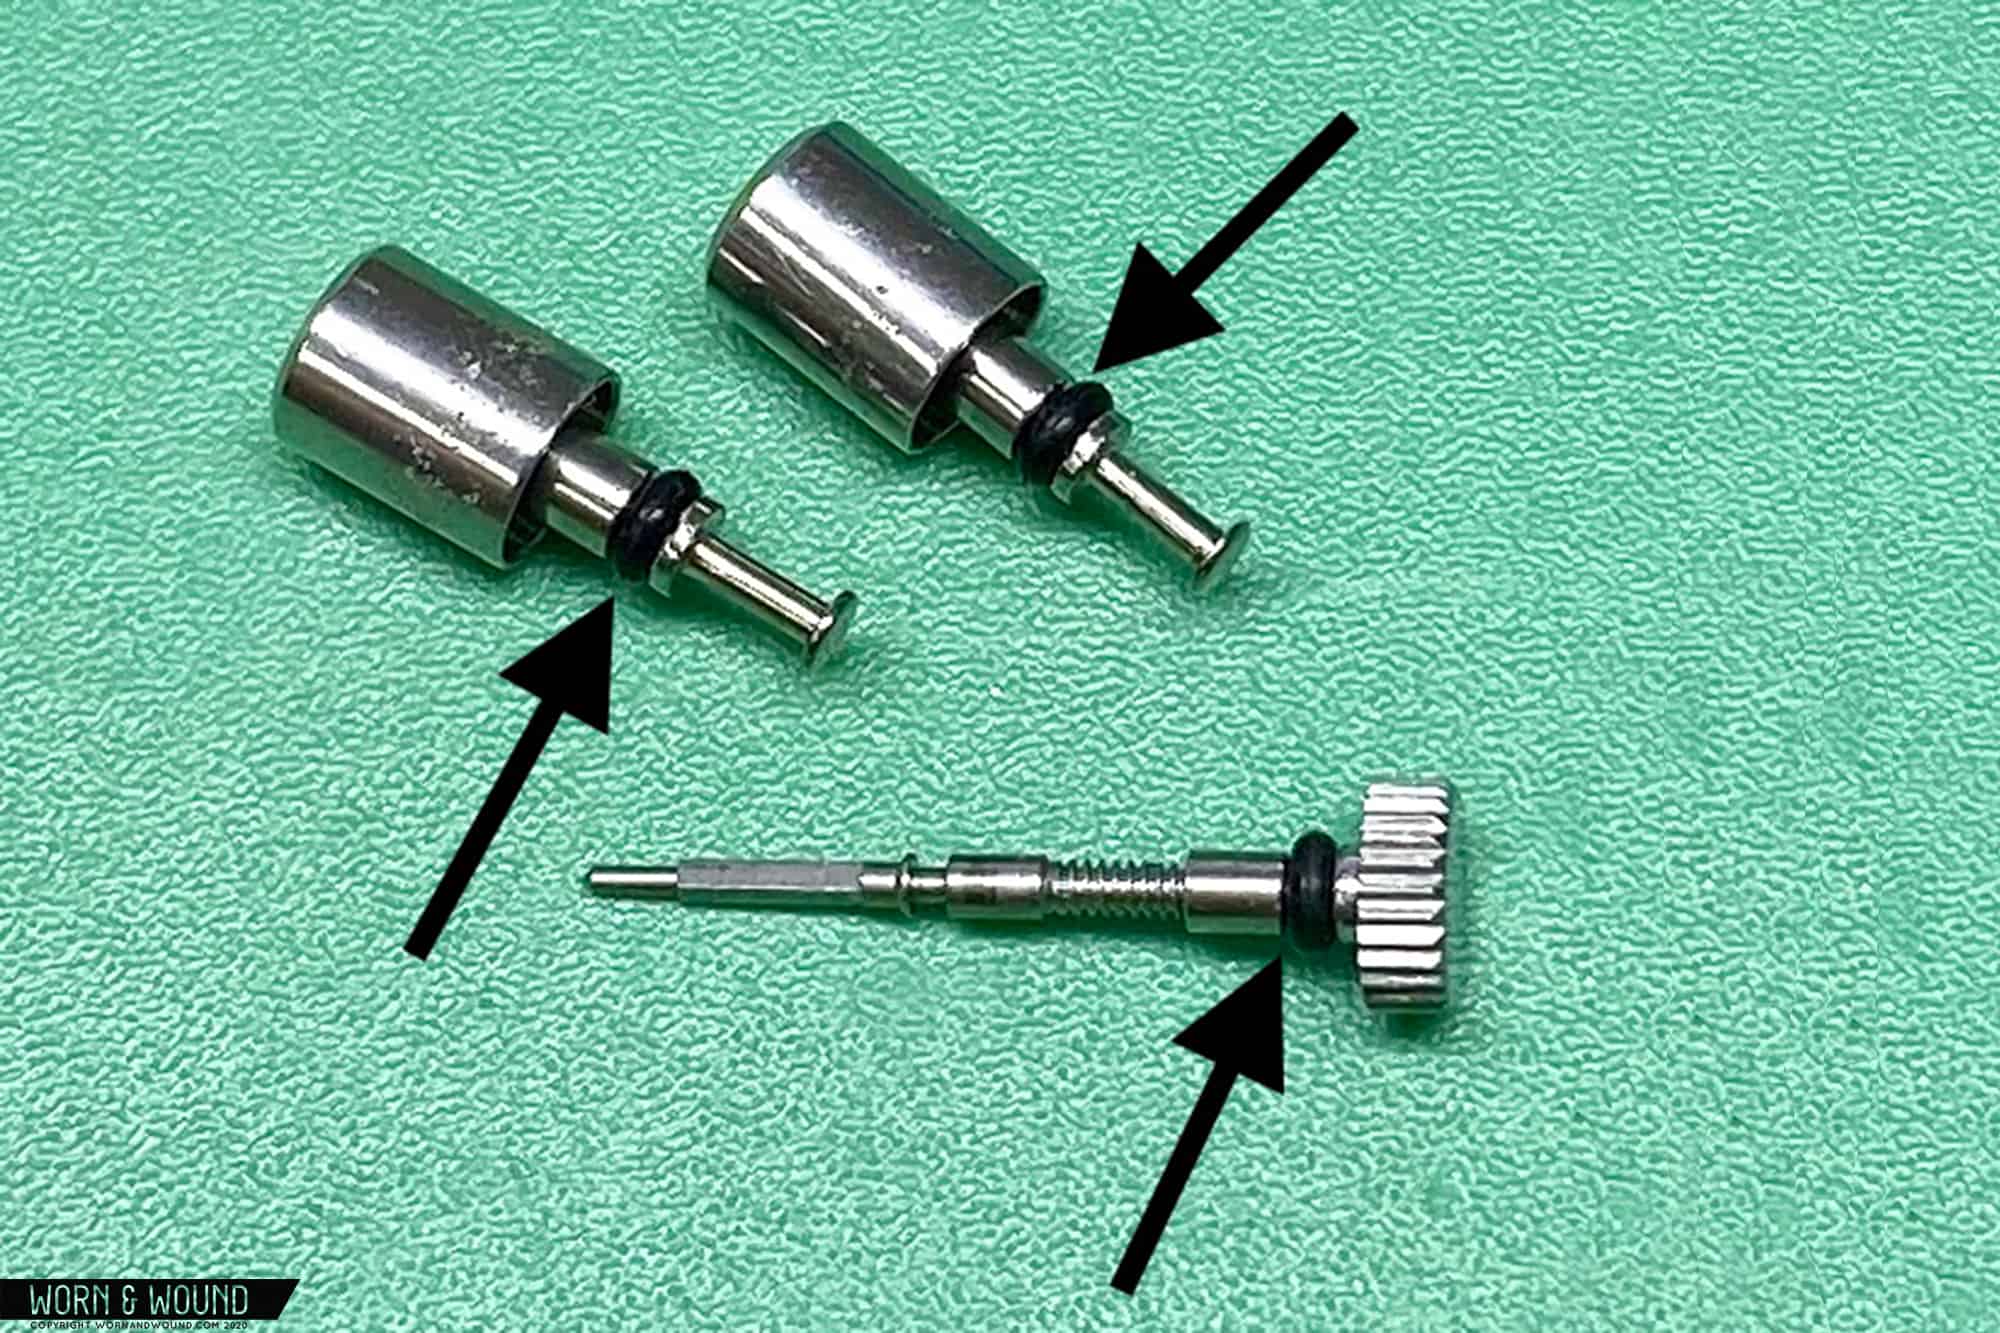
One of the most common issues Seiko chronograph’s face is sticking of the pushers and crown. If you are an avid Seiko collector, then I’m sure you’ve encountered this problem. The cause of this is either broken pusher springs or gaskets which have deteriorated over time. 

This particular watch had another problem altogether. The previous watchmaker had installed three gaskets onto the crown, but there should only be one. This sort of reckless behavior is, unfortunately, all too common with unscrupulous “watchmakers,” who don’t care to obtain the correct profile pusher and crown gaskets. I rectified this problem (you’ll see my fix near the end of the of the assembly). 

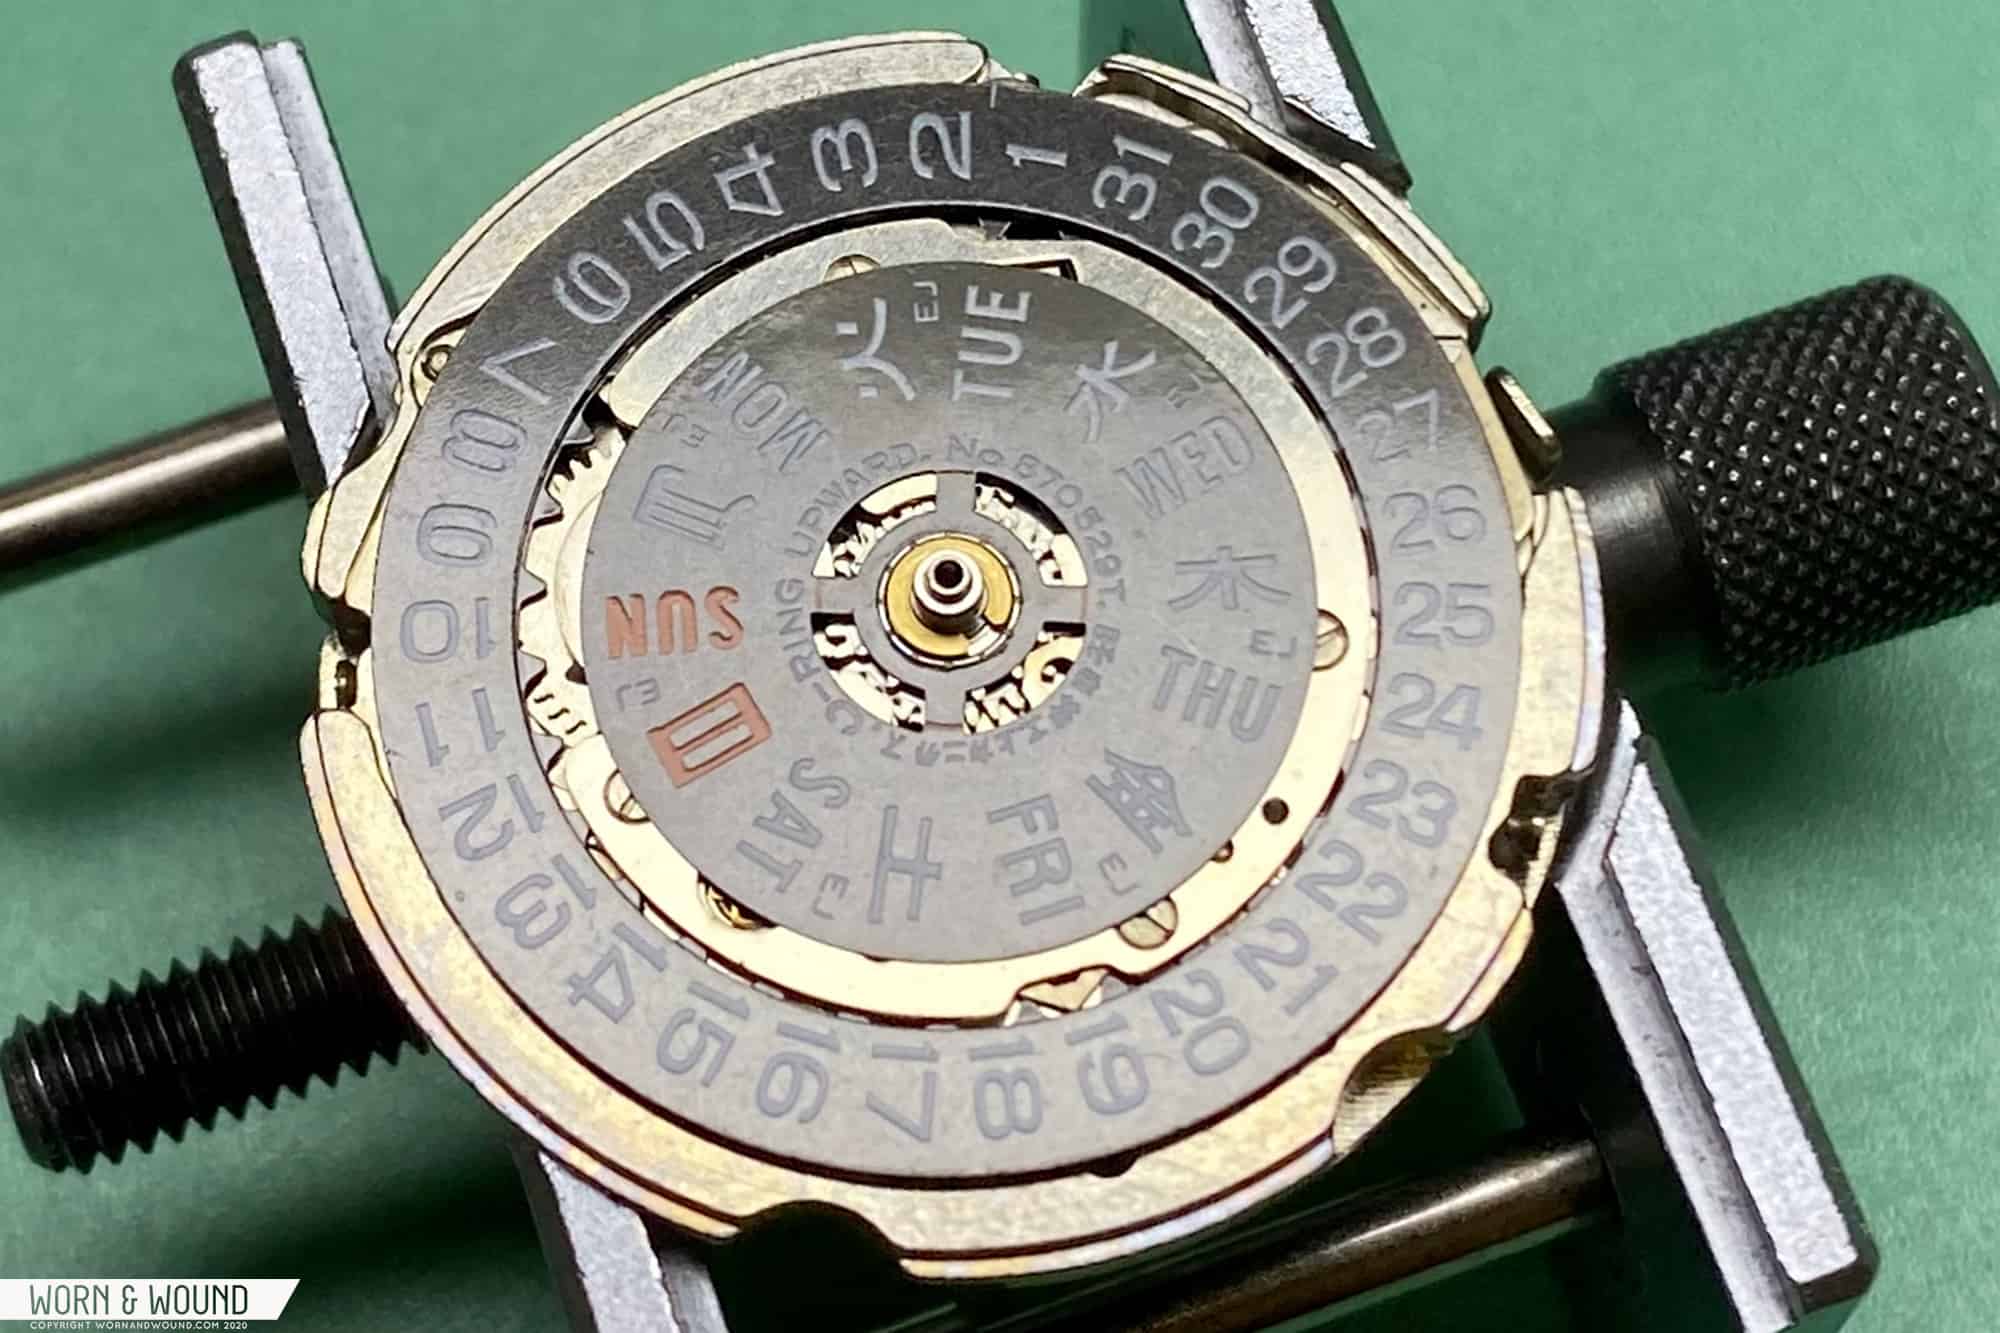
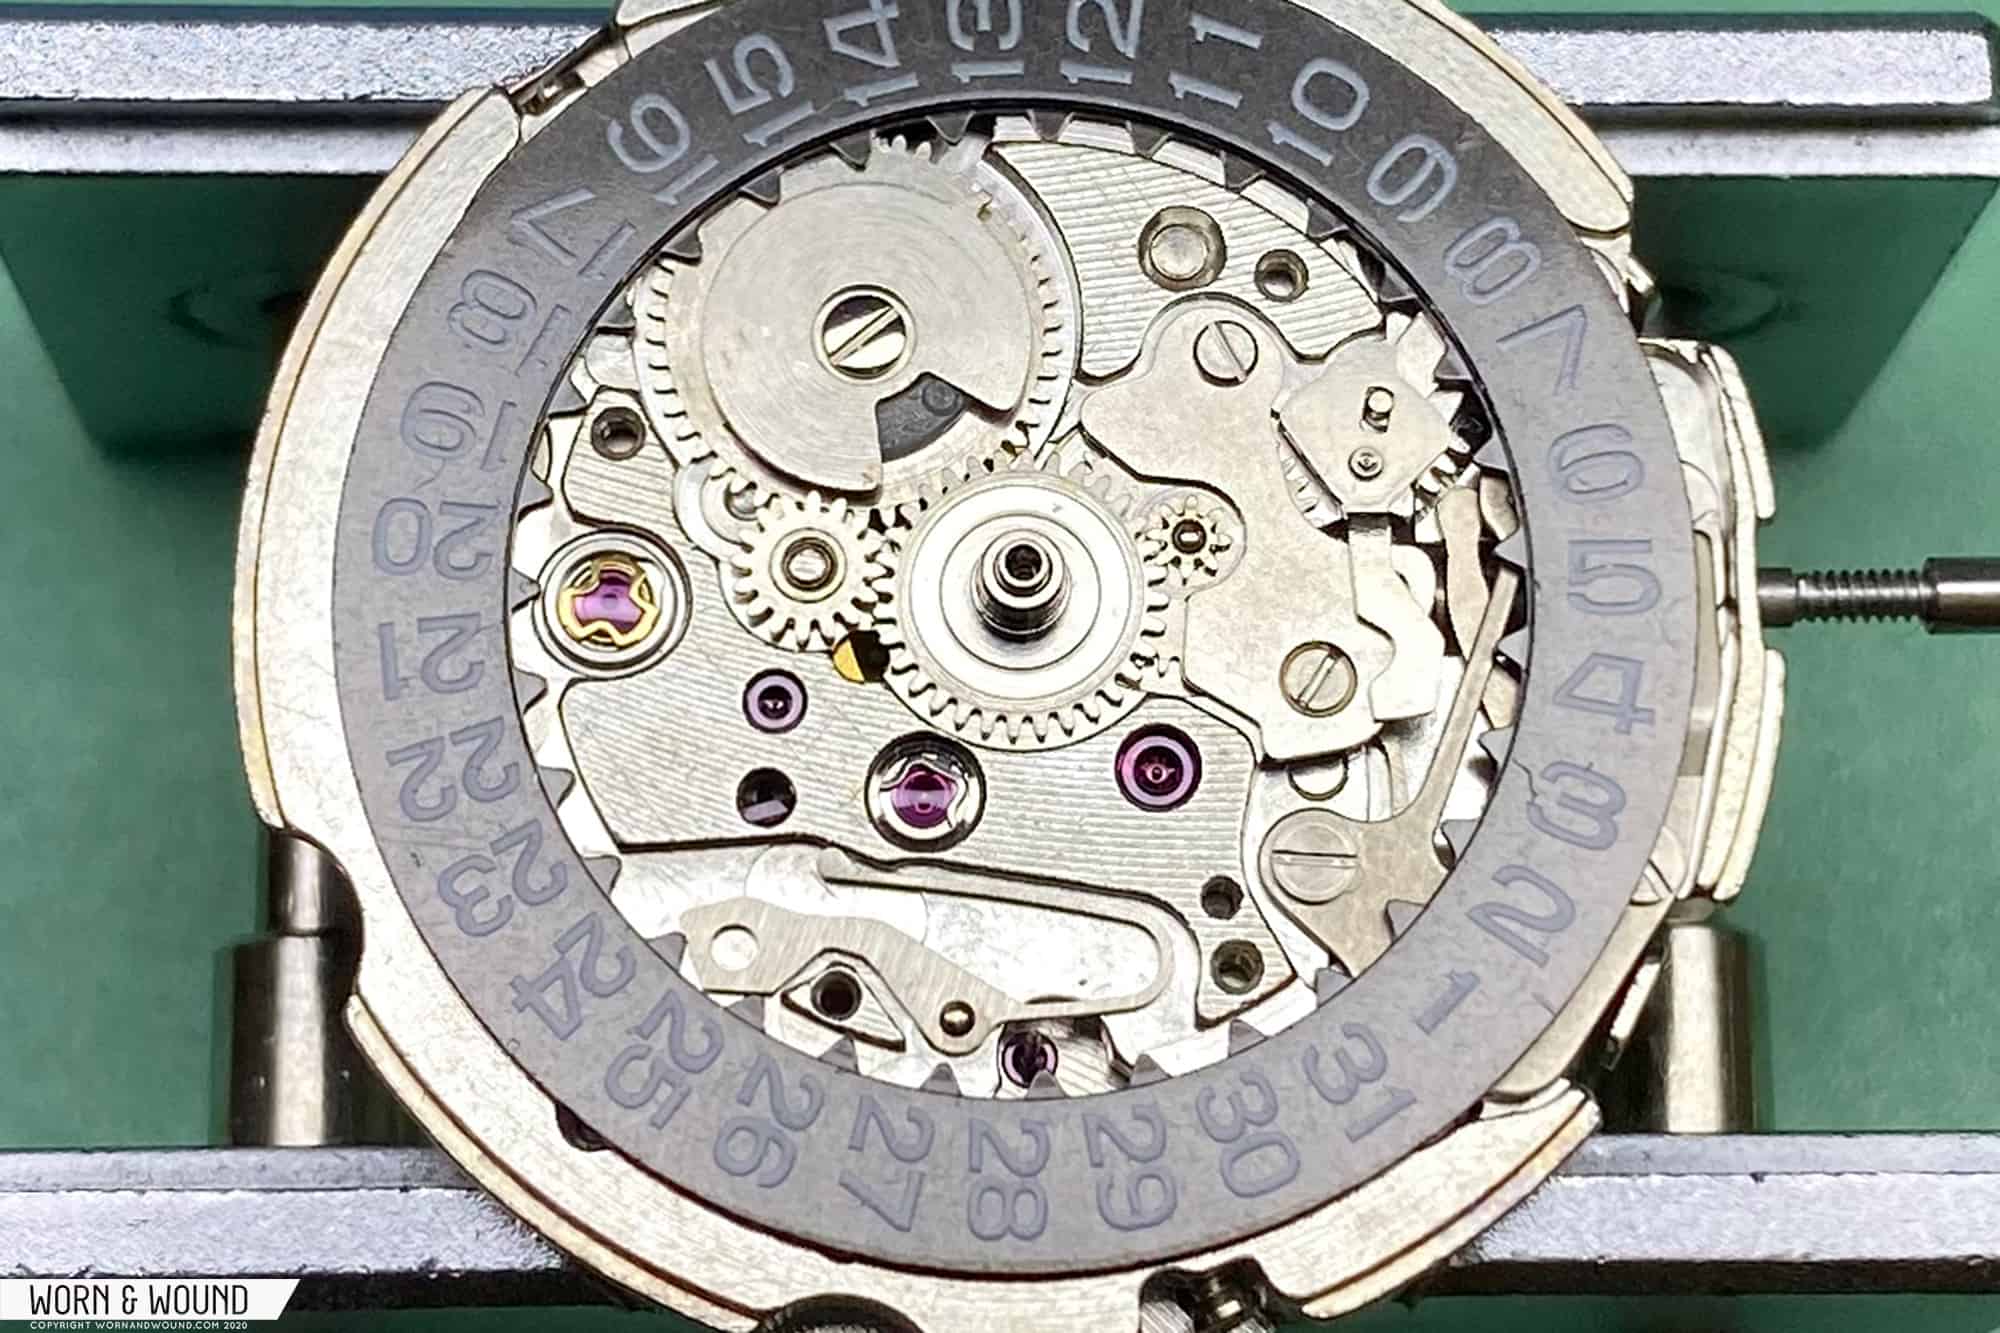
With that out of the way, a proper breakdown of the movement can begin. The first order of business is the calendar work on the top-side of the movement.  First, we begin with the removal of the day and date disk.

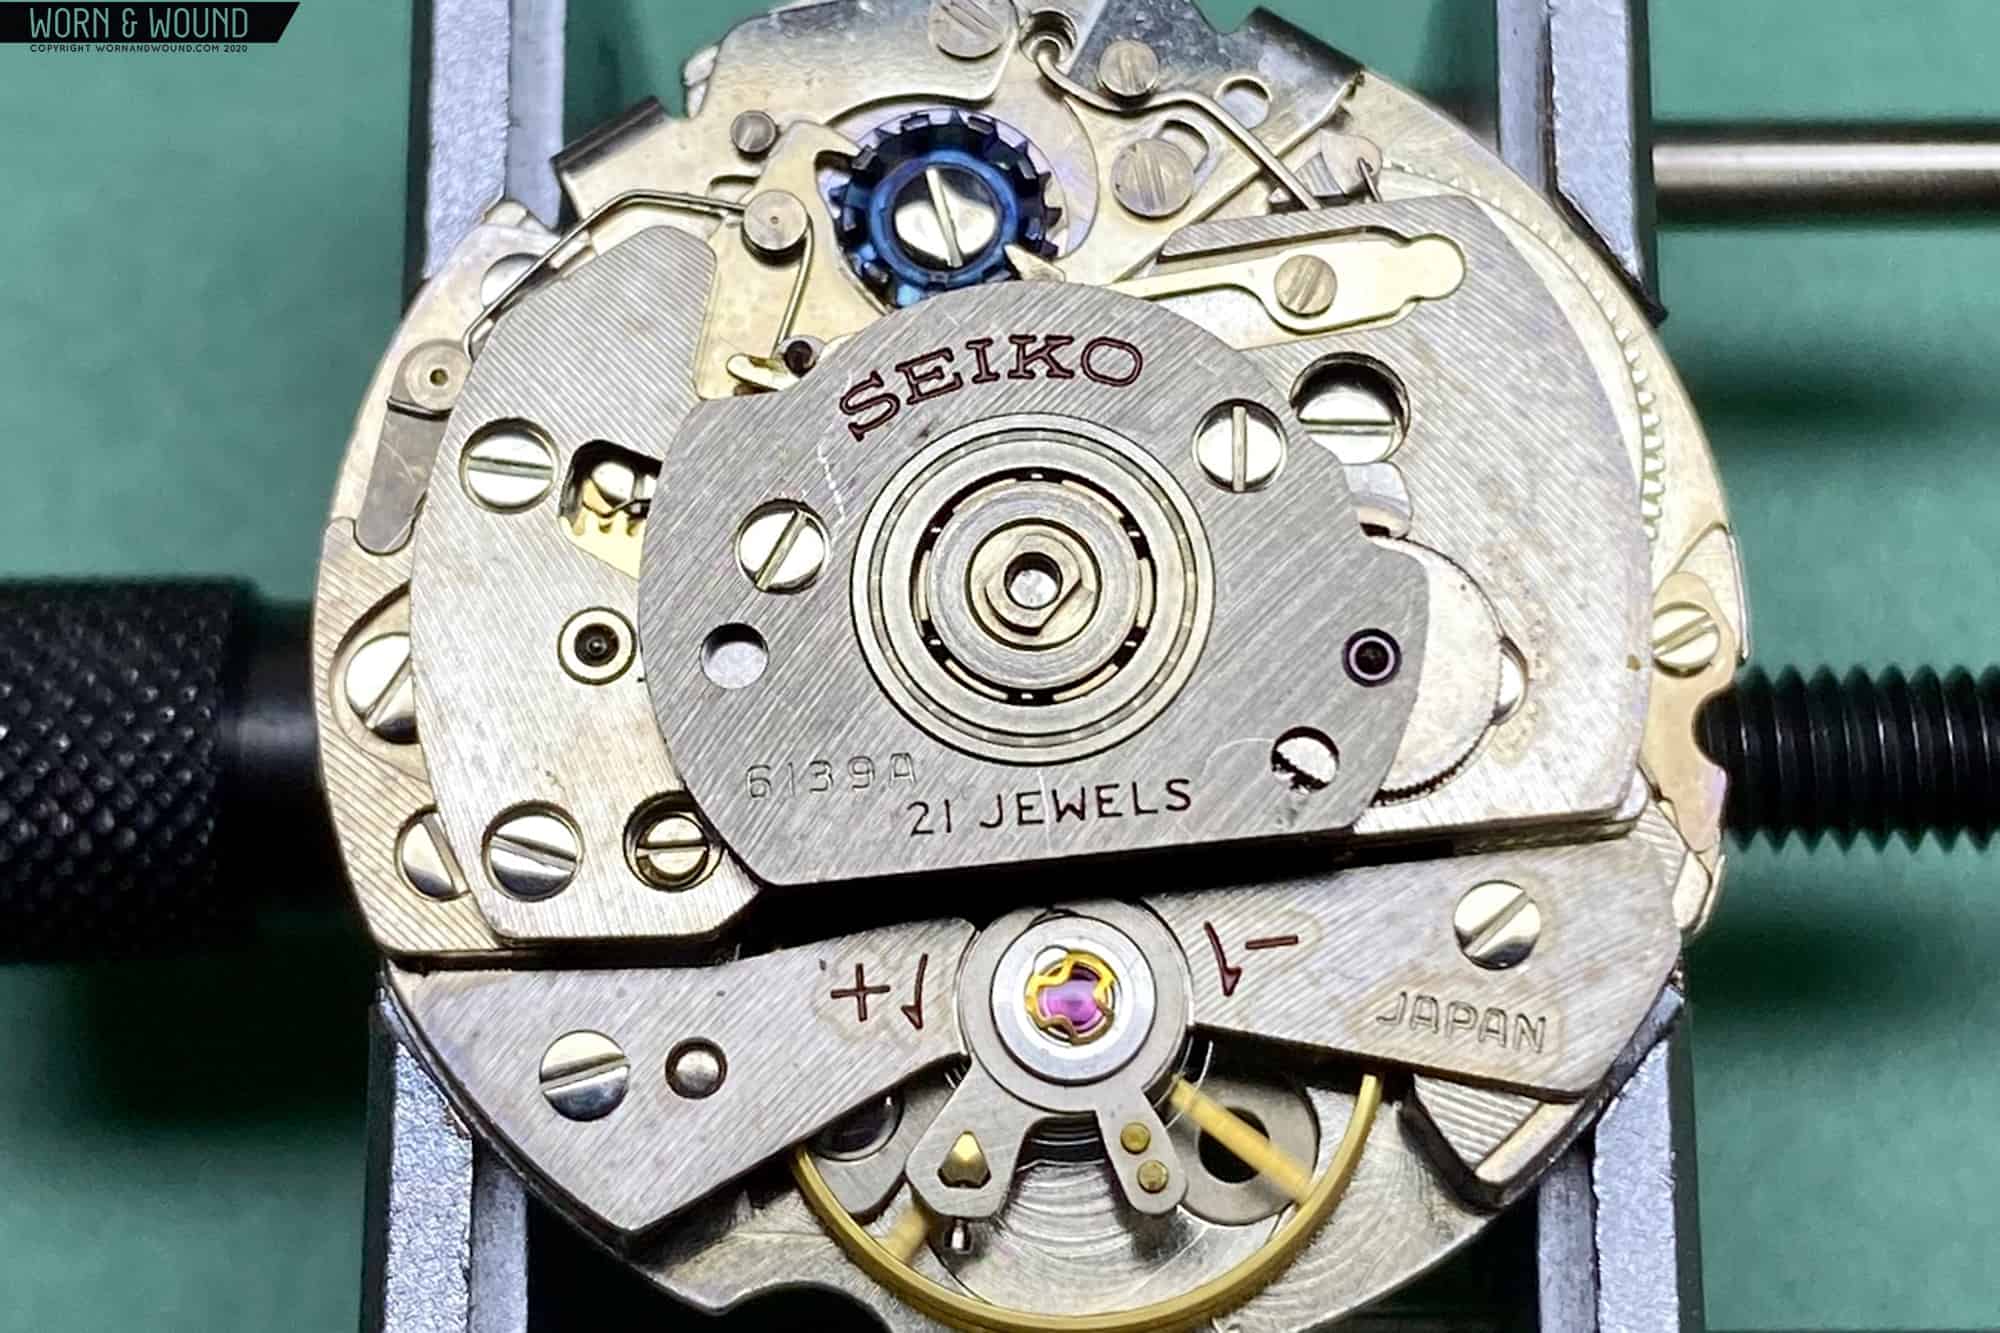
With that done, we can flip the movement over to the other side. Here’s what it looks like sans rotor.

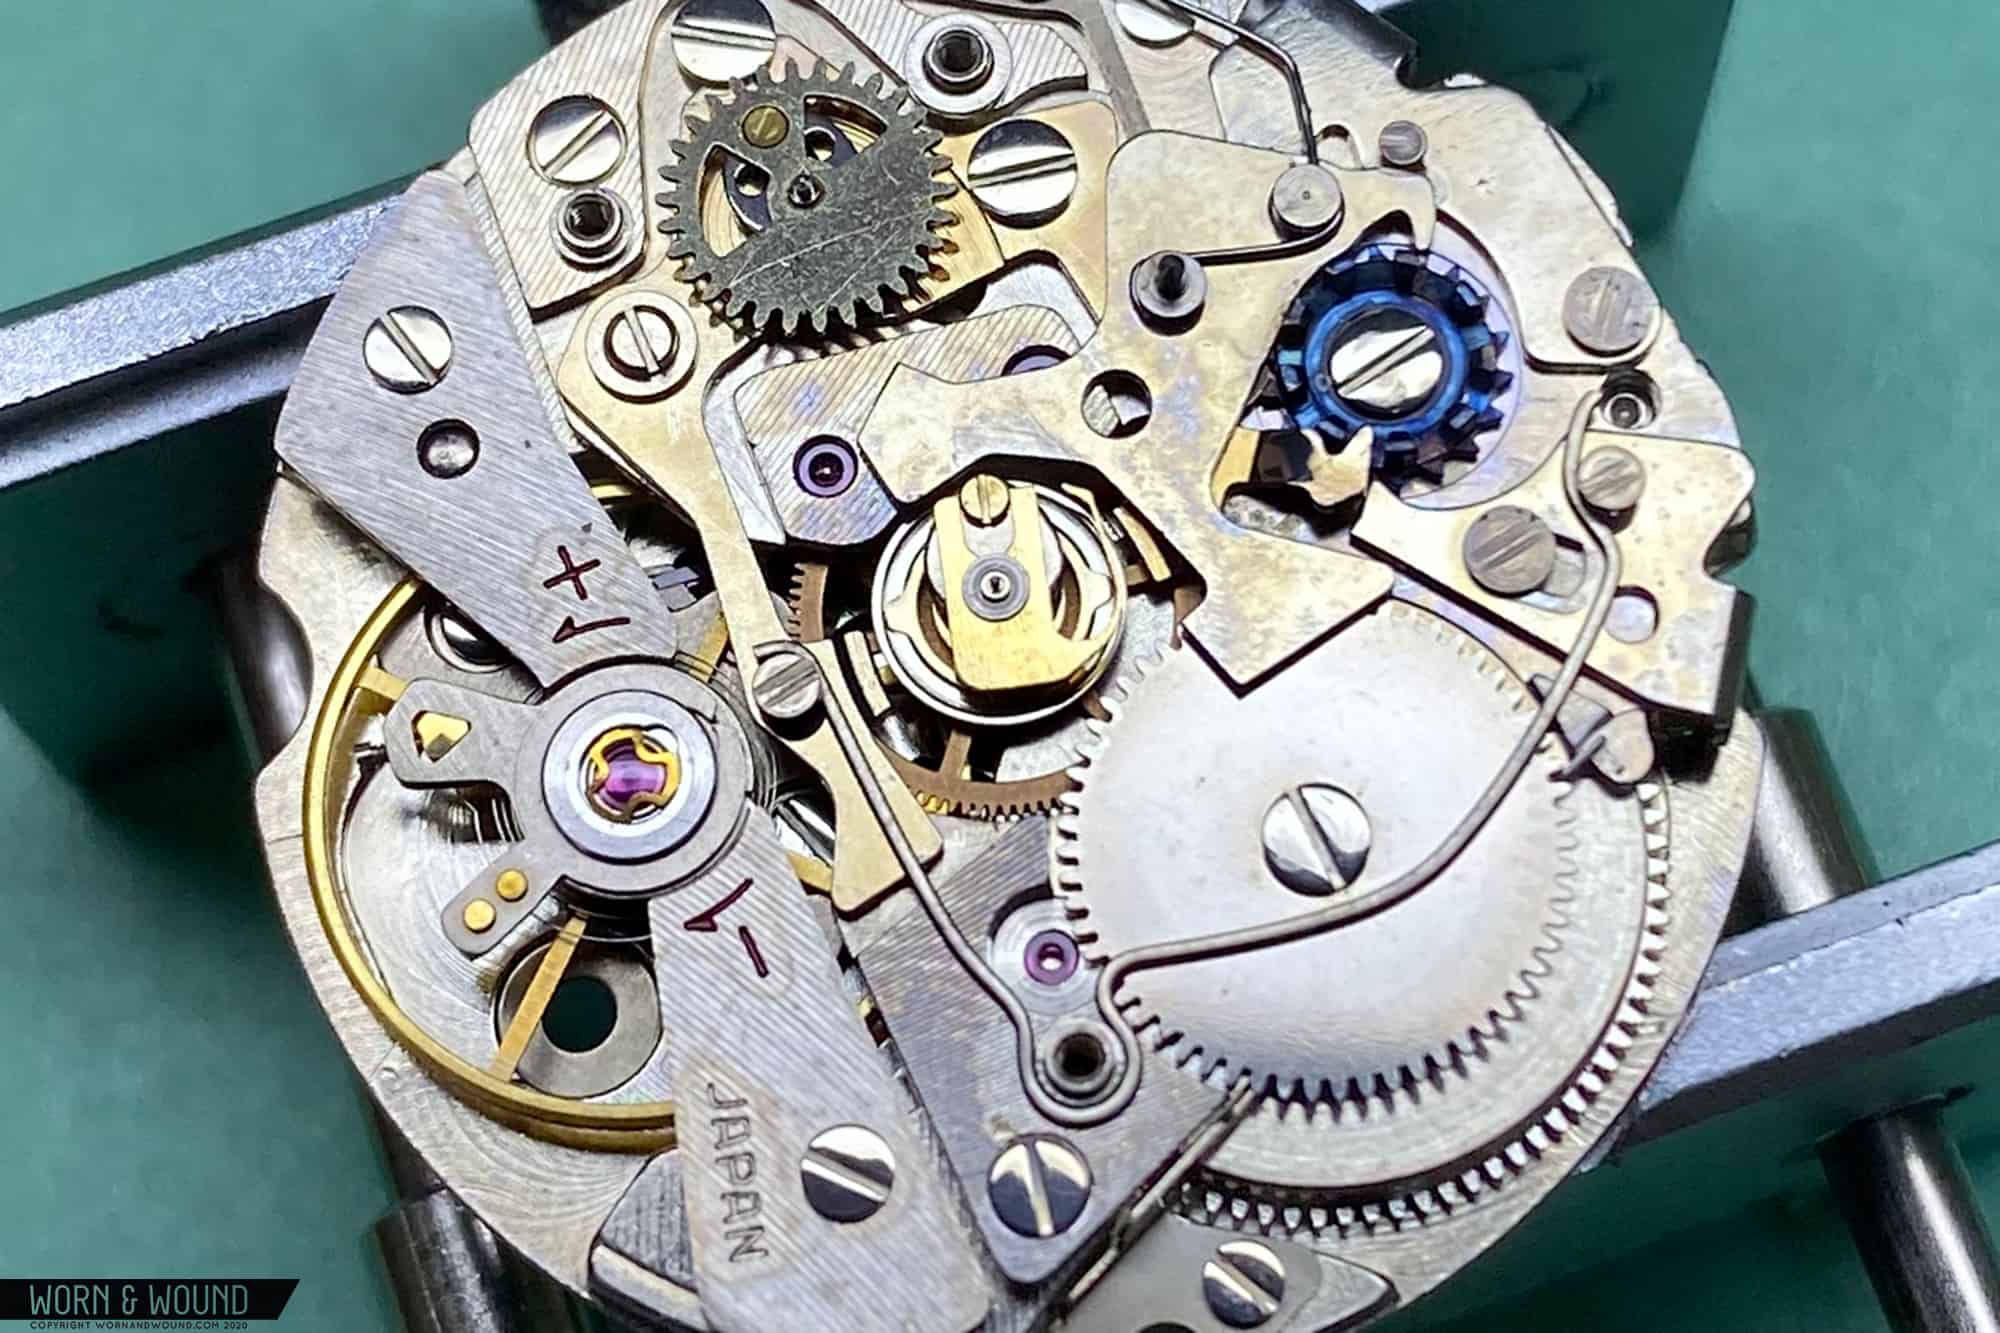
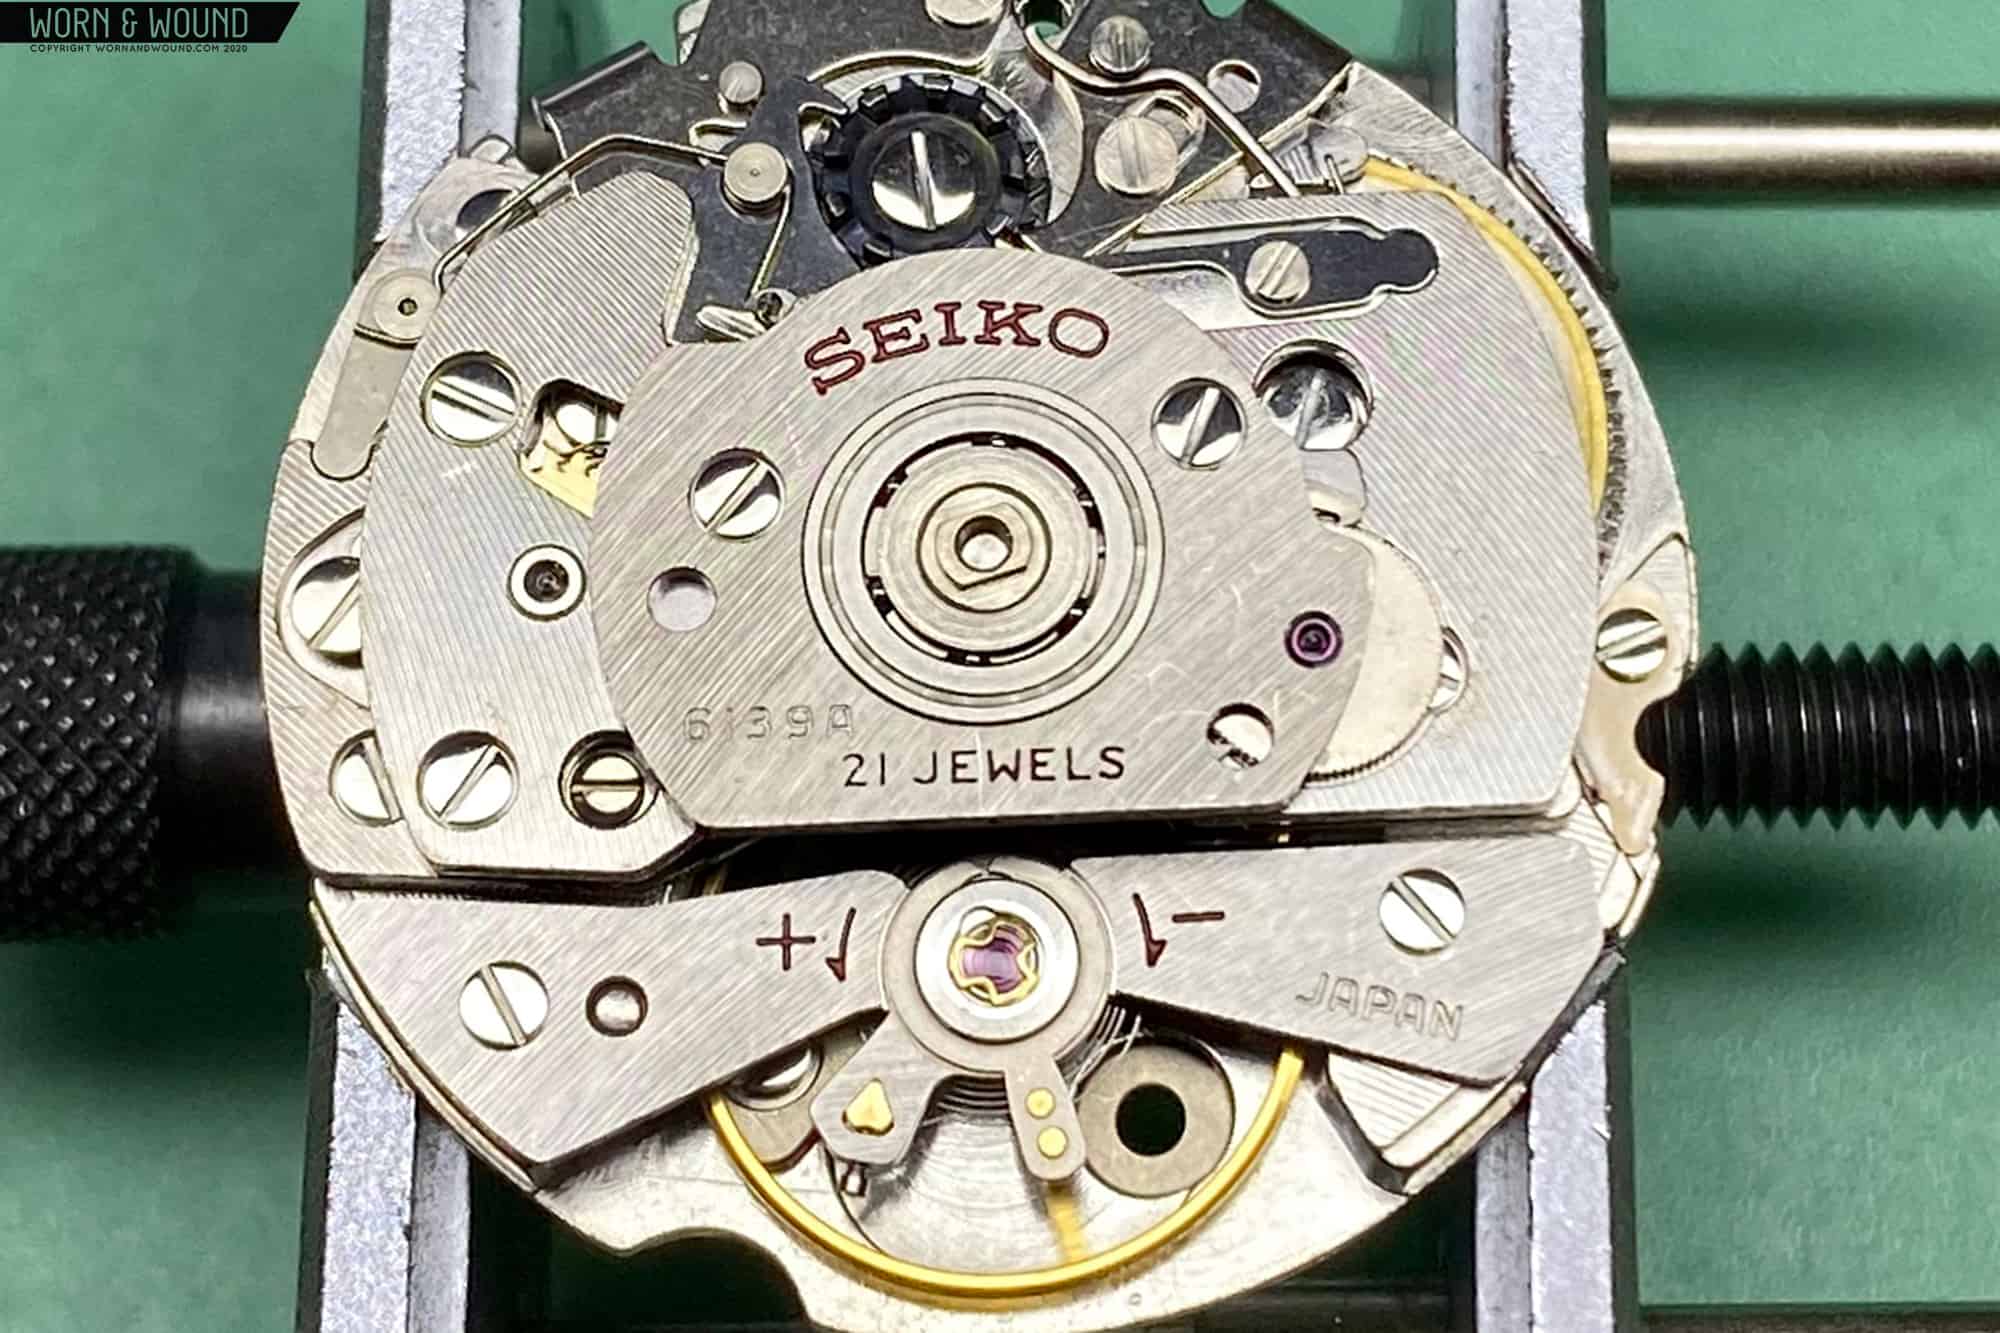
As I stated at the outset, this movement is the 21-jewel variant, and it also features a blued column wheel (the wheel used to engage and disengage the chronograph, and generally only found on higher-end chronograph movements). You can see that column wheel below, top-right.

With most of the chronograph levers removed, we can start to see what sets this movement apart from the 17-jewel variant. The third wheel, which sits next to the escape wheel, is jeweled on the train bridge (see below), but it isn’t on the 17-jewel variant. We can also see a big, fat fingerprint, an unfortunate souvenir from some previous “watchmaker.”

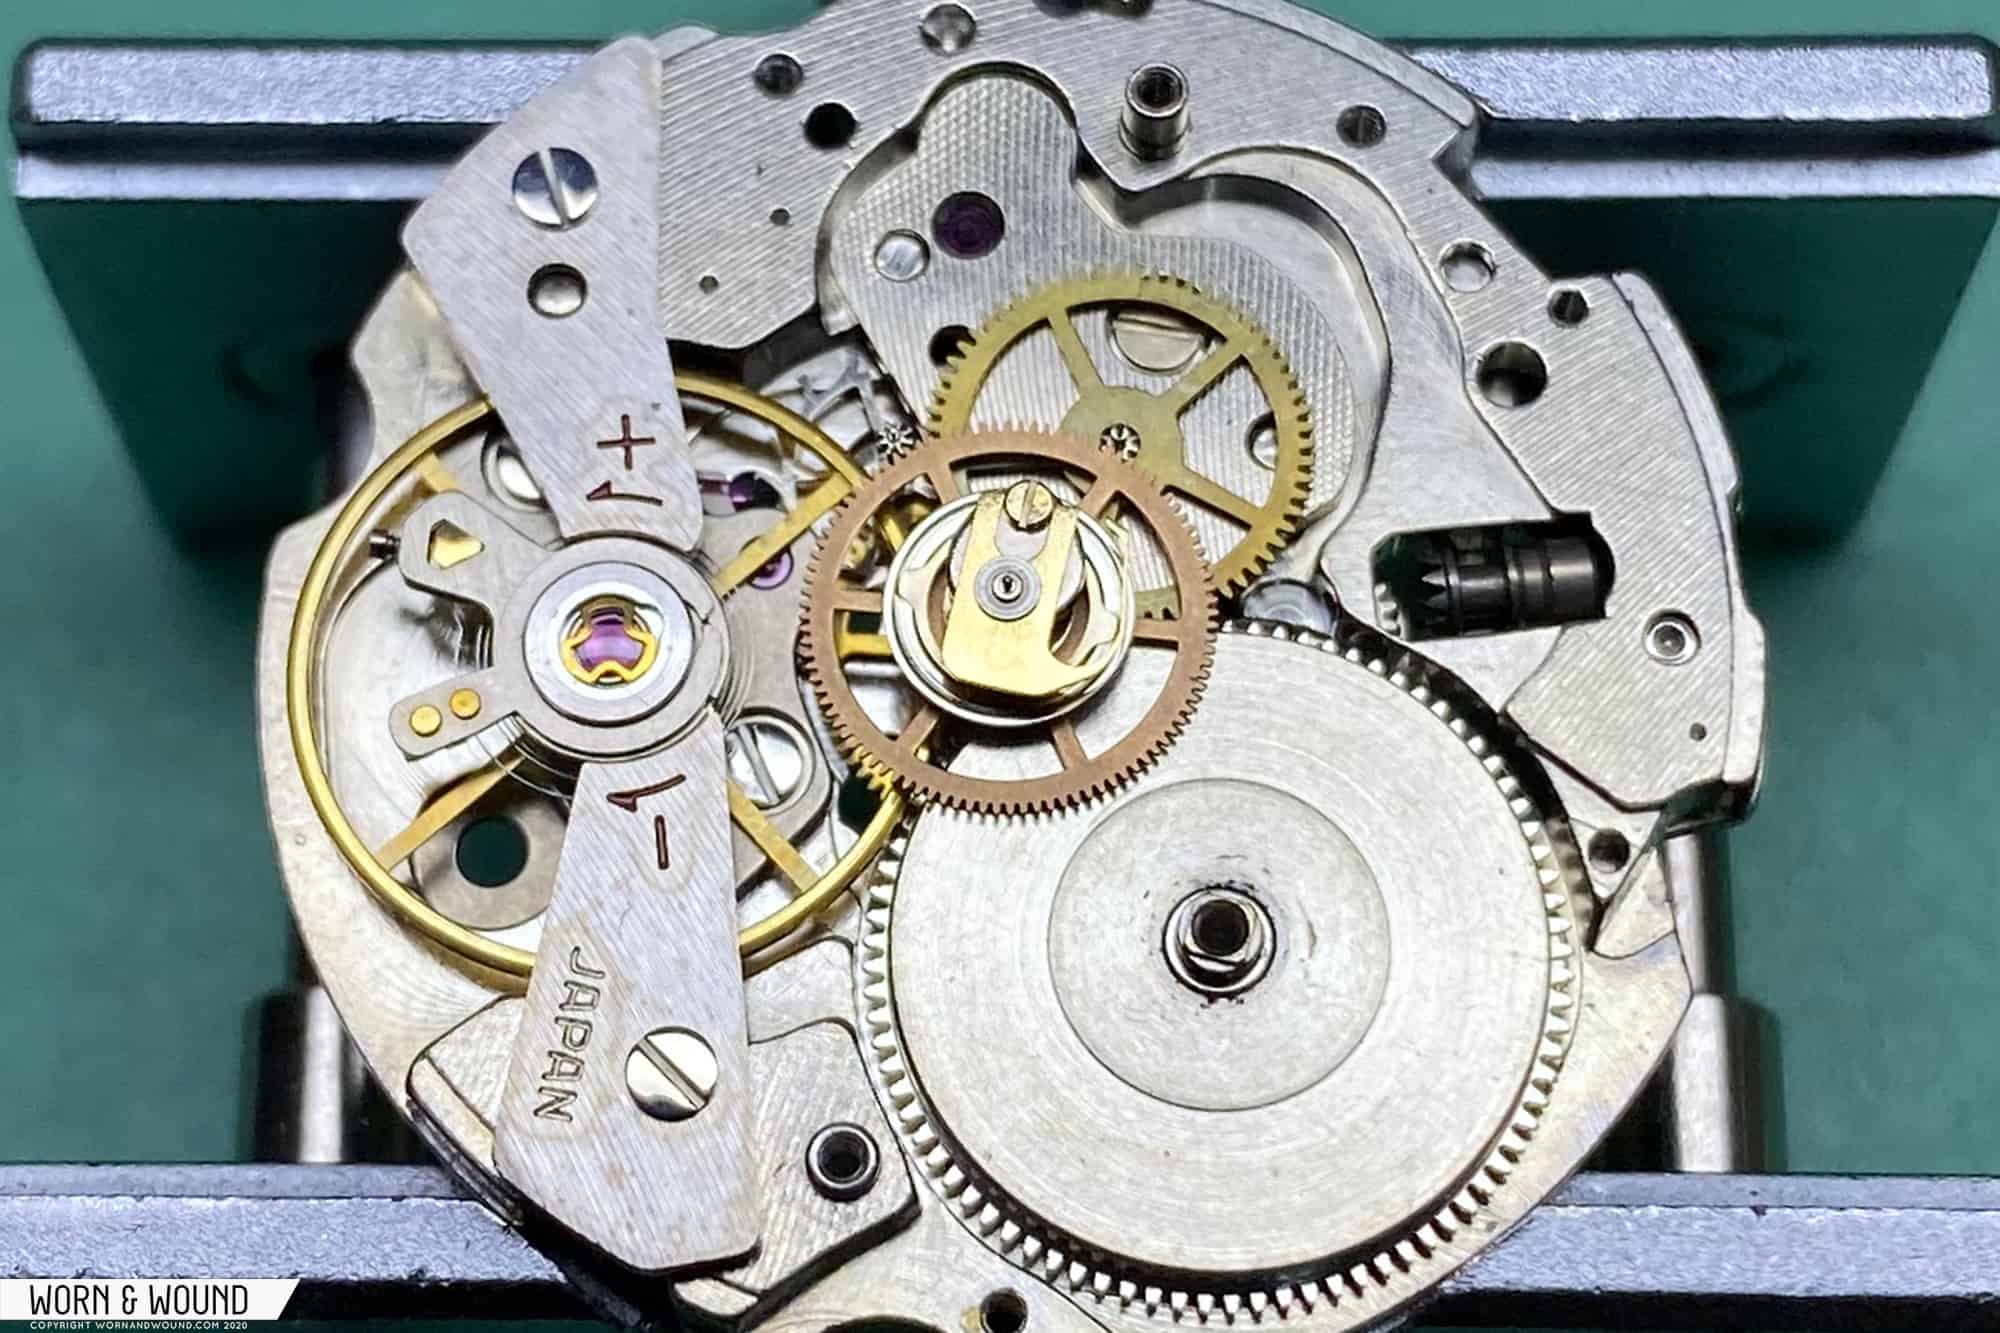
With the gear train bridge removed, we are left with the train wheels and central chronograph runner sitting in the movement.

Below, you can see the dirt and build-up of old oil, which is visible on the jewels and surround the bearing for the barrel arbor.

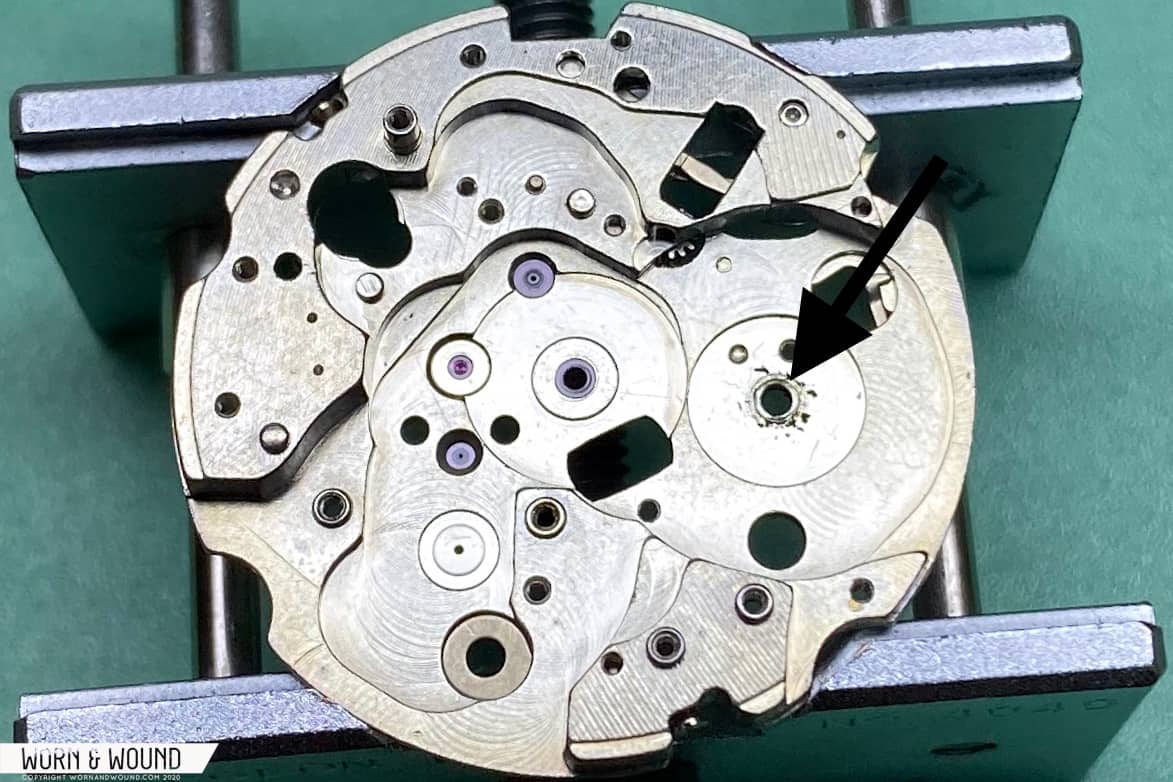
One of the typical wear points on a 6139 caliber can be found on the barrel arbor bearings on the mainplate and the train wheel bridge.

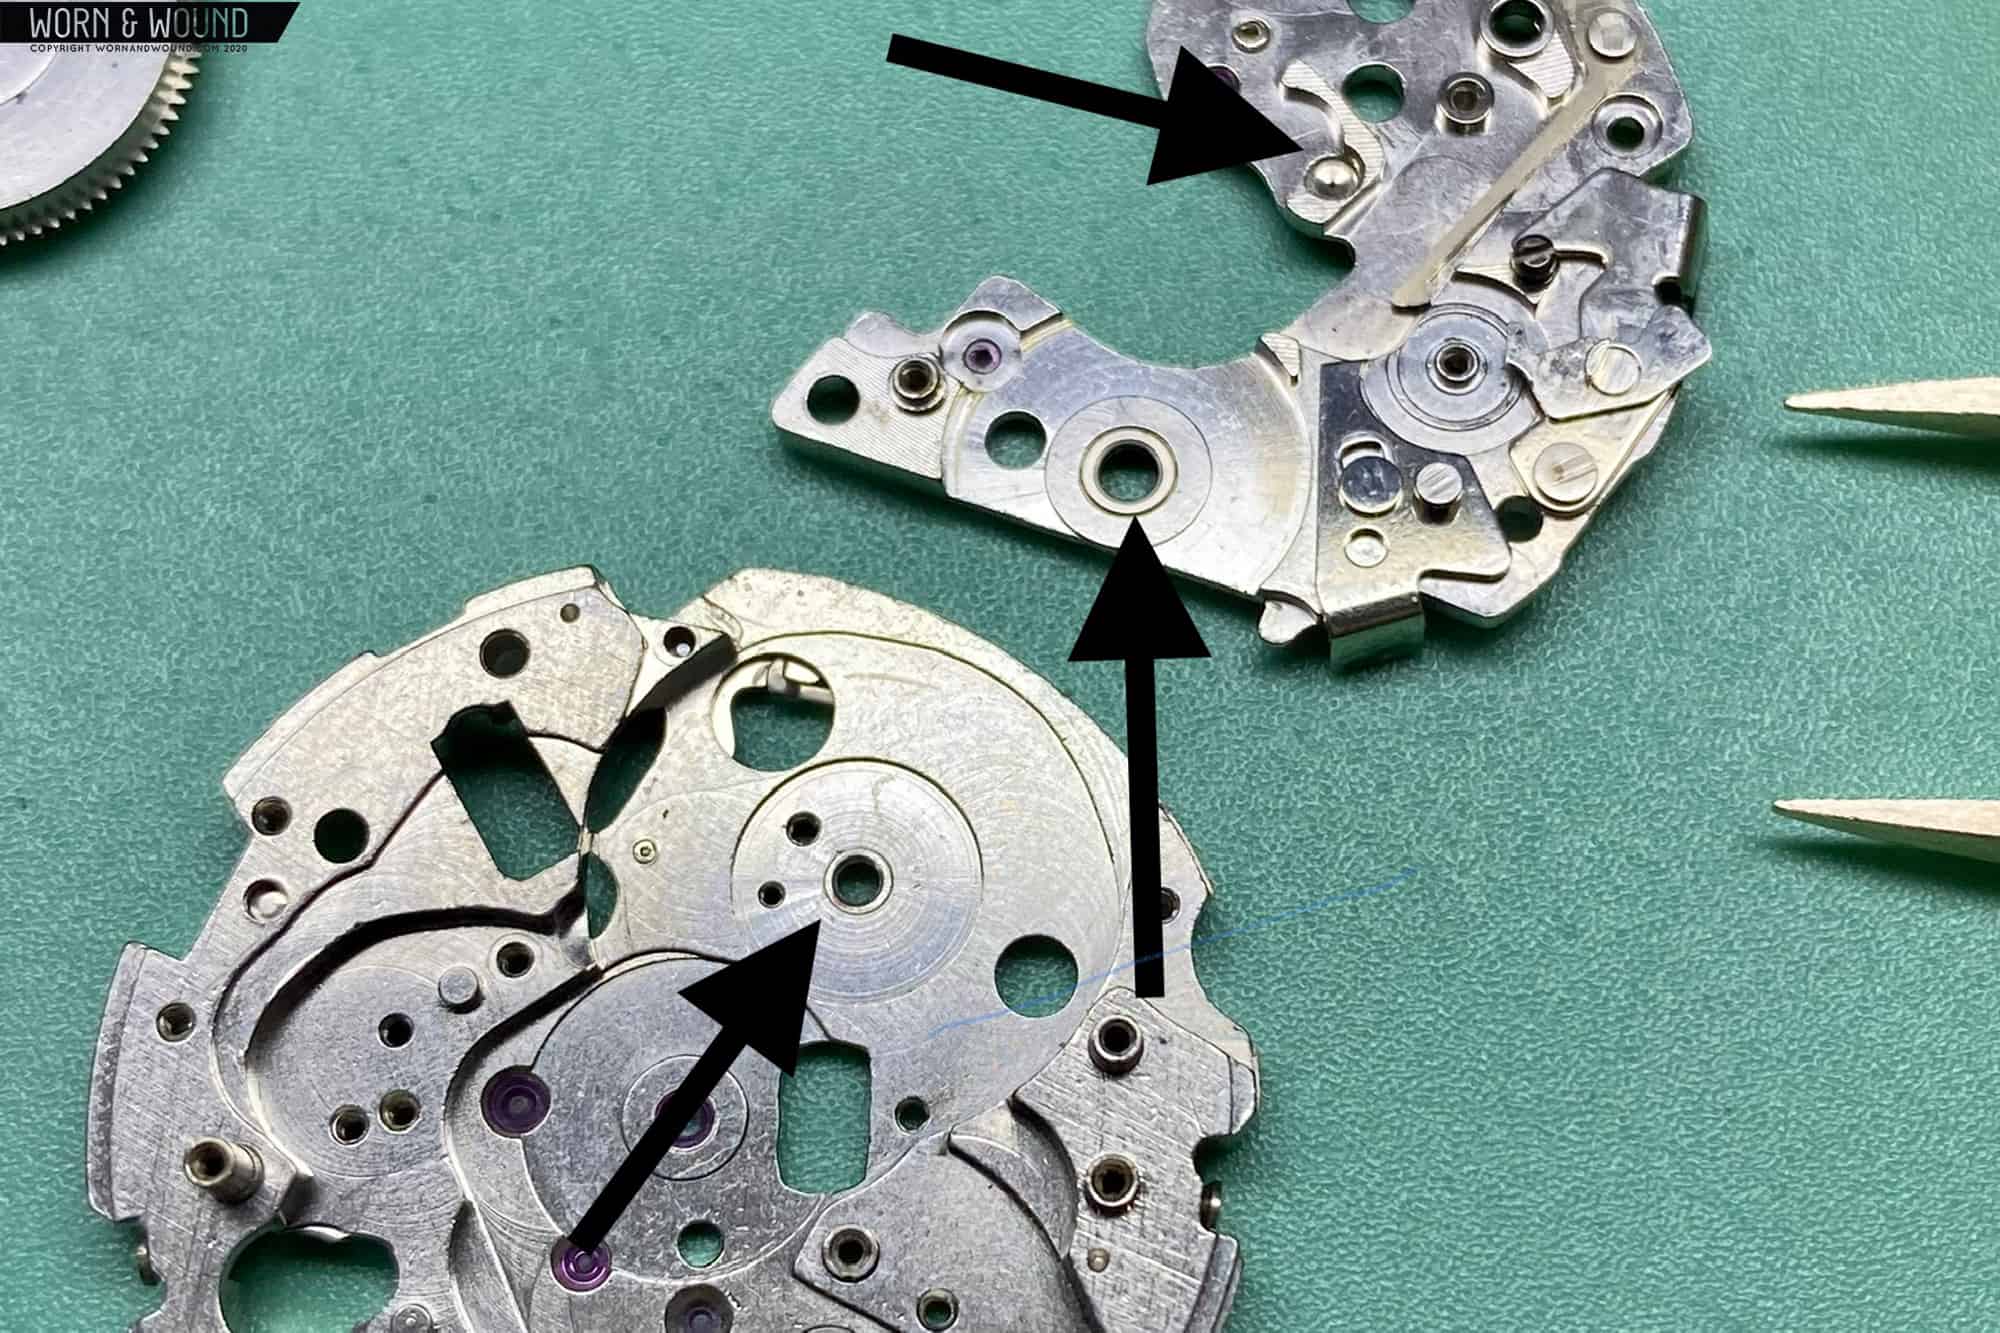
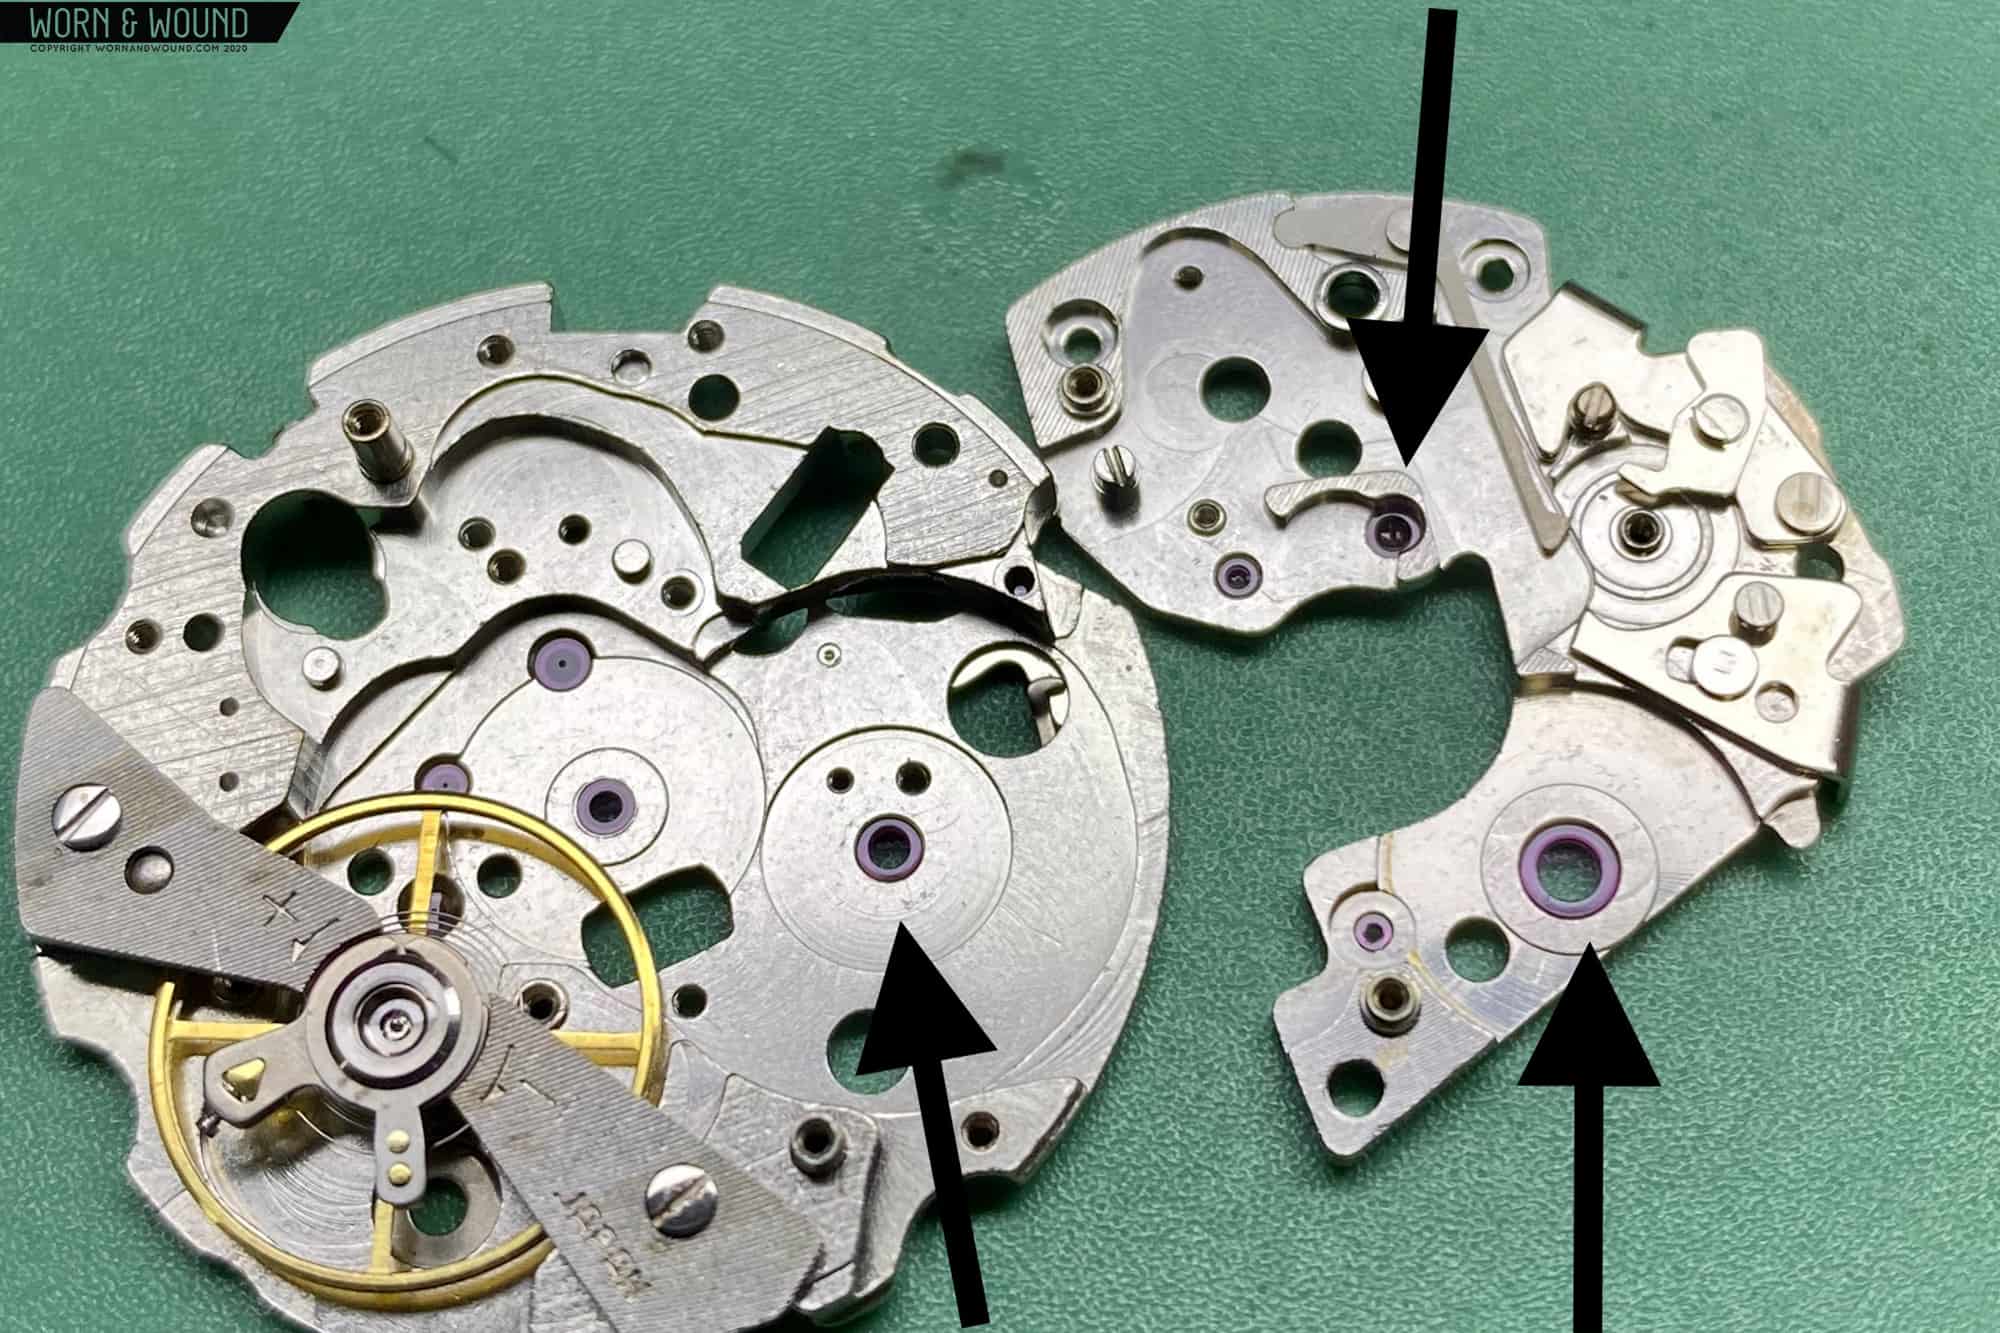
Over time, the barrel arbor wears away at the plates and turns the once-round hole into an oval. This causes the barrel to hit the mainplate or train bridge, and sometimes it can come into contact with the center wheel. This wreaks havoc with the timekeeping and amplitude and is an issue that must be rectified. Unfortunately, more common than not, it is left to worsen over time and blamed on the watch just being old. To remedy this situation, the movement can be upgraded from a 21-jewel to a 23-jewel movement (not something actually offered by Seiko). This actual movement didn’t require the upgrade, as the bearings were in good shape and not worn, but it is something to note as it is a common wear point and needs changing more often than not. The below image shows what the jewel upgrade for the barrel would look like.

Once the movement has been completely dismantled and checked for wear, it can be put through the cleaning machine. Now we are ready to begin reassembling the caliber.

Putting It All Back Together

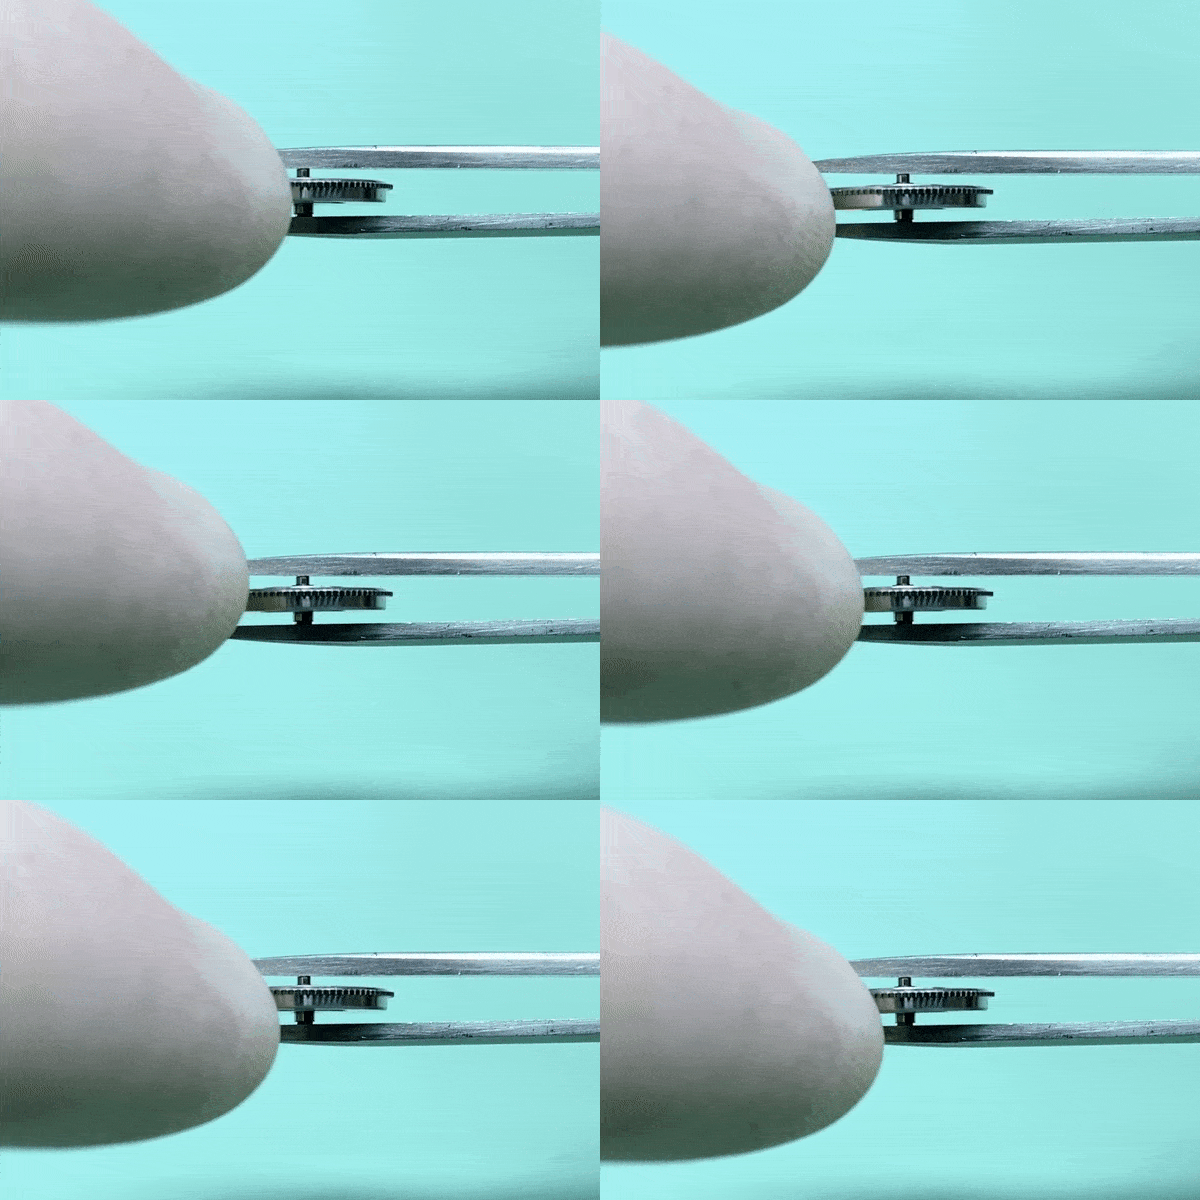
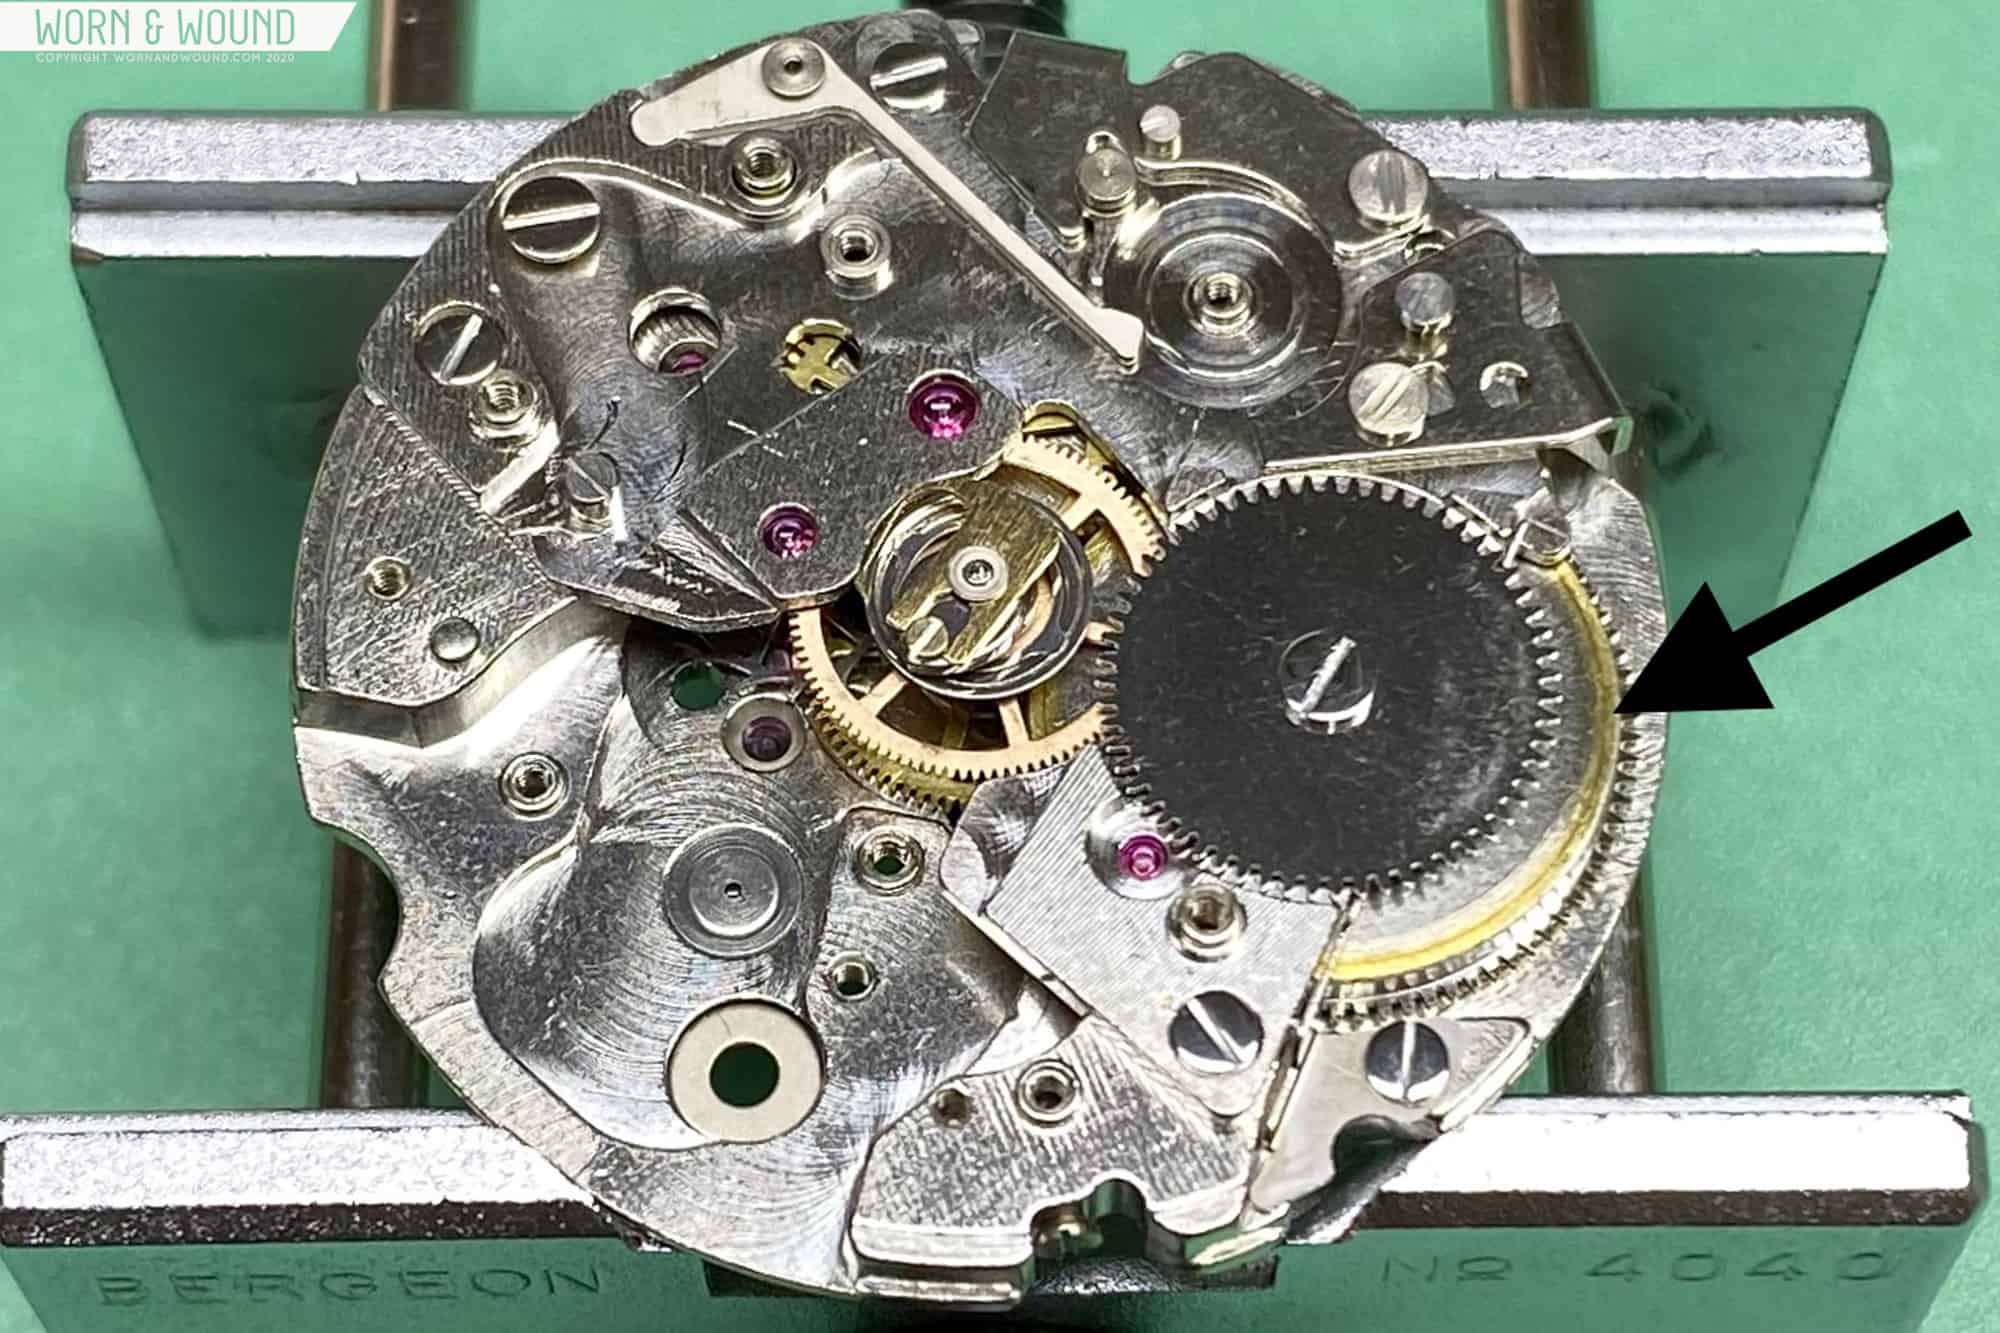
One of the first things we need to check before assembling the movement is the barrel itself. Over time the softer brass of the barrel is worn away by the steel arbor that rotates within the barrel as the mainspring winds and unwinds with  tremendous force.

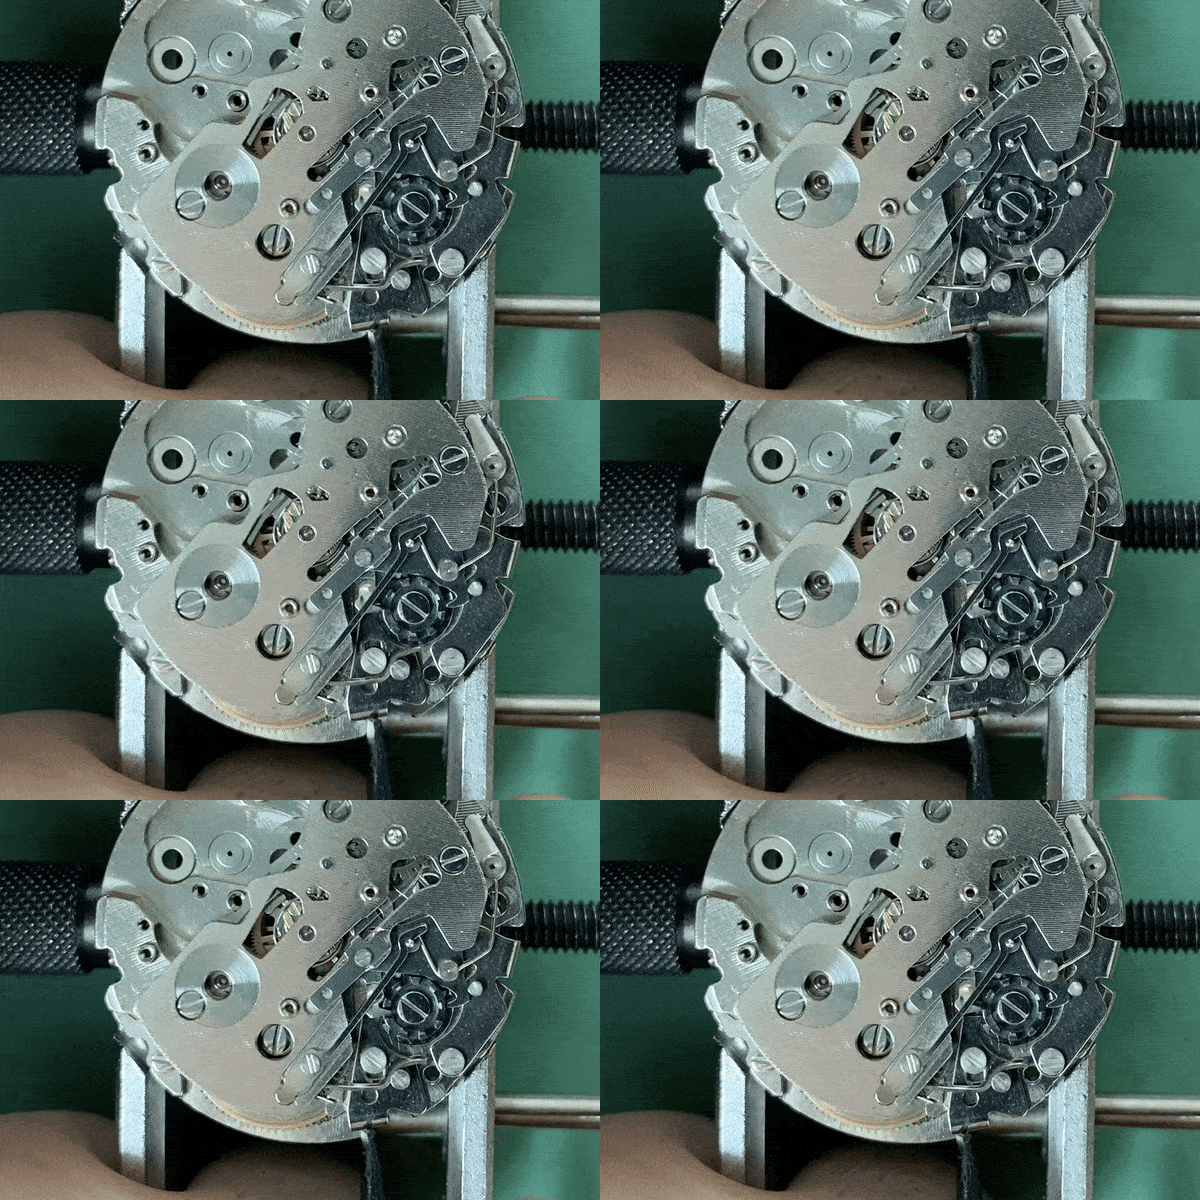
The below gif shows an unacceptable amount of play in a barrel.

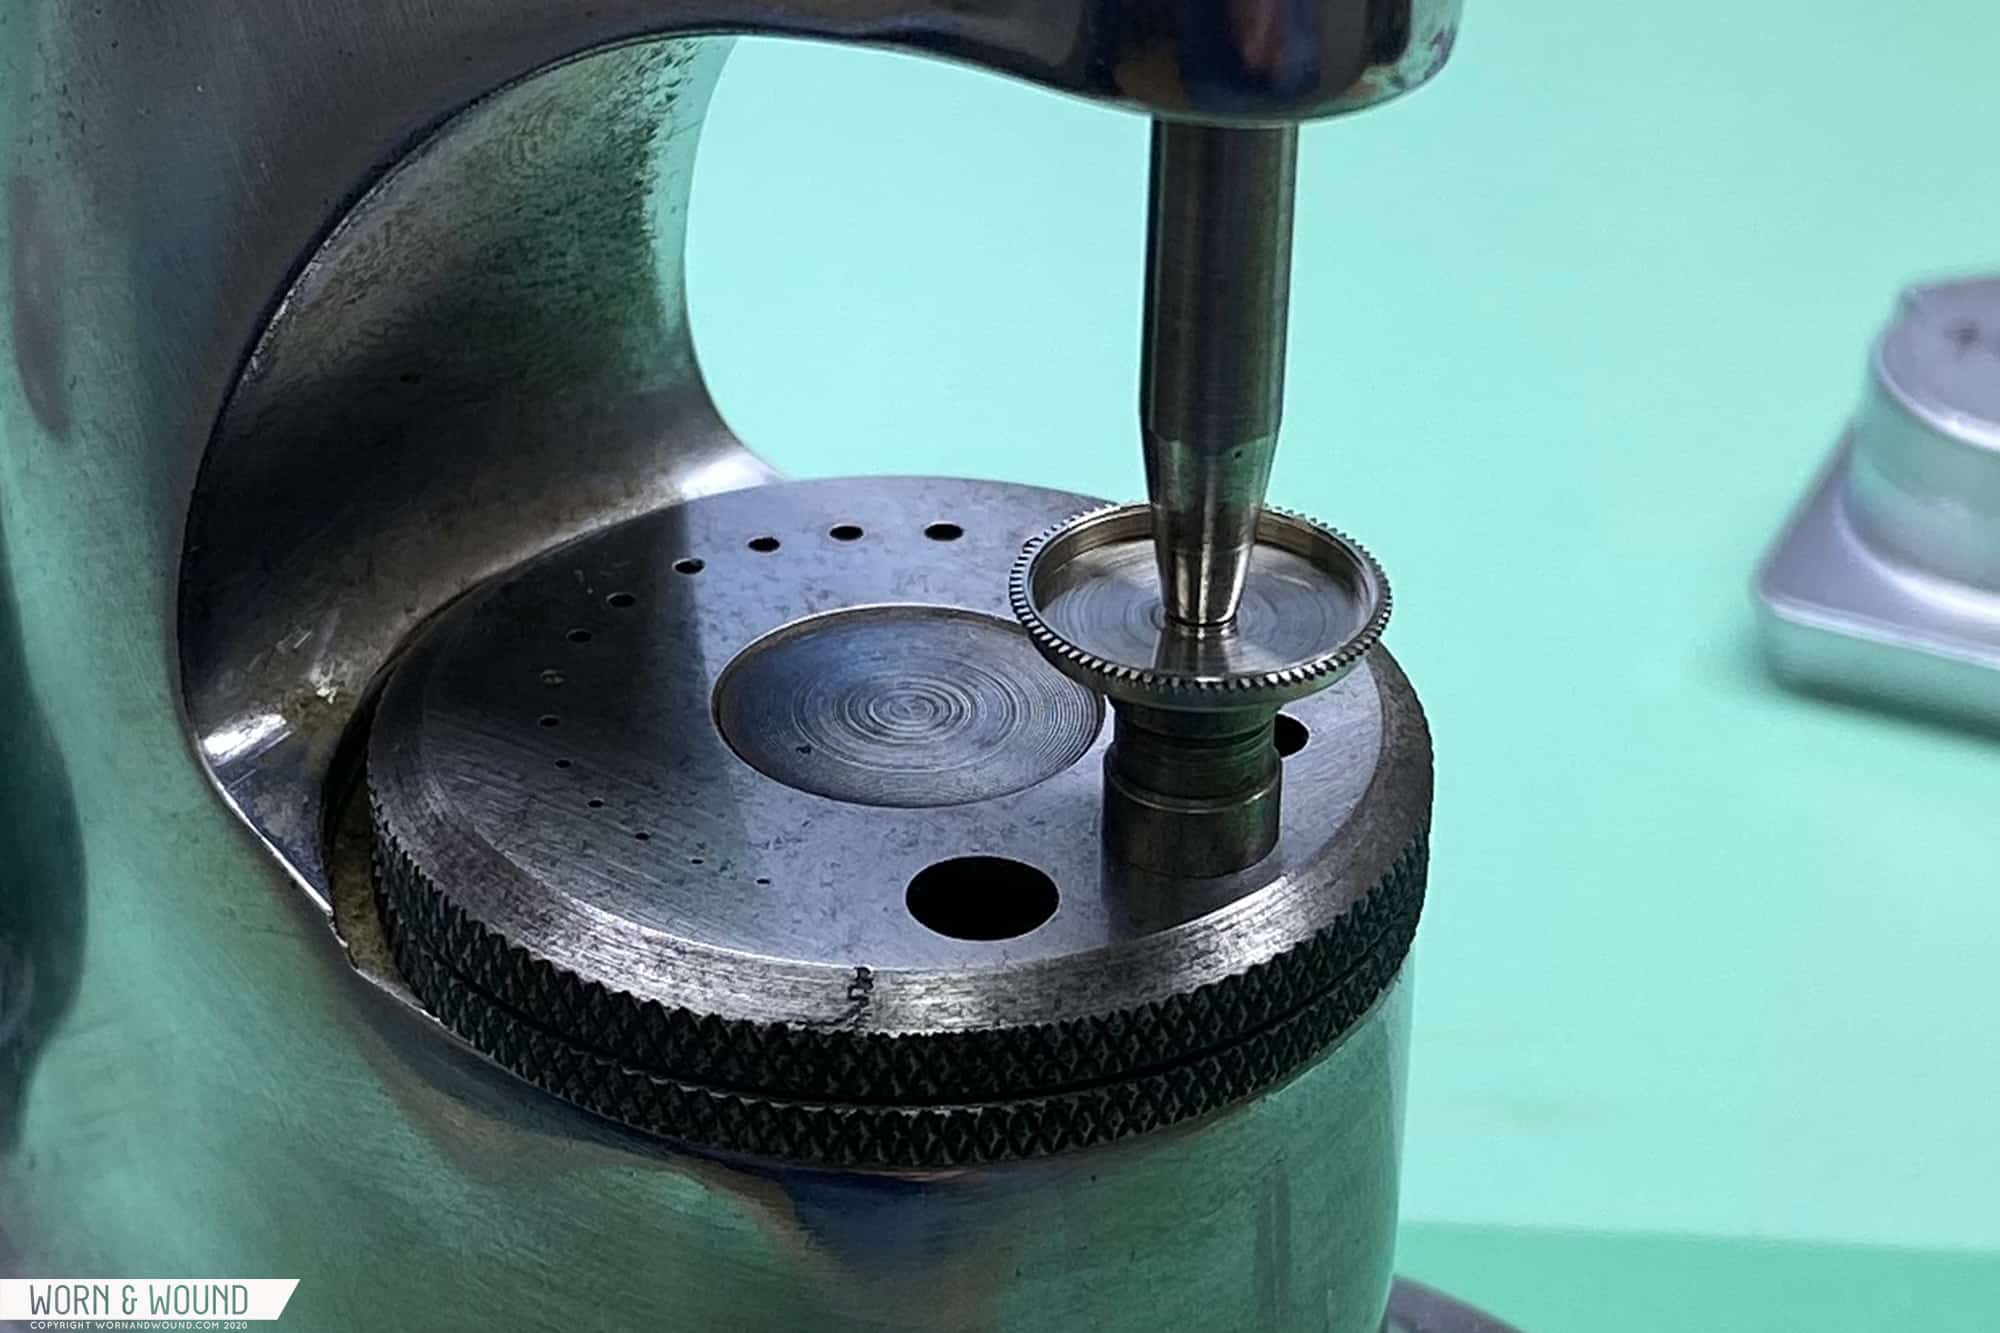
To remove this play, the barrel is generally punched in the manner you see below.

After this repair is done, the result, as demonstrated in the below gif, is an acceptable level of play. However, this isn’t always possible.

In this particular case, the barrel had to be swapped out due to an unacceptable amount of wear that couldn’t be rectified via the above method.

Now, with the gear train and barrel in place, we add the chronograph components. You can see in the below image the wear on the barrel I mentioned above. The barrel had to be swapped with a repaired version from another movement. Look at the brass ring on the outside to see where it rubbed on the train bridge.

The rest of the levers, wheels, and springs are added before the top plate is installed. Here you can see the chronograph levers situated so that the chronograph can begin running. Check out the column wheel in action below.

With the top plate installed, the pallets and balance are put into place.

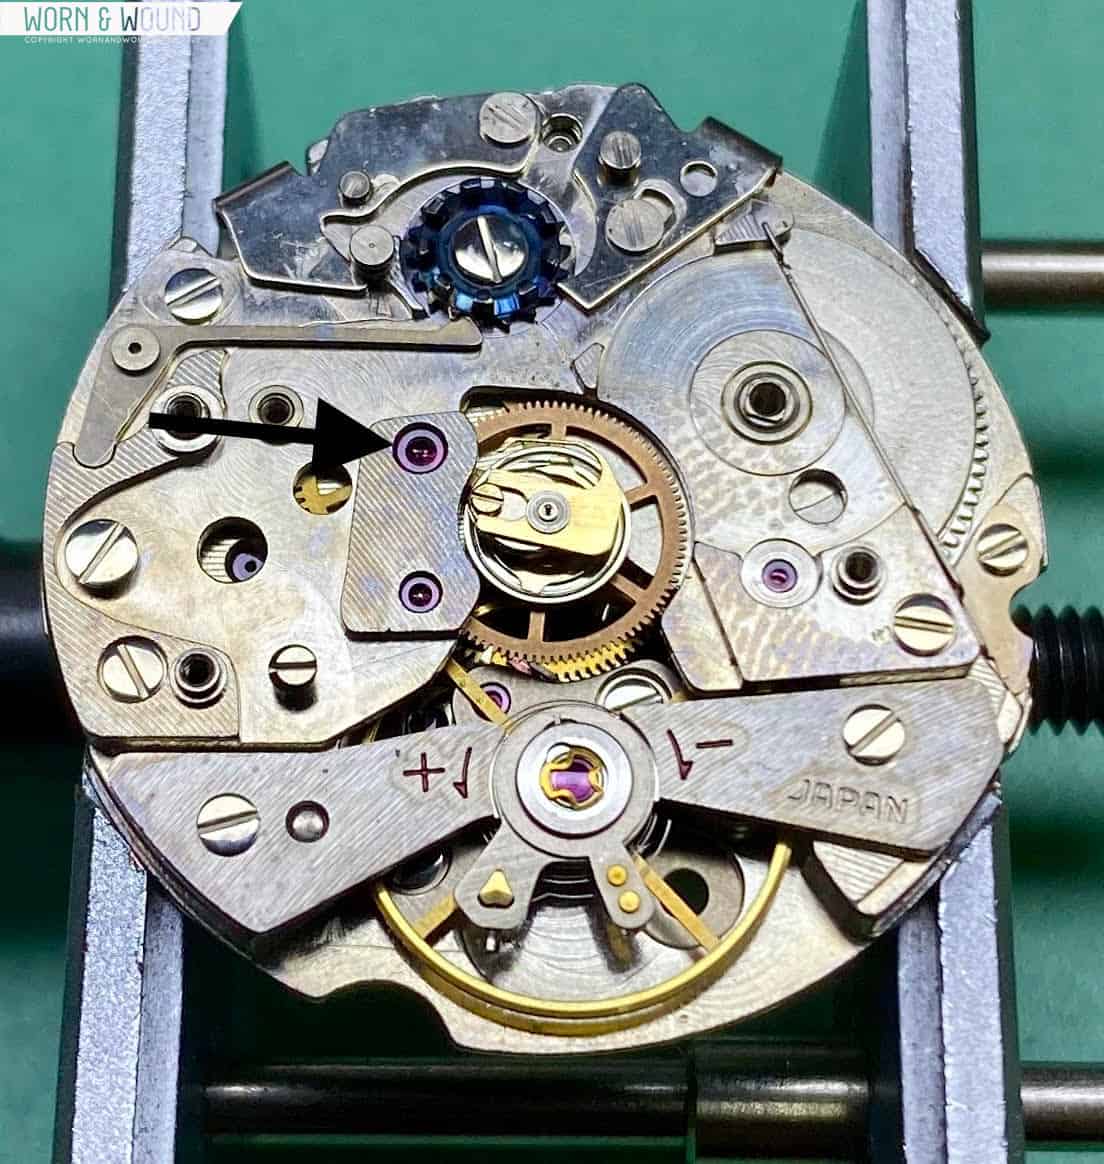
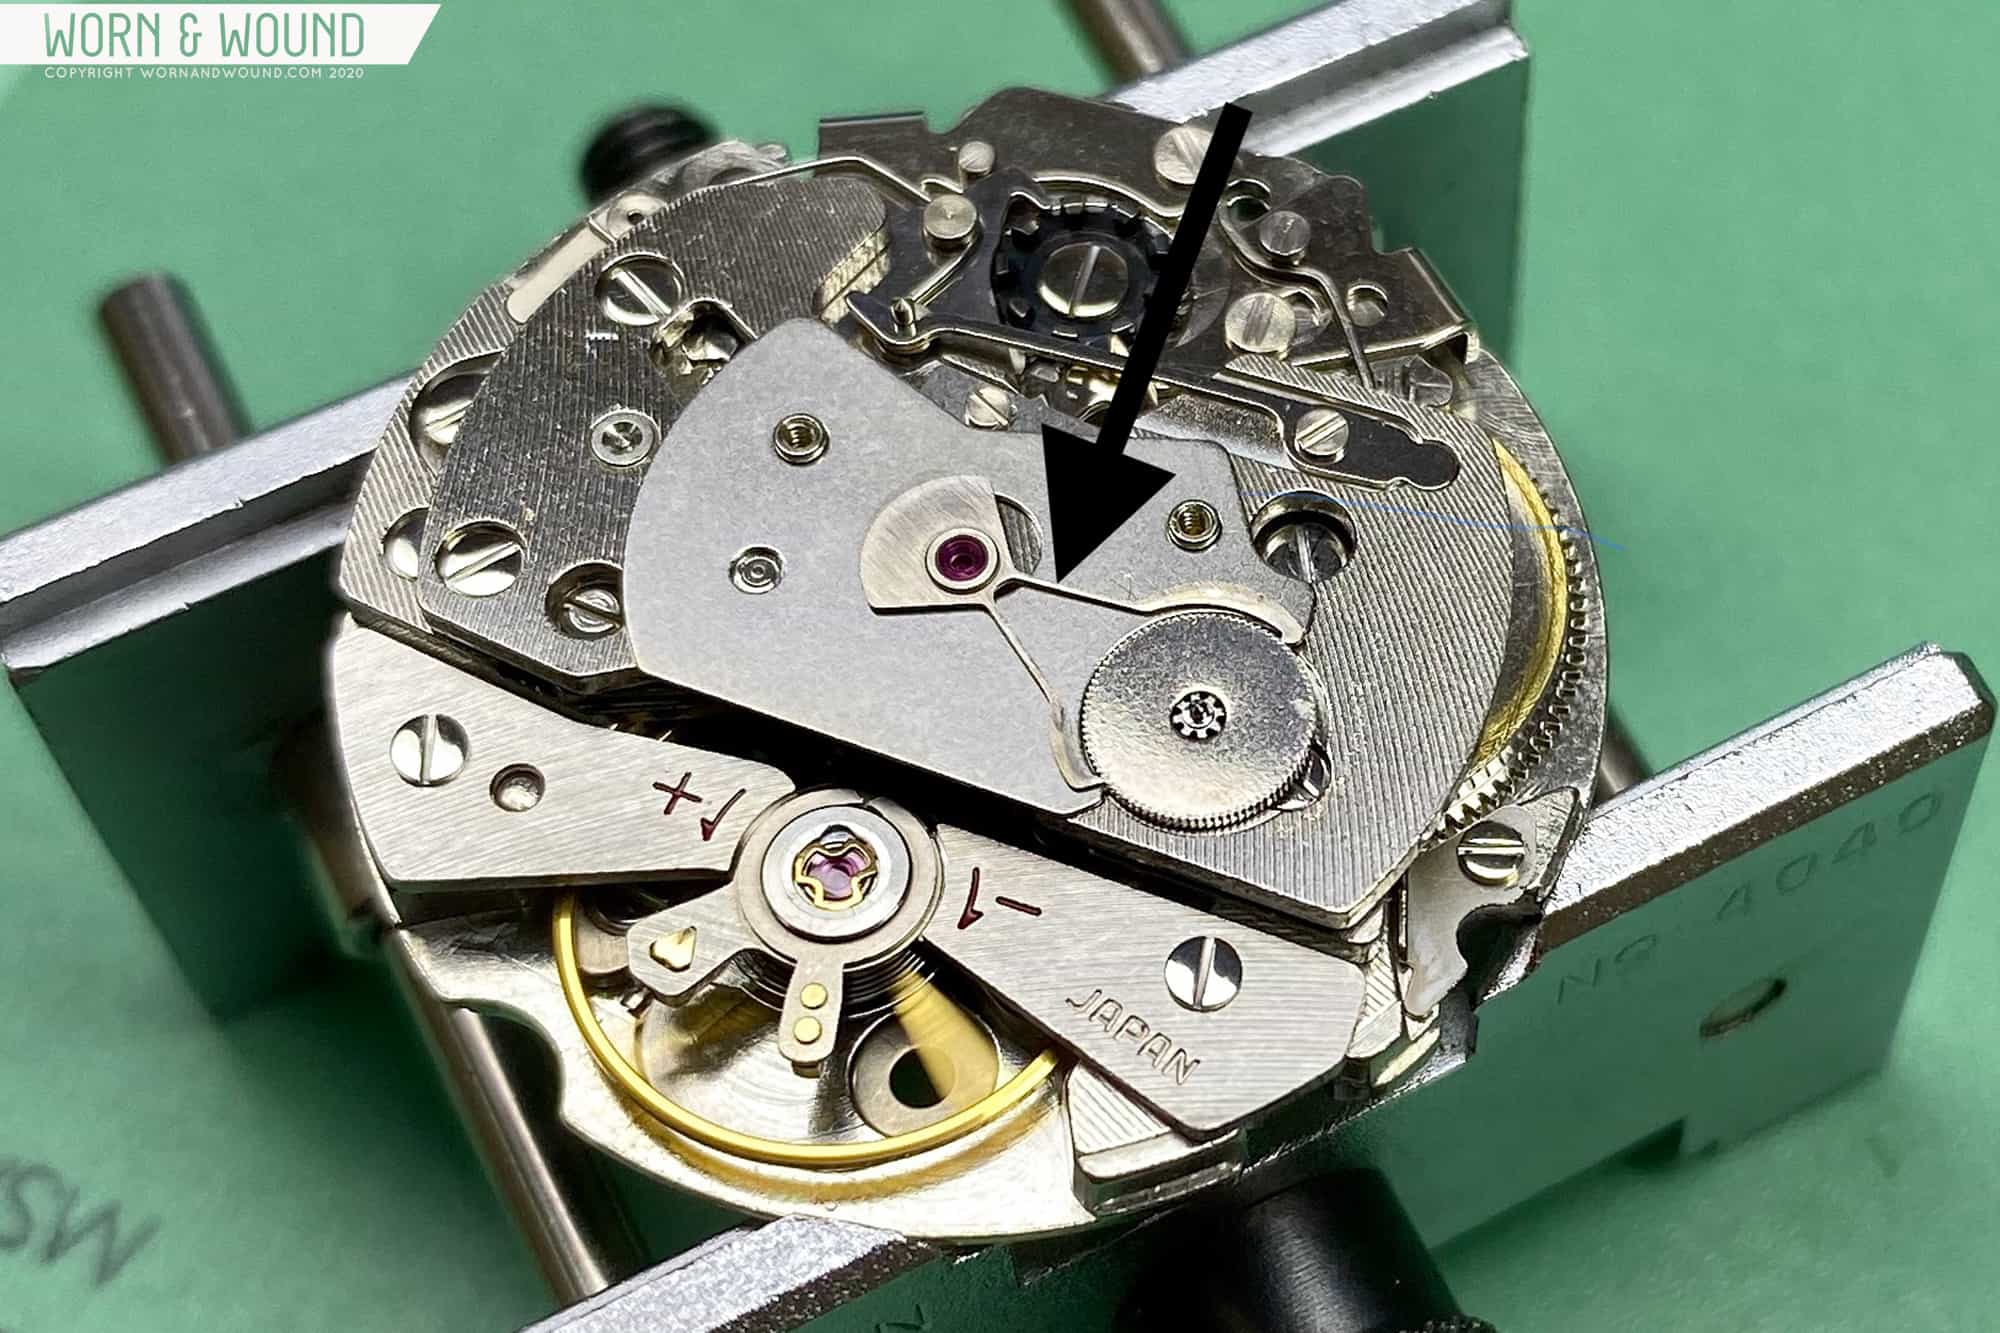
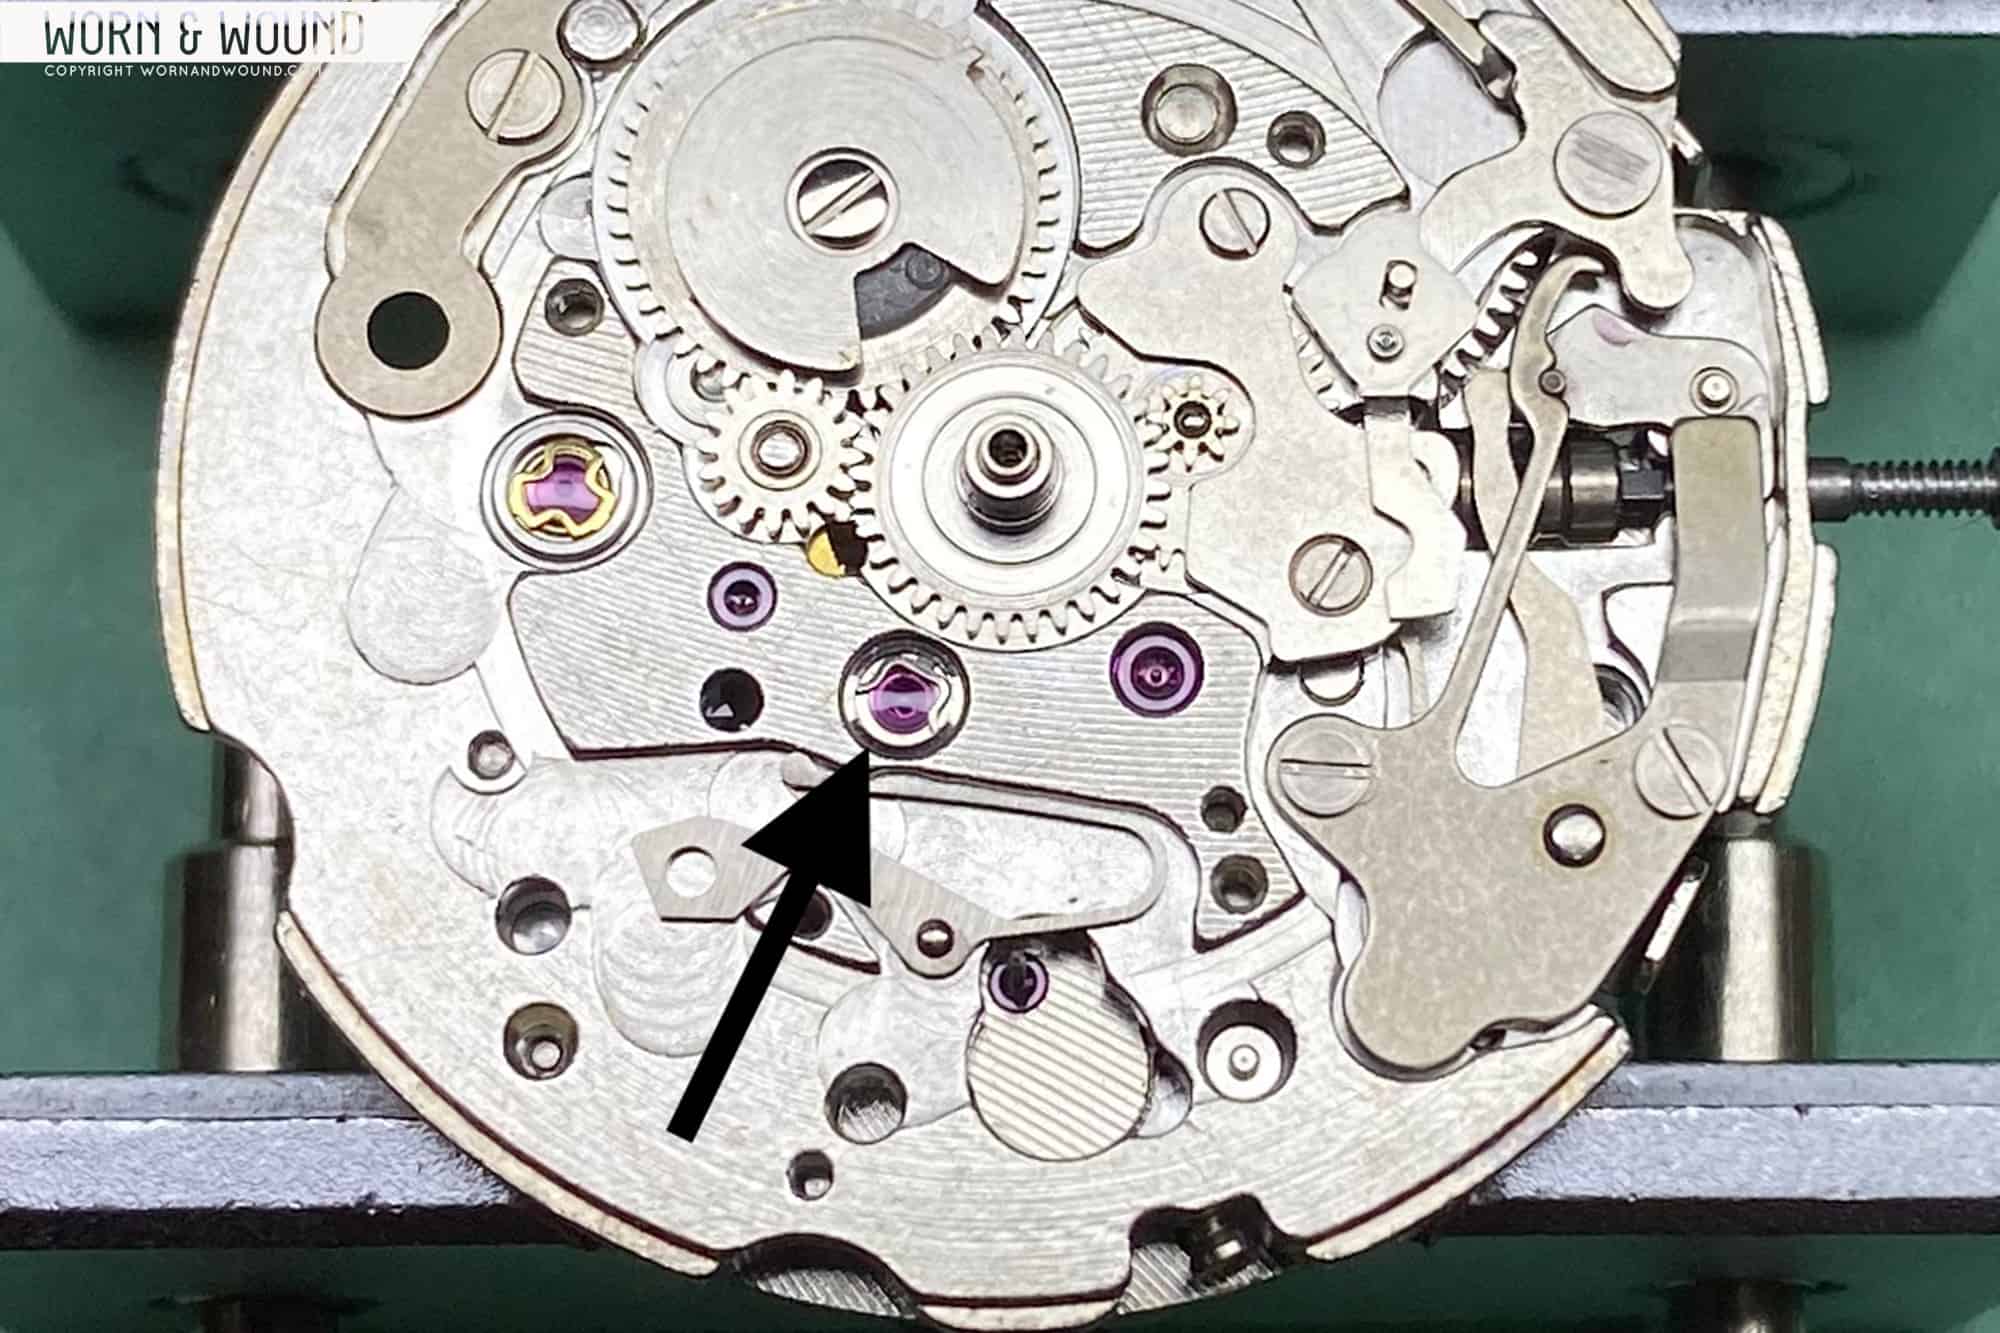
Now that the gear train and the chronograph components are in their place, we can install Seiko’s “magic lever,” which is indicated by the arrow in the below photograph. The magic lever consists of a jeweled hole and two arms that have the ability to “grab” the wheel that sits next to the ratchet wheel. As the lever gyrates back and forth, it pulls the wheel forward one tooth at a time, which winds it. The upper plate that sits on top to keep the lever in place has an offset pivot that engages with the jeweled hole of the lever. The oscillating weight is then mounted on top of that. As the oscillating weight spins, the offset pivot allows the lever to advance the wheel forward. That wheel then engages with the ratchet wheel next to it, which is screwed directly onto the mainspring arbor. The result is a highly efficient winding system.

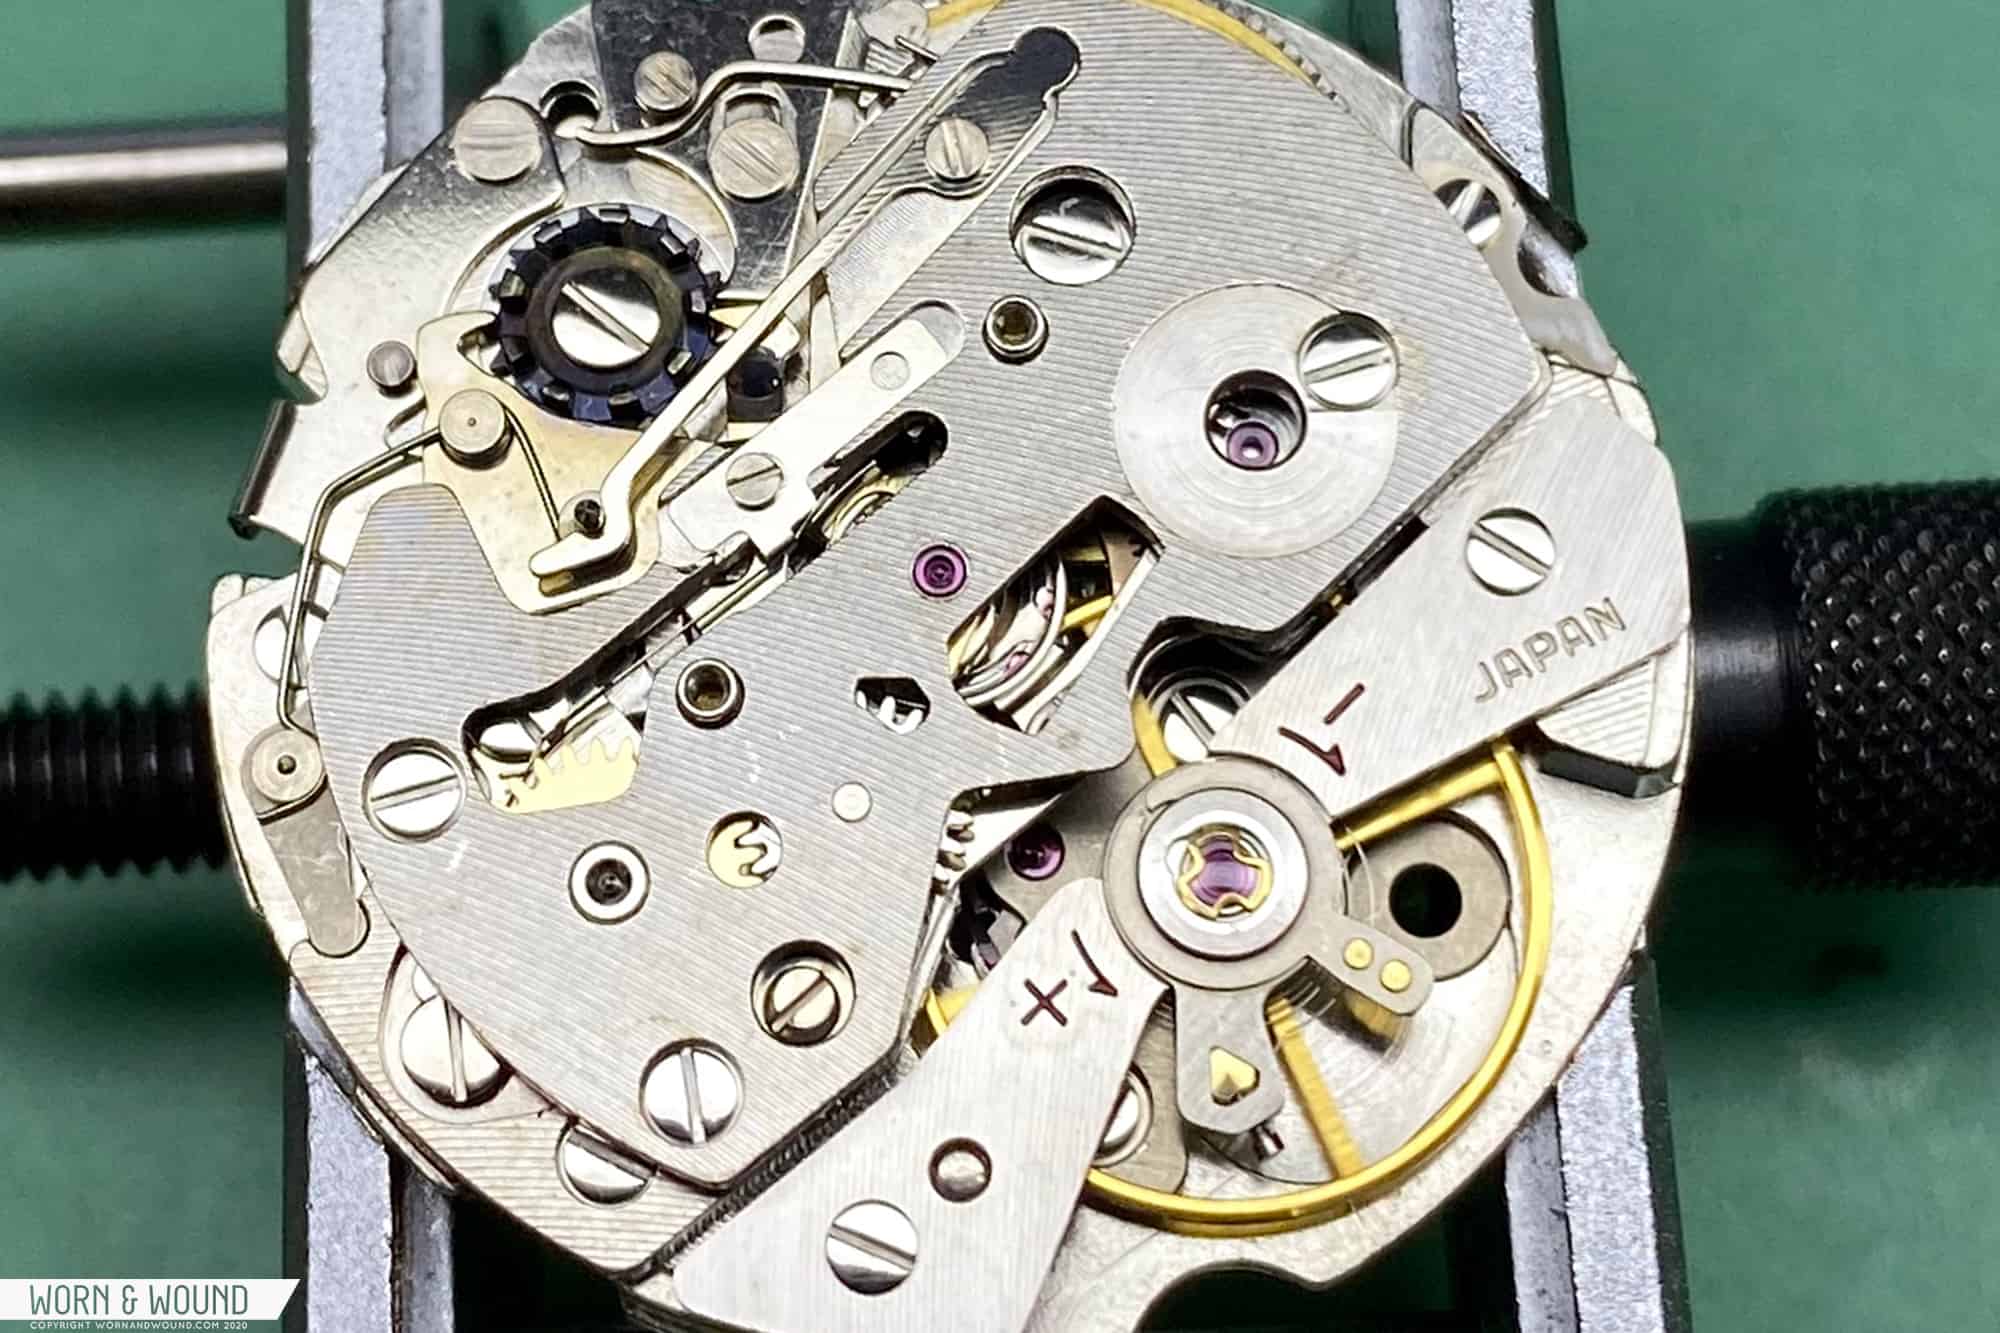
After the top plate is installed, the dial side is ready for assembly.

The cannon pinion and the rest of the hand setting work is installed. Here you can also see another difference between a 21-jewel and 17-jewel movement. The jewel for the escape wheel is actually two pieces (see arrow in the image below), featuring a cap jewel and a shock protection spring. This extra spring helps to protect the delicate pivots of the escape wheel if the watch recives a knock. The more delicate and smaller the pivot, the greater the risk of breaking. It also helps to reduce friction, as the surface contact area of the pivot on the jewel is reduced.

The rest of the calendar and hand setting work is added to the movement. Then the dial and hands are carefully installed so as not to damage or mark the components.

Before the movement is ready to be cased, the correct pusher and crown gaskets are installed. No shortcuts here.

The watch is then cased and ready for testing.

As you can see from the breakdown, these vintage Seiko chronographs are incredibly well made for the money. There is a lot of talk comparing them to high-end Swiss movements, but to me that’s just comparing apples and oranges. Vintage Seiko’s were built with a purpose in mind, and that was functionality, and they really stand on their own and dont need to be compared to anything for validation. One thing is for certain, though — for the money you’re likely to pay for one of these, a better mechanical chronograph doesn’t exist.

For information on Ashton Tracy’s services, be sure to be visit www.theseikologist.com 

The post Watchmaker’s Bench: Breaking Down a Seiko 6139 Chronograph appeared first on Worn & Wound.