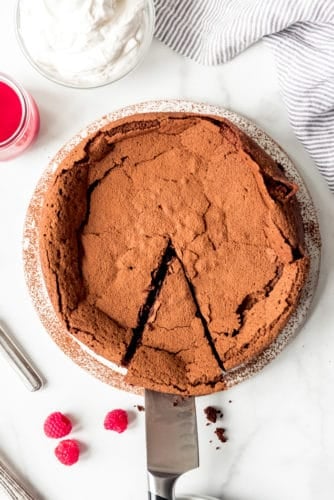
This decadent, rich Chocolate Torte is an easy, elegant dessert to serve to your friends and family to make them believe you are a gourmet cook! Each bite is a luxurious experience for the most dedicated chocolate lovers!
If you love chocolate desserts like we do, be sure to try these Moist Chocolate Cupcakes, Death by Chocolate Cheesecake, or Chocolate Meringue Cookies!

Chocolate Torte
We are obsessed with this classic chocolate torte that manages to be both elegant and rustic at the same time. Maybe it’s the dense, almost fudgy interior of or the crackly, delicate top that is dusted with cocoa powder, but there is just something about this dessert that defies all my ability to resist temptation.
If you really want to dress it up for a special occasion, you can serve it with a simple raspberry coulis drizzled on top or around the plate to make it extra fancy. Or just a dollop of barely sweetened whipped cream is perfect to offset the rich sweetness of this chocolate torte.
This chocolate torte is perfect for Valentine’s Day or a fancy dinner party when you want something to impress without needing to work too hard.

How to Make a Chocolate Torte:
- Preheat the oven to 350 degrees F and prep a 9-inch springform pan by buttering it and dusting with cocoa powder. This will help the chocolate torte release more easily when it is done baking, without leaving an unsightly flour residue.
- Melt chocolate and butter together until smooth. This can be done in a double boiler or the microwave using 30 second bursts of heat and stirring between each interval.
- Beat the eggs and sugar together using an electric mixer for 6 minutes until pale and light. It’s important to beat them until the color starts to change because this is what actually leavens the chocolate torte. It also helps create the light, crackly surface on top.
- Gently combine the melted chocolate with the eggs and sugar. Be careful not to overmix because you don’t want to deflate the lightness of the eggs too much. It’s easiest to add the chocolate in two batches and stir by hand. Pour the batter into the prepared springform pan.
- Bake until just set. It takes 30-35 minutes for the chocolate torte to bake. Start checking around 30 minutes. The torte will be puffy and the center should just barely jiggle. The top of the torte should be matte instead of glossy. You can also test with a toothpick to see if it comes out with just a few crumbs attached.
- Cool completely. Leave the torte in the pan to cool for at least an hour, then run a sharp knife around the edge to be sure it is loose before detaching the rim of the springform pan. You can serve the chocolate torte at room temperature, or chill and serve it cold.
 What makes a torte a torte?
A torte is very similar to a cake, except that it is usually made with little to no flour and served unfrosted with just whipped cream, berries, or possibly a glaze as an accompaniment. Tortes are also generally shorter than cakes because they don’t have the same structure of flour to help them rise higher while baking like a cake.
I think of chocolate torte as being somewhere between the realm of cake meets brownie meets truffle cheesecake. It has elements of all three, but is really it’s own thing entirely.

How do I know when a torte is cooked?
The most difficult part about baking a chocolate torte is knowing when it is done. If you overcook your chocolate torte, it can turn out dry.
The best way to tell if the torte is cooked through is to judge by it’s appearance. The center should jiggle ever so slightly and the top of the torte will look matte instead of glossy.
You can also insert a toothpick to see if it comes out with only a few crumbs.

How to store leftover chocolate torte:
If you need to make this dessert in advance or have leftover chocolate torte, wrap it in plastic wrap and keep it in the fridge for up to 5 days.
You can freeze a chocolate torte by first letting it cool completely, then wrapping it in plastic wrap and sealing it in an airtight container. Freeze it for up to 3 months. Thaw overnight in the fridge before serving.
More Desserts Like This:
- Easy Creme Brûlée
- Chocolate Lava Cake
- Marble Bundt Cake
- Strawberry Tart
- No-Bake Chocolate Eclair Dessert

Chocolate Torte
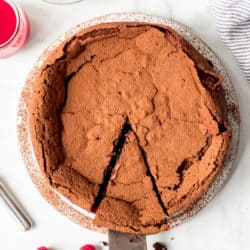
This decadent, rich Chocolate Torte is an easy, elegant dessert to serve to your friends and family to make them believe you are a gourmet cook! Each bite is a luxurious experience for the most dedicated chocolate lovers!
- 3/4 cup unsalted butter, cut into small pieces ((12 tablespoons))
- 12 ounces bittersweet or semisweet chocolate, chopped
- 6 eggs, room temperature
- 3/4 cup granulated sugar
- 1/4 teaspoon salt
- 1 teaspoon vanilla extract
- Unsweetened cocoa powder, for dusting
- Sweetened whipped cream
- Fresh berries
Preheat oven to 375 degrees F. Butter the bottom and sides of a 9-inch springform pan, then dust with cocoa powder to help the cake release after baking.
In a large, microwave-safe bowl, combine the butter and chocolate. Microwave for 90 seconds, stopping every 30 seconds to stir well. Stir in the vanilla, then set the bowl aside to cool slightly once the chocolate is completely melted and smooth.
Meanwhile, combine the eggs, sugar, and salt in a large bowl. Beat on medium-high speed for 6 minutes using a hand mixer or stand mixer fitted with the paddle attachment, until thick and a pale yellow color.
Add half of the melted chocolate and butter to the eggs and sugar, stirring with a large spoon or spatula to combine. Fold in the remaining chocolate, then pour the cake batter into the prepared springform pan.
Bake for 30-35 minutes, just until the center barely jiggles and the top is no longer shiny. A toothpick inserted into the center of the cake should come out clean with only a few crumbs.
Let the cake cool completely. Then run a sharp, thin knife around the inside perimeter of the pan before removing the springform ring. Dust the cake with cocoa powder or powdered sugar and serve with sweetened whipped cream and fresh berries.
- You can serve this with a berry sauce or chocolate ganache for an even more elaborate finish.
Recipe adapted from The Food Network.